

Now that I have explained the base, it’s time to draft the actual pattern and start folding! Like I mentioned in the last post there are two different methods I’ve been using and they both start from the grid.
In both cases, you can either do horizontal or vertical strips, depending on the design you want to make.
Method 1

This method consists of adding different shapes around the squares which will then be folded on top of the squares and that creates patterns and textures to the garment.
Each section is cut twice – maybe in two different colors or types of fabric – and sewn together as if you were adding a lining to each piece separately. Only after this you can sew all the pieces together.
Sounds complicated? No worries! I’ll demonstrate the sequence with the latest piece I posted on Instagram. Starting from the pattern.

So, you have the grid. You can try drawing directly on it and see what kind of patterns would look nice. Draw the shapes exactly how you’d like to see them when folding. If you want the best result, you must draw on each square separately as they are not identical.

I decided to add these triangles. As they are a simple shape, I just drew two dots in the middle of each square, 1cm apart from each other to help me get all the triangles in the right size.
When copying the pattern you need to mirror each shape on both sides of the square like this:

Copy one column or row at a time. You have the numbers and letters there so you won’t get lost.
In the end I had these 5 pattern-pieces. The facing is optional, because all the pieces are lined anyways.

Cut each piece twice for both sides. I decided to alternate with black and white and line everything with the opposite color.

Sew all the pairs together. I had all these angles to trim and clip before turning around. You can also cut the facing-bit off from the side that’ll remain under (btw: in the picture there are two different pieces, don’t get confused by the color of the facing!) Press.

This is the part where you’re happy if you added that extra ease to your original pattern. Now you have to sew all the pieces together exactly at the edge of the original squares. You’ll easily lose a couple of millimeters at each of the many seams. So try to sew as close as possible to the edge. The stitching might remain partly visible, depending on your design. If you have the facing, sew it at the end.

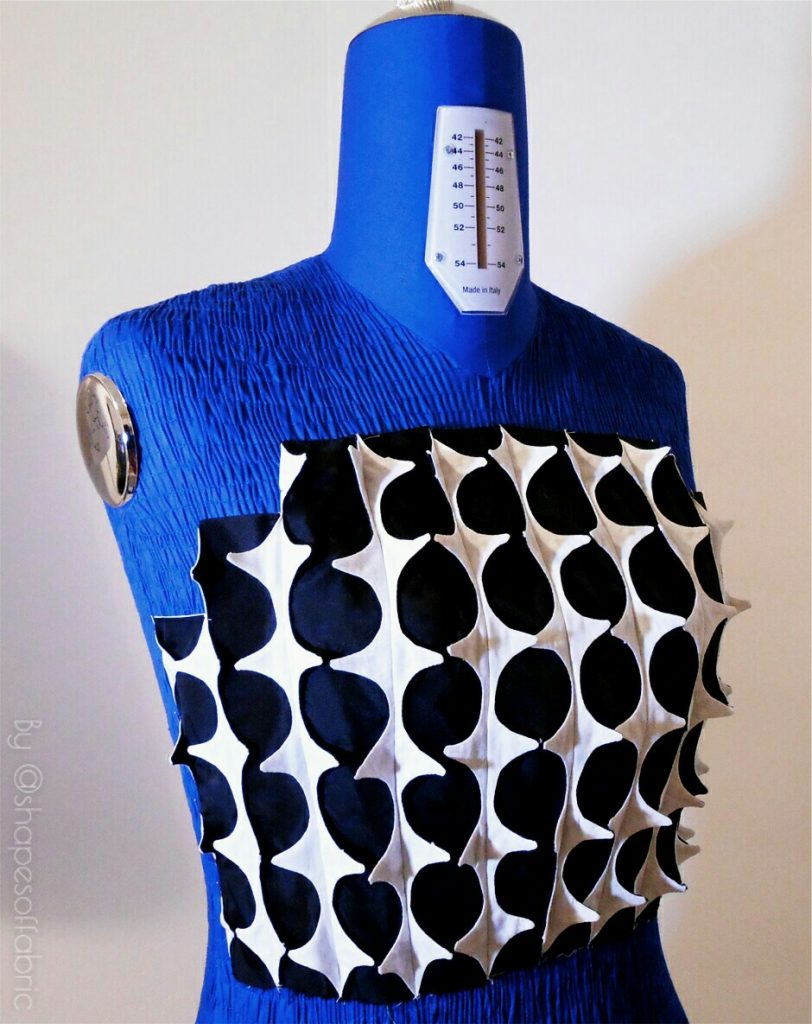
Press the seams open. Now you should be able to see the pattern you designed. You can add hand stitches to keep the design flat. Personally I prefer leaving it as it is, because it looks more interesting and has more texture to it. Also the created pattern looks different from different angles this way. As a comparison, there’s a flat design in the first picture of this post.

Here’s just another example of a design with circles and what the pattern looked like:

Method 2
This technique is more similar to ribbon-folding than the previous one. You can manage it without adding extra ease to the original pattern.
Basically you’ll add pleats in between the squares. They can be box-pleats or knife-pleats, which you then fold further to get different shapes. I’ll demonstrate the two versions with paper.
Box-pleats
Here’s a design I made by adding folded box-pleats between the squares in horizontal rows.

First you’ll need to do some calculations. So decide how wide you want your shape to be. For example in this case I wanted it to reach the middle of the square on both sides. I measured the square and decided I needed 2cm on both sides. That being a pleat means 4cm on both sides, hence total to be added is 8cm between each square.

Add it in a 90 degree angle from the square so it’ll match the following square.
Copy each column or row and add the centimeters needed between each square. Add seam allowances only around the original squares.
Here’s a sequence you need to follow for all the pleats.

You’ll find it useful to mark the middle of each pleat. That way you’ll get a symmetrical box-pleat. You can do the trimming part also directly in fabric, but I think it’s easier to do it already when drafting the pattern, even though it means folding everything twice: in paper and in fabric!
In the end you’ll have a bunch of long strips of paper as your pattern-pieces:
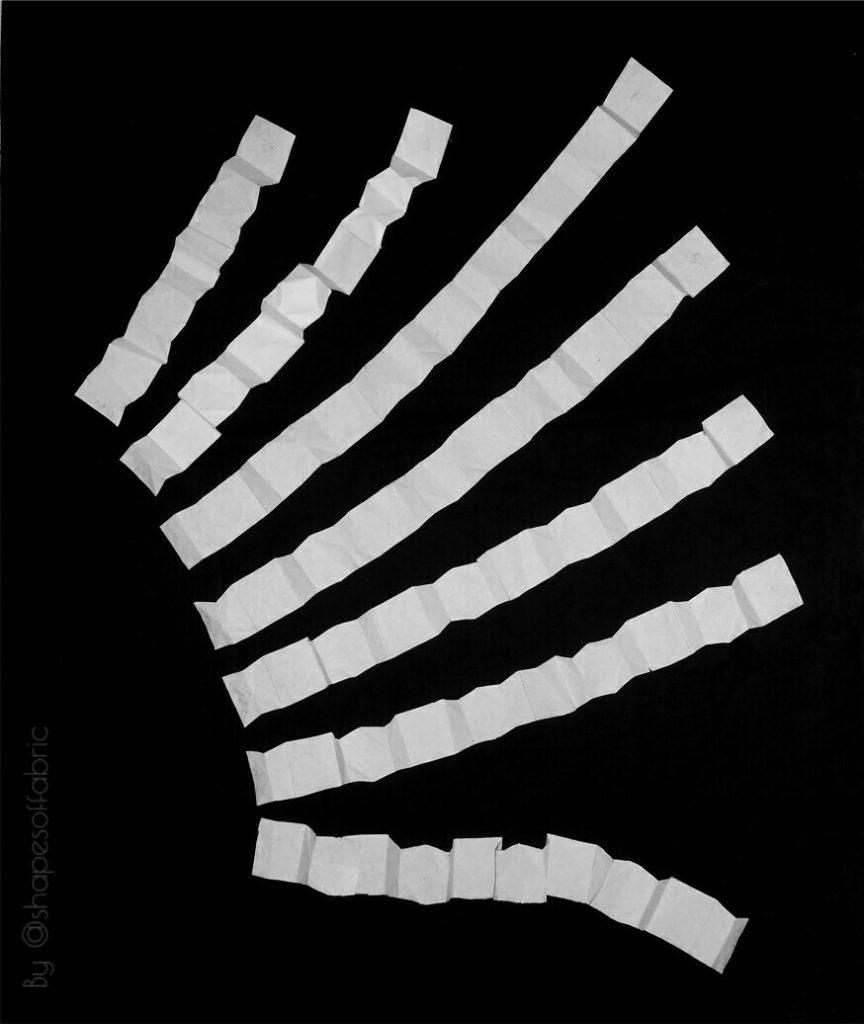
Basically you can follow the same sequence when sewing. Prepare each strip separately without mixing the order. Stitch the box-pleats at their base and press the pleats just like you folded the paper.
If you want, you can fix the folds in place either by hand stitching underneath so it won’t show or with a sewing machine on top of the edges, maybe even with a contrasting color.
When all the strips are ready, you can sew them together, matching all the squares.
Knife-pleats
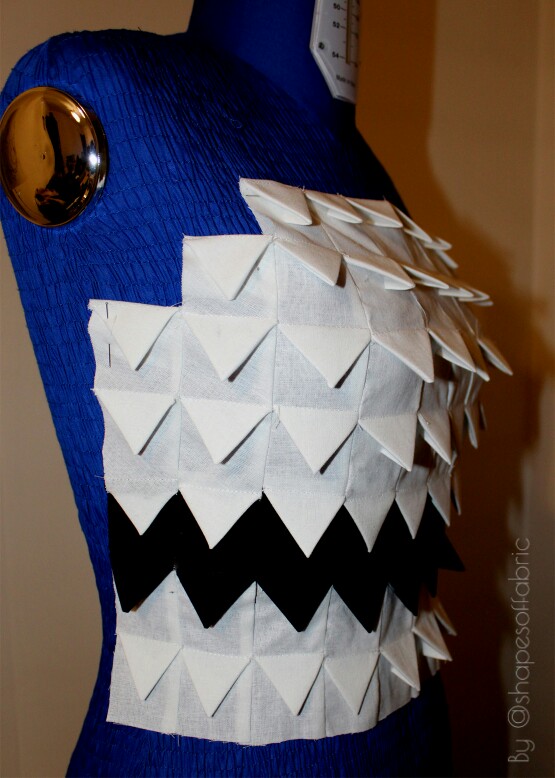
I have another example where I did knife-pleats in vertical columns. As an extra twist there’s a row in black fabric, which turns into a zig-zag shape.

The idea is exactly the same as above: measure first to decide the width of the pleat and double it. Now you won’t have to double a second time as knife pleats extend only in one direction.
Here’s the sequence. This time there’s nothing to trim, so you don’t have to fold the paper. Just add the pleats and seam-allowances.
You can follow the sequence while sewing from the 2nd picture onwards. The last picture shows the folds from underneath.

The stitching will remain visible because the knife-pleat won’t cover it like the box-pleat does.
In this picture you can see how I left the folds pressed without stitching them. I liked how they remained more lively that way.
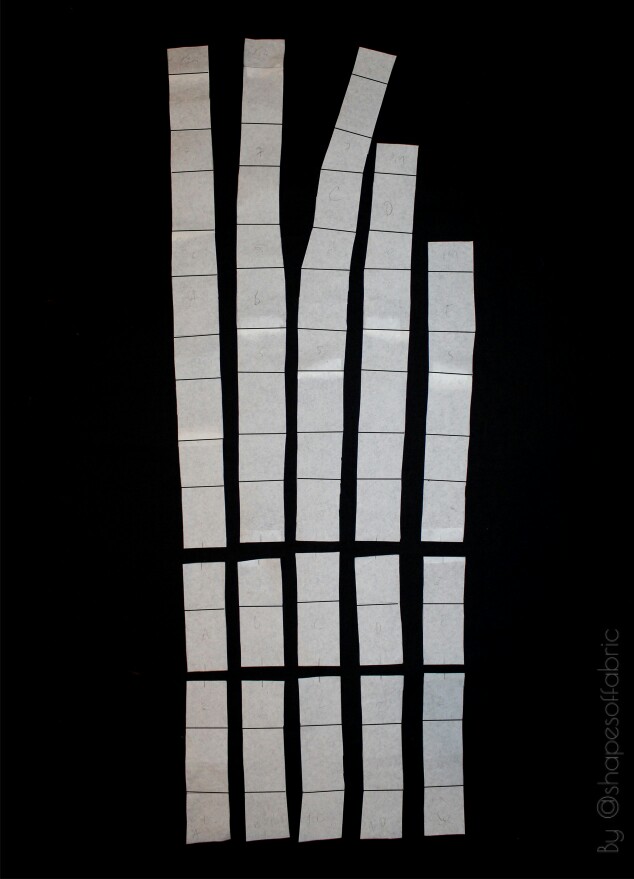
And this is the pattern with the black sections separated:
Lastly
You might be wondering how to get a smoother edge at the top. The solution would be to add half squares at the end of the first two rows.
I know this technique requires a lot of work if you want to fill a whole bodice. But you can also use it only in a small part of your garment by drawing just a couple of rows of the grid on the pattern. Maybe on the edge somewhere or around the waistline. How about a few squares at the centre front?
Cut some random strips of paper or a piece of ribbon and start folding! That’s a good way to get ideas. You could add double box-pleats to get more alternatives. If you’re using a fabric that doesn’t ravel badly you have so many more possibilities with the folds as you don’t have to hide the raw edges!
Happy folding.

6 Comments
Great tutorial. Thanks for the great work
Thank you! 🙂 And you’re welcome.
fab! Your website is full of great inspiration. I can’t wait to try this out 🙂
I’m so glad to hear that. 🙂 Mission accomplished then. Have fun!
Brilliant pattern and style. You’re amazingly talented, thank you for sharing ❤️. I can’t wait to try this tutorial. 😊 if it’s available.
Thank you so much! 🙂 How wonderful that my older tutorials are still being useful.