I almost exclusively sew clothes, but this year I’ve taken an interest in home décor pieces.
And here’s one: A cushion cover decorated with bamboo pleats! You might recognize the motif, too. It’s from one of my Instagram bodice experiments from years ago. Needless to say, this was much easier, and the design worked out nicely.
Last week, I headed to the fabric store to look for a suitable material and found a piece of silver-gray upholstery fabric, probably a polycotton mix, from the remnants section. I usually don’t get to use upholstery fabrics, so now I definitely wanted to try it out.
But now I’m getting ahead of myself. Let’s prepare the pattern first! There’s a video, too.
The Cushion Cover Pattern
Before drafting the pattern, you need to know the size of your cushion. It’s because the cover will be slightly smaller. I got a 50 x 50cm cushion.
Whatever the size of the cushion (well, at least as long as it’s not a tiny one), start by drawing a square that’s 2cm smaller in both directions. In this case, I drew my square 48 x 48cm. This size even includes a 1cm seam allowance at each edge, so in reality, the cover will be 3cm smaller than the cushion.
Divide the square evenly into four parts. Then, divide it diagonally into four parts as well.
The illustration below shows a line drawing of the design. You don’t have to draw all the lines because we only need the colored triangle to draft the pattern, as this is a symmetrical design.

For this size, I drew the lines 4cm apart. Each of them will become a bamboo pleat. I could fit four of them into the design. You can add more or fewer lines and use different measurements, too. Depending on your cushion size.
The important thing is that the lines meet at the diagonal seam. This will happen if you draw the lines at a right angle.
There will be inverted box pleats in the center.
Add a seam allowance to the diagonal line, too, and half a box pleat to the remaining edge. I added 4cm. Fold the box pleat and cut off excess paper at the top edge.
Before adding pleat allowance to the bamboo pleats, free the seam allowance at the bottom by making little cuts at the ends of the bamboo lines. This way, the pleats will stop at the seam line.

Cut down from the diagonal seam, stopping just before the seam line where you made the cut (from the other direction).
Spread to add 5cm of pleat allowance. Fill the gap with a piece of paper. Fold the pleat towards the center where the box pleat is and trim off excess paper at the top while the pleat is still folded. This way, you’ll get the correct pleat allowance shape.
Prepare all the bamboo pleats in the same way. Add notches where you can’t otherwise see where to fold. For example, at the bottom of the box pleat.
Cut this piece four times on the fold.

In addition, you’ll need a plain back piece and one lining piece that goes under the front piece to prevent the pleats from opening. Use the original square size of your pattern to cut these.
There’s a regular zipper at the bottom.
Sewing the Cushion Cover
I made a video about the sewing process, too. You’ll find it here.
Cut all the notches you marked on the front pieces, as you will need them to make the folds. The bottom notches cover the entire seam allowance width, except for one of the four pieces: The piece that will be sewn to the zipper. Here, just cut small notches.

If your fabric frays easily like mine did, serge the back piece straight away.
Preparing the Front Piece
First, we need to fold, pin, and stitch down all the folds.
I recommend starting from the center of the piece where the box pleat is. Find your reference notches and make the folds.

Then, fold all the bamboo pleats towards the box pleat, just like you did with the pattern. In fact, you can use the pattern to help you locate the folds if you can’t find them. Each bamboo pleat should have three reference points: two notches and one pointed tip.
Pin, aligning the edges. After pinning all the folds, stitch near the edge to fix them in place.

Prepare all four pieces like this and press. I serged mine, too, leaving enough space for the bottom notches.

Then, we’ll unite the four pieces. First, into pairs. Match the bamboo and box pleats at the seams (see the arrows). Press the seams open.
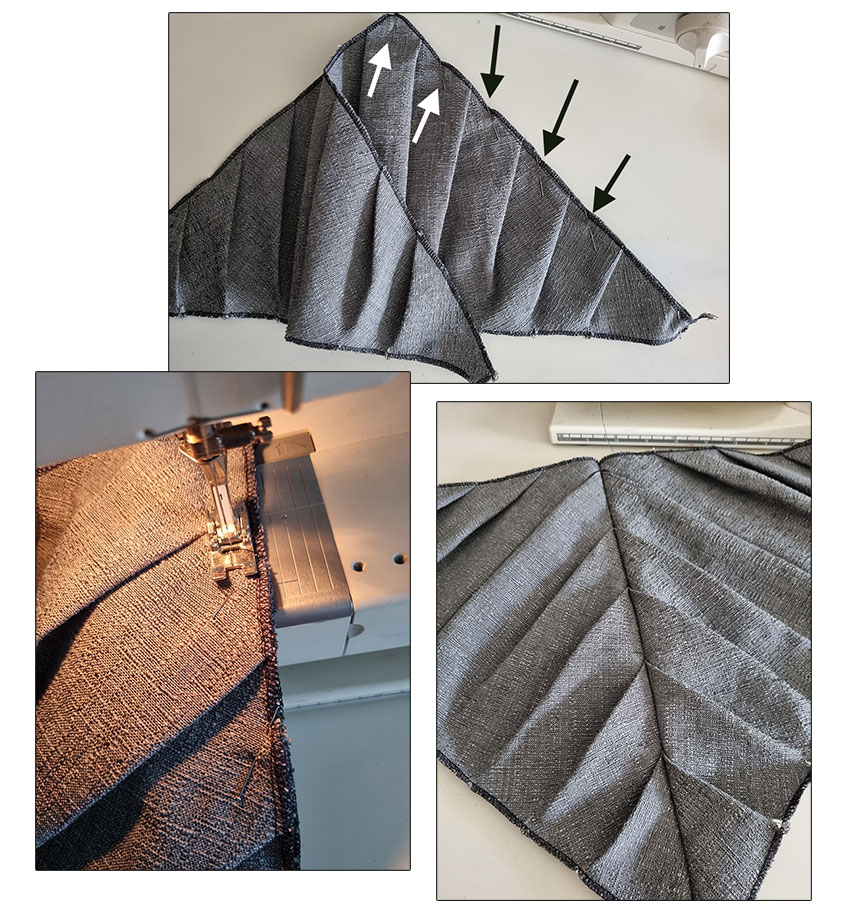
Then, we’ll sew the pairs together, matching the pleats at the diagonal seam again. Press the seam open.
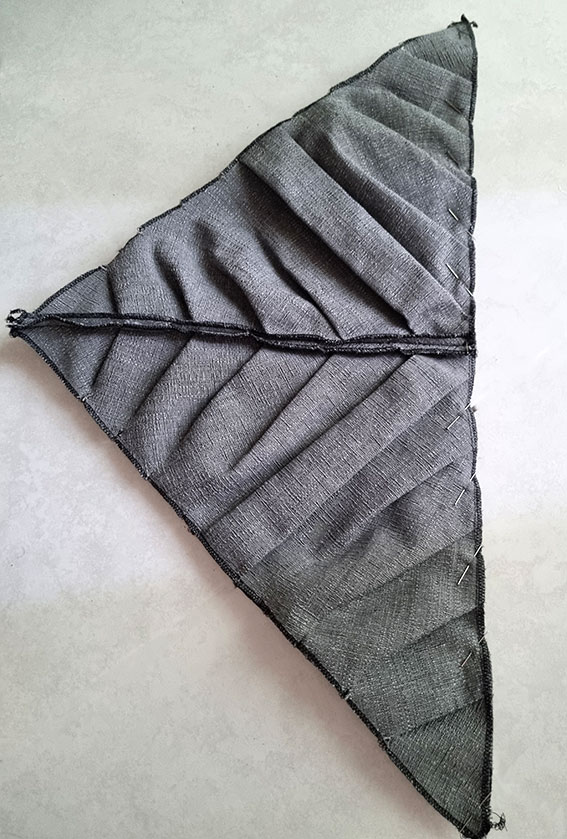
After this, you need to decide if you want to hand-stitch the ends of the bamboo pleats in place from the wrong side. They tend to open, but personally, I don’t mind.
Otherwise, you can just go ahead and attach the lining under. If you already finished the edges of the bamboo pleat pieces as I did, you need to finish the edges of the lining piece separately beforehand.
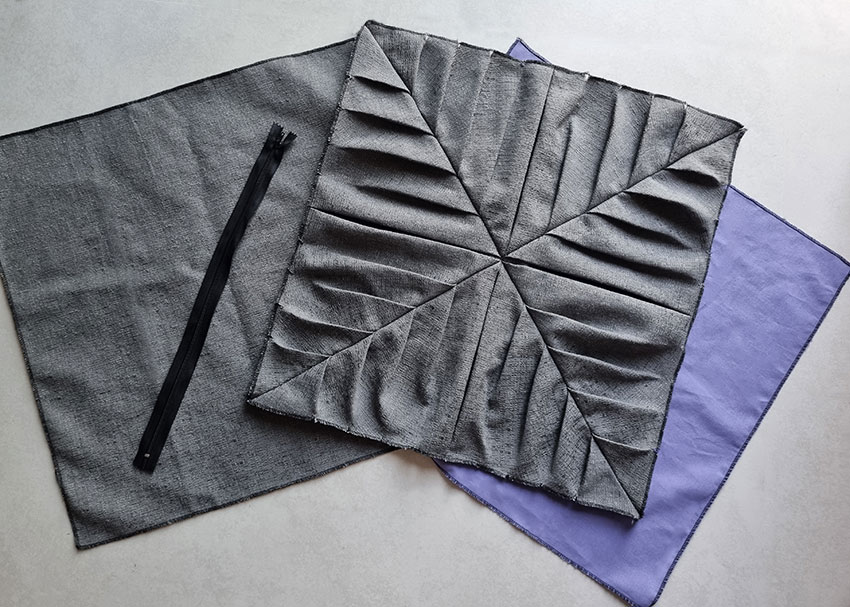
Pin and stitch the lining under the front piece, matching the corners and center points. I used basic cotton from my stash.
After that’s done, we’ll attach the zipper.
The Zipper
Find the bamboo pleat edge with the shortest notches and place the back piece on top, right sides together. Pin the corner points and measure 5cm in from both corners, marking the points with pins. The zipper will cover the remaining area.

Sew the 5cm-long seams at both ends normally, then sew the section in between using the longest stitch on your sewing machine. Press the seam open.
The (regular) zipper should be only slightly longer than the opening. See if you need to shorten it first.
Then, place the zipper face down on the seam you closed with the long stitches. The top stops should be aligned with the opening’s starting point. Pin the zipper temporarily in place, trying to center the zipper teeth to the seam.
Baste both sides, catching all the layers. Then, sew one side at a time with the zipper foot. Leave enough space for the zipper cursor.

Remove all basting and long stitches. If you left enough room for the cursor, you should now be able to open the zipper. Finally, close the short edges of the opening by sewing back and forth a few times.

After this, you can close the remaining three sides of the cushion. Leave the zipper open before sewing so you can turn the right sides out through the opening. Press the seams.

Tadà: The Cushion Cover with Bamboo Pleats!
That didn’t take much time at all, and now I’ve got a pretty unique cushion cover. What do you think? Will you try this out?


2 Comments
Hola Srta.Mina, he visto el video del tutorial del cojin, y me ha encantado ¡¡ muy bonito, muchas gracias, lo voy hacer, espero me salga tan bonito como el de usted, muchas gracias por compartir.
Muchas gracias, Isabel! 🙂 Looking forward to seeing your version.