

I know many of you have been waiting for a tutorial about pants pattern alterations. Well, here it is! 🙂 I will show you how to draft three pants patterns for the summer. And how to sew them, too.
For me, summer pants have rather wide legs, are possibly cropped, and are made of lightweight materials.
All of these patterns are based on the basic pants block. I made them so you can even draft all three of them without having to start from the beginning. Each design comes with a fun little decorative detail.
Flounce Pants
I’ve been wanting to make myself a pair of pants with a flounce sewn into both side seams since I published my Ruffles and Flounces Patternguide. And the moment had finally come!
Besides the flounces, this design has a shaped waistband and a zipper at the c-back.
The legs are not wide enough to call these palazzo pants, but quite wide anyway. I have a pair of pants with the perfect leg width, so I just took the measurement from their hem. I recommend you do the same.
The Pattern: Pants
Trace your basic pants block. There are just a few alterations you need to do. I was happy with the waist height, so I simply separated the waistband pattern from the top edge by drawing a parallel line 6cm below the original waistline. Of course, the measurement depends on how high you want your waistband to be.
Close the dart and adjust the lines by removing any angles. Ensure the line flows smoothly between the front and back pieces. You should have right angles at the c-front and c-back.
If part of the waist dart remains, you can remove its volume from the side seam, as shown. This should be a rather small amount.
The front waistband piece will be cut twice on the fold, while the back piece will be cut four times. This way, you also get a facing.

I kept my pants full-length.
Now, if you measured the hemline of your favorite pair of pants, compare the measurement to the hem circumference of your basic pants block (front + back). Assuming the goal is a wider-legged pant, divide the difference by 4 to add the same amount to both sides of the front and back hems, as shown.
The basic block is already set up so that the back piece is wider than the front. This is why we can now just add the same amount to both pieces.

The flounce will grow wider towards the hem. Decide how wide you want its widest point. Then, use this measurement to mark notches to the side seam, measuring from the hemline up. For example, mine is 20cm.
This is because the flounce might touch the ground if it ends lower than this. Well, depending on how drapey your fabric is.
Then, measure the side seam from the top edge to the notch. You’ll need this for the flounce pattern.
The Pattern: Flounce
The flounce pattern is an irregular spiral. Which means you draft it freehand.
You already have the seam length. This is your starting point: Draw a spiral so it matches the seam length.
Decide how wide the flounce will be at the top of the side seam. Mine is 8cm. From there, the width grows gradually until it reaches the maximum size at the end of the spiral.
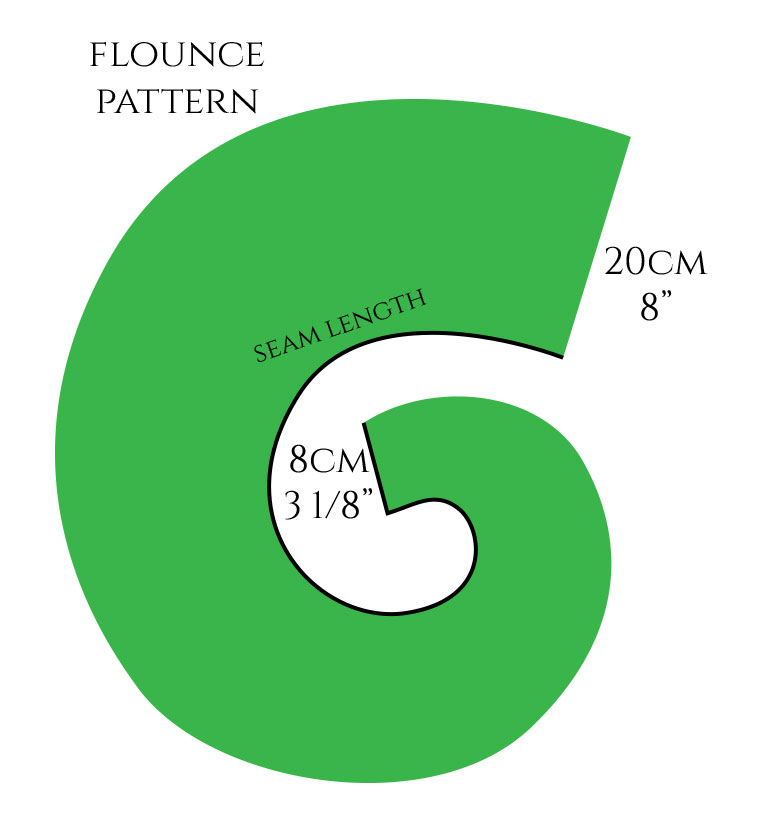
Leave enough space for seam (and hem) allowance, but otherwise you can make your spiral quite curved. Keep adjusting the shape until you’re happy with your pattern.
Decide how you want to finish the flounce hem. If you want to use the serger, there’s no need to add hem allowance. I finished the curved hem with a bias facing, so I added a narrow seam allowance. If you want to do the same, measure the flounce hemline length.
Sewing the Flounce Pants
I chose really lightweight black wool for my pants. Consider that the flounces will show the wrong side of the fabric, too. You also need a zipper and a bit of interfacing to cover one layer of the waistband.
Cut both pant pieces and the flounce piece twice.
I started by finishing the flounce hems, using the same fabric as the pants to cut bias strips. I needed two per flounce to make the strips long enough. You can cut them 2,5-3cm wide.
First, pin and sew one edge of the bias strip to the flounce hem, right sides together. If you want to be extra precise, you can divide both the bias strip and your flounce hem evenly into four sections beforehand and match the points.
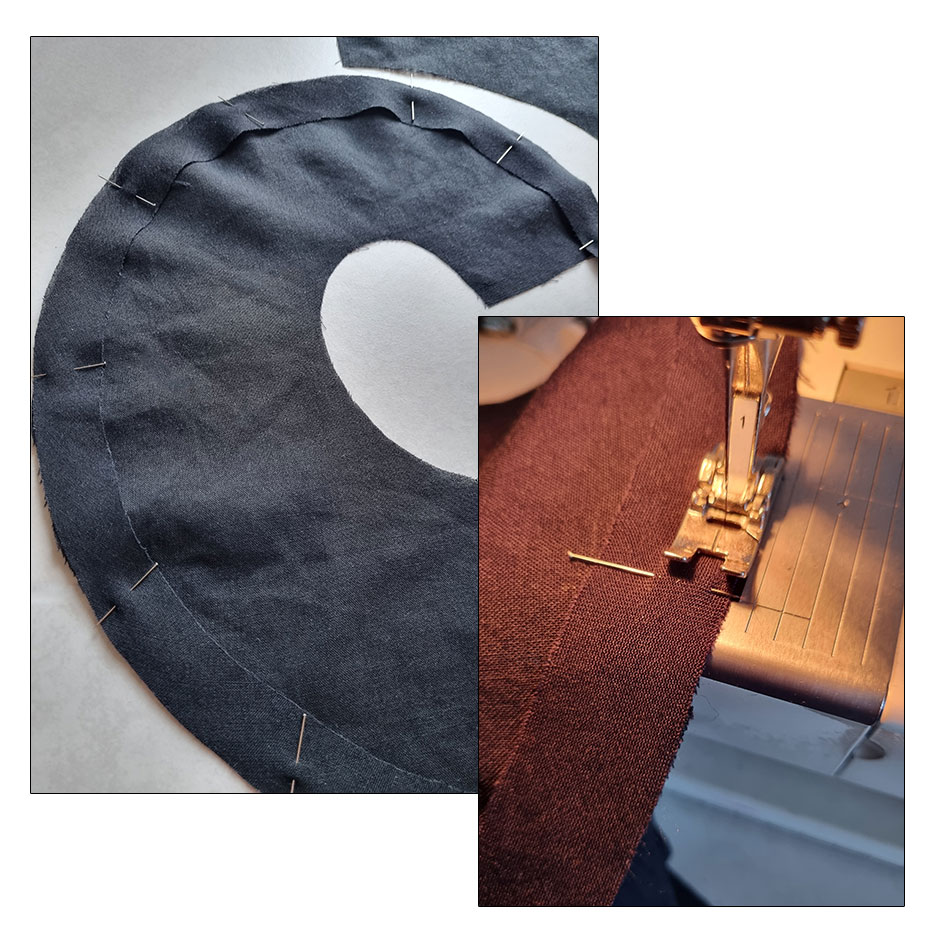
Then, press the bias strip towards the seam allowance. Turn the wrong side of the flounce up and press the unsewn edge of the bias strip to meet the previous seam.
Next, make a second fold and press the entire bias facing to the wrong side.
Then, sew near the fold.
I folded the hemline of the short edges of the flounce twice and stitched.
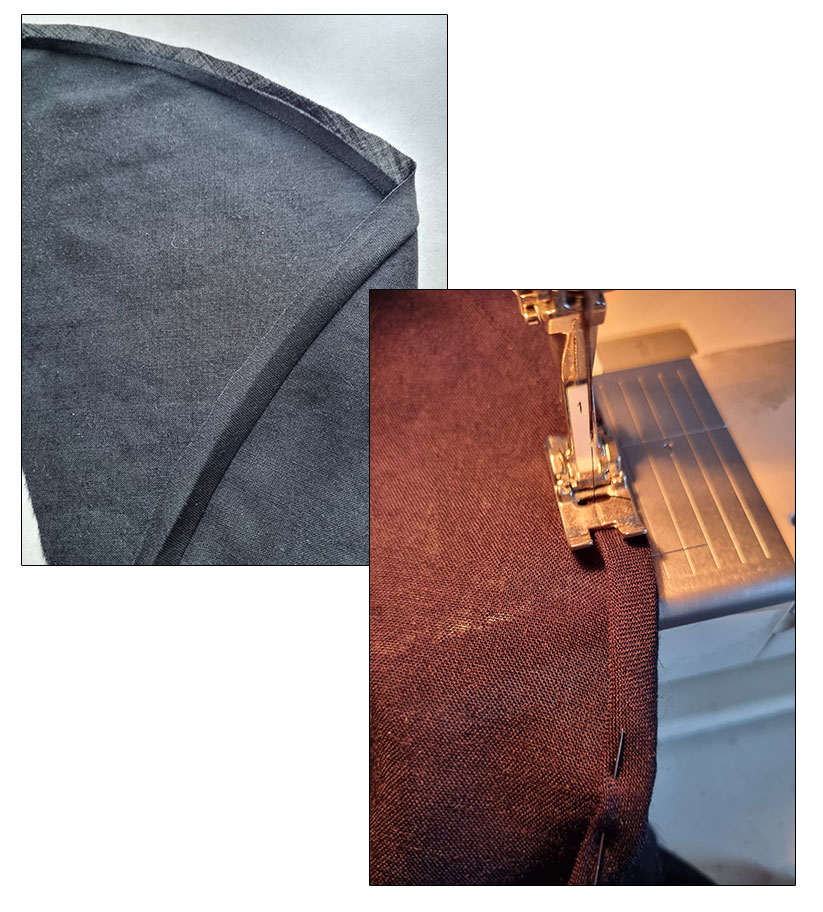
I decided to close the inseams of the pants first. Then, I pinned the flounces to the side seam of the front pieces, right sides together. Here we have the notch that marks where the flounce should end.
My flounce was easy to pin. There was no need to make cuts to the seam allowance.
Stitch the flounce in place, keeping the stitches inside the seam allowance.

Then, pin the front and back pieces along the side seam, right sides together, matching the notches. Sew, and press the inseams’s seam allowances towards the back and the side seam’s towards the front (because of the flouce).
Finish the edges, including the hemlines and the (still open) crotch seam. Lastly, close the crotch seam, leaving just the section above the back hipline notch open for the zipper. Press the seam open.
Next, we can prepare the waistband. As mentioned, you need to interface one layer. This is the layer that will remain on top (not the facing).
Close the little side seams of both layers. Then, sew the layers together along the top edge. Trim the seam allowance, press it towards the facing, and understitch. Finally, press the waistband flat.

Then, pin & sew the top layer – the one you interfaced – to your pants’ waist, matching the seams, c-front, and c-back points. Press the seam allowance towards the waistband.
Attach your zipper. It starts at the top edge of the waistband. Then, sew the c-back seams of the waistband facing to the wrong side of the zipper.
Press the remaining long edge of the waistband facing under and pin it so it covers the waistband seam. Stitch near the fold.
The last step is to hem your pants. I hemmed mine by hand utilizing the catch stitch.
The Flounce Pants Are Done
This was a pretty quick pants pattern alteration. No pockets or fly front zips. Yet, the result looks really cute! Finishing the flounce edge with a bias facing sustains the flounce hem nicely, giving it some extra bounce.
The lightweight wool is practically weightless! I was a bit worried these would be see-through, but in the end they aren’t. Phew! 😀

Pin Tuck Waist Pants
With this pants pattern alteration, I wanted to introduce creating a waistband using pin tucks. This way, you will also be adding volume at the same time. There will be a facing to finish the waist edge this time. And a zipper at the c-back as before.
The Pattern
Trace your basic pants block. Or, if you already drafted the previous pants, you can trace those pattern pieces instead. I left them slightly shorter (12cm) to make cropped pants.
Just add the waistband you separated from the top edge back by tracing. Then you can use the shaped waistband pattern directly as your facing pattern for these pants. Otherwise, start from scratch, as before:

When deciding on the initial pant leg width, first determine how many tucks your pant waist will have. Each of these will increase the pattern width by 1cm, except for the one that will replace the waist dart.
Once you have the number of tucks, add the amount of extra width they will create to your initial pant hem circumference. Then, take a measuring tape and place it around your leg to evaluate the new circumference.
I was happy with my flounce pant hem circumference as the starting point.
The Pin Tucks
Note down the dart width at the waist; then you can ignore it. Just redraw the waist, removing the dart shape.
Decide how many tucks you want at the waist. Consider they will be 0,5cm wide and folded away from the c-front, towards the c-back. The amount depends on how close together you want them. Each line in the illustration below represents the base of a tuck.

Draw the lines parallel to the grainline and number the sections. There will be one tuck where the waist dart was, but you won’t add tuck allowance for it. Therefore, no line.
Draw the shape of your waistband. This will determine the length of your tucks. Mine has a V-shape at the front.
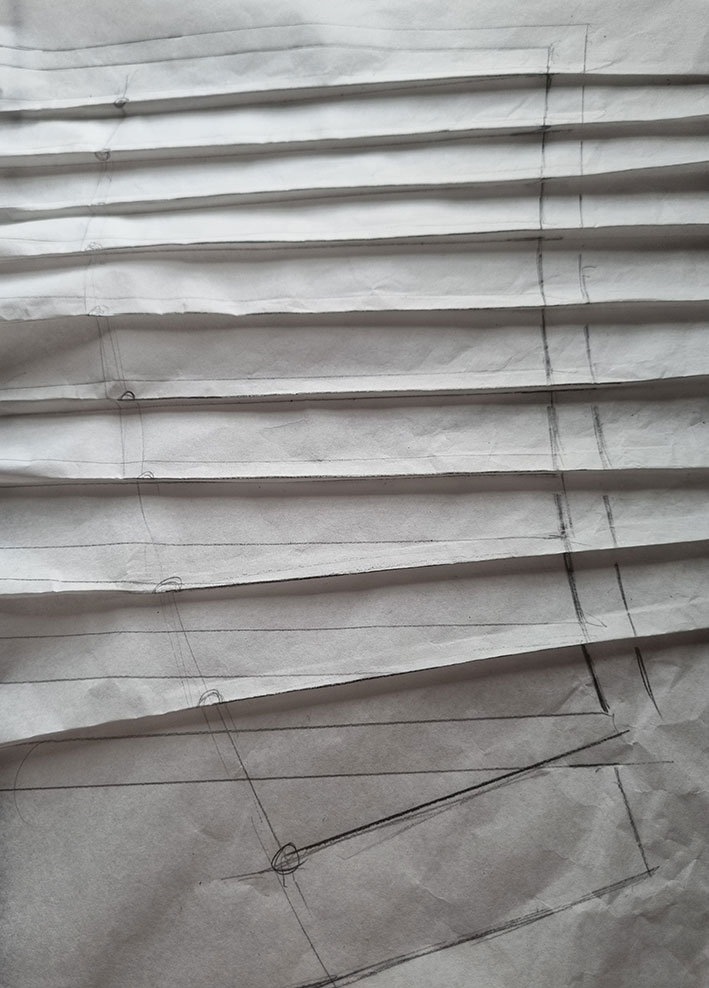
Take another piece of pattern paper to add tuck allowance, utilizing the tracing method.
Trace one section at a time, adding a 1cm tuck allowance at a right angle between the sections. You can use the hemline as a reference, since it’s perpendicular to the grainline.
Draw a line in the center of each tuck allowance at the top and mark the endpoints following the waistband shape you sketched earlier. You can slightly adjust the directions of the tucks near the side seam (off-center) to distribute them better.
Once you get to the waist dart, just draw a line with an endpoint. The tuck won’t cover the entire dart width, but you can distribute the rest of the volume between the other tucks, sewing them slightly wider at the top, and maybe remove a bit from the side seam, too.

Adding volume will make the hip curves useless, so feel free to remove them below the tucks.
Before cutting the top edge, fold all the darts along the central lines and then away from the c-front/towards the c-back. Add seam allowance, and cut with the tucks folded to get the correct shapes.
Sewing the Pin Tuck Waist Pants
For these pants, I wanted something flowy and, in the end, went with this reddish-brown viscose that looked like silk.
You’ll need to cut each piece twice. Mark the endpoints of the tucks with basting thread. For the starting points, just make a little cut at the waist.
Before sewing, press the tuck folds between the waist notches and the endpoints you marked. The mountain fold is on the right side, of course.
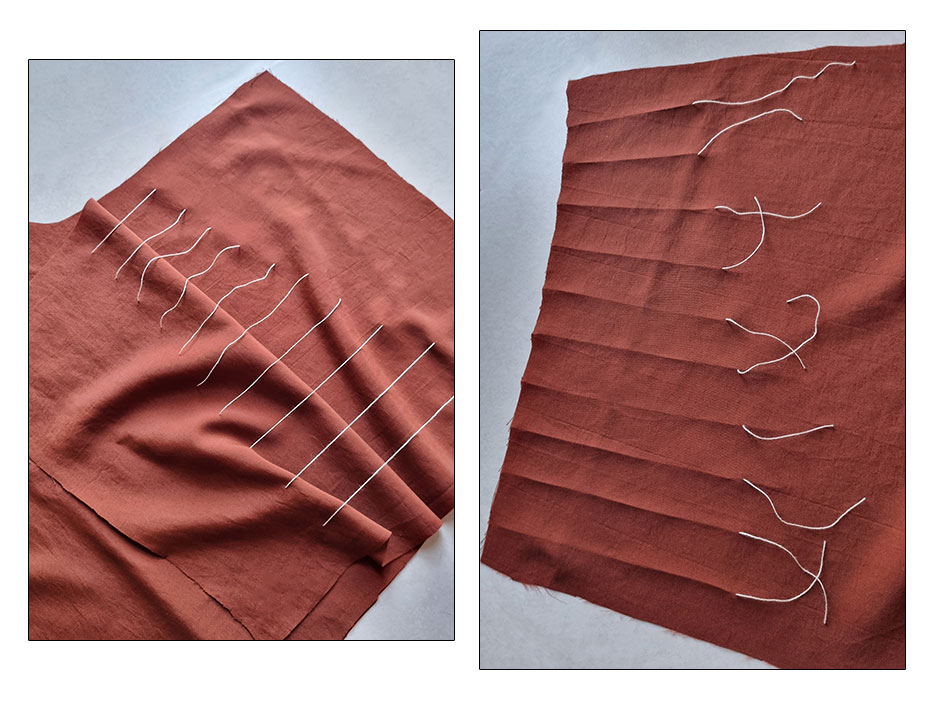
Start by sewing the tucks. Their width is 0,5cm, except at the back; you might need to make some of the tucks slightly wider at the waist to cover the whole waist dart volume. Stop sewing where the basting thread marks the endpoint. Back stitch. Be careful with the tucks near the side seam, as they are not on the grain if you inclined them. They will easily stretch.
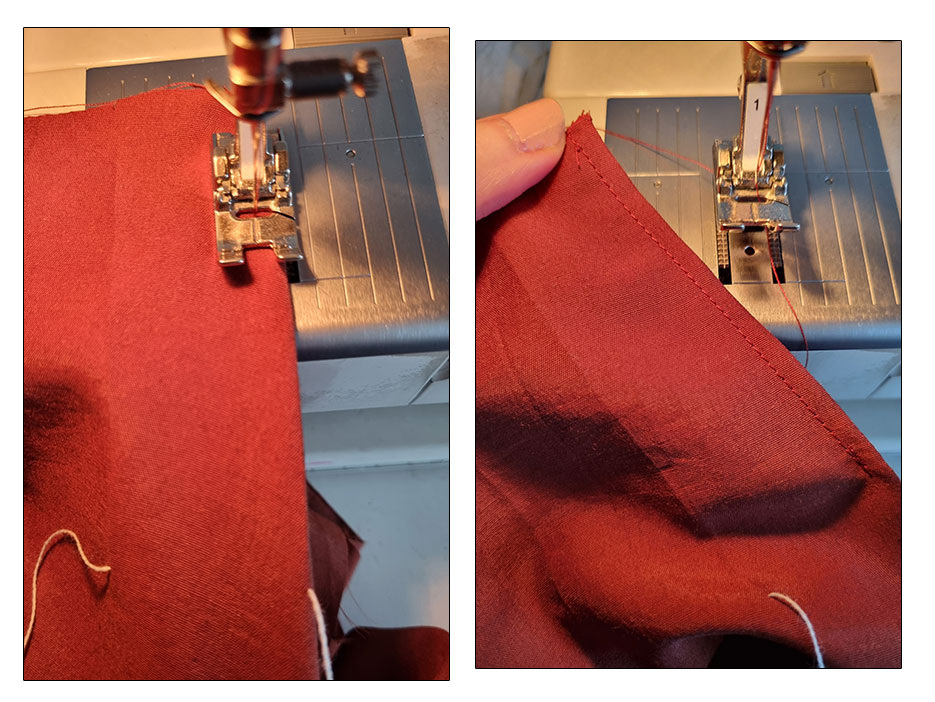
Press the front tucks away from the c-front and the back tucks towards the c-back.
Then, close the side seams and the inseams. I decided to go with French seams because of my fabric choice.
Press the seams towards the back and finish the edges if needed.
Close the crotch seam, leaving the c-back open above the hipline.
This time, I did double folds and sewed the pant hems with the sewing machine.
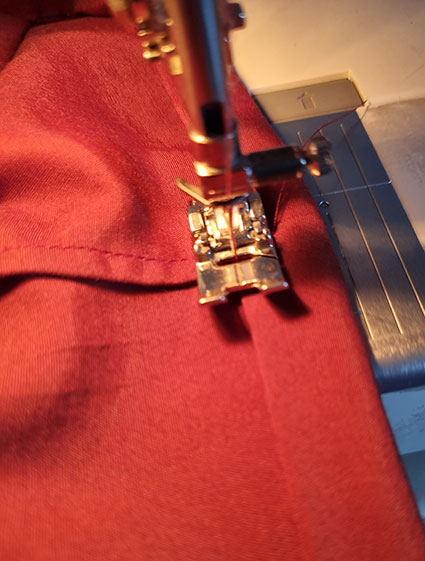
Interface the facing and then close its side seams. Press the seams open and finish the edges.
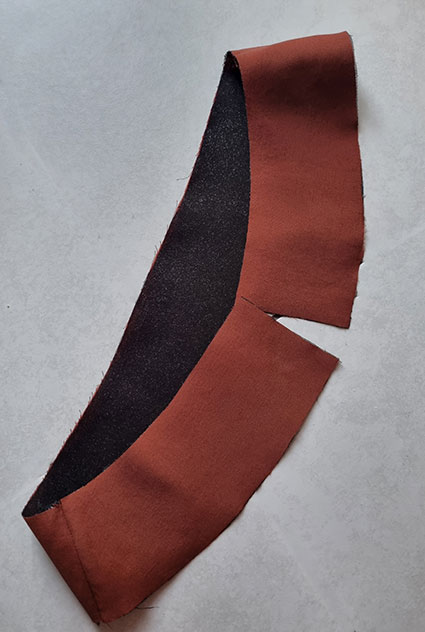
Attach the facing to the pants’ waist, matching the side seams, c-front, and c-back points. This is the moment of truth! If your pants’ waist is too large or too small, you need to adjust your tucks. They might be too narrow or too large at the waist. Trust your facing, not the pant waist. 😀
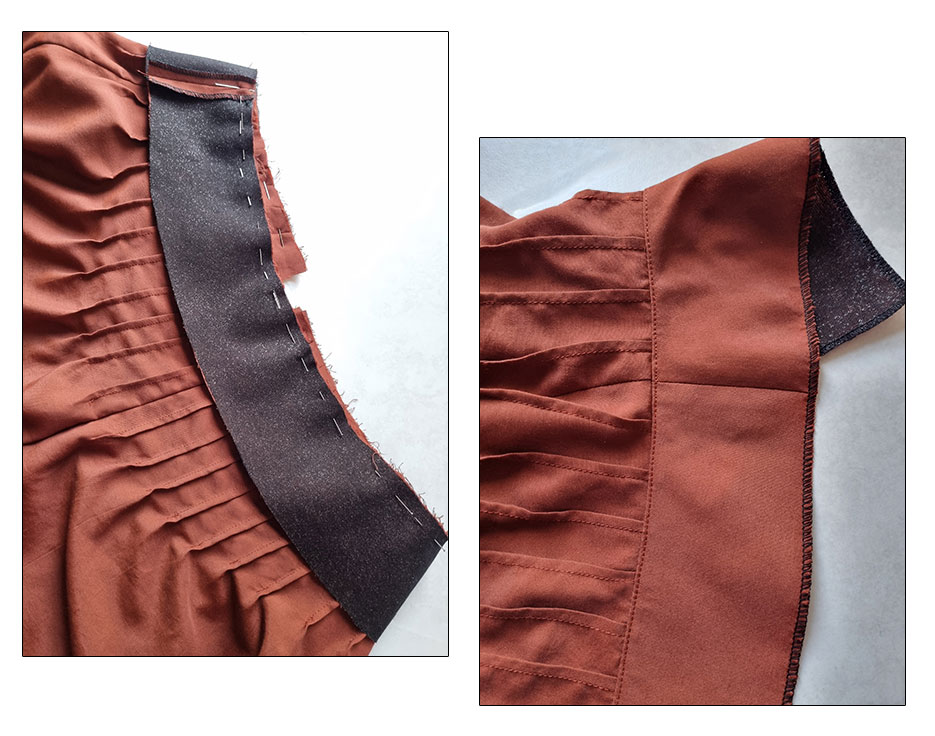
After successfully attaching the facing, trim the seam allowance by half and press it towards the facing. Understitch. Finish the remaining seam edges as well as the free edge of your facing with your preferred method.
Then, attach the zipper. I have an invisible zip here.
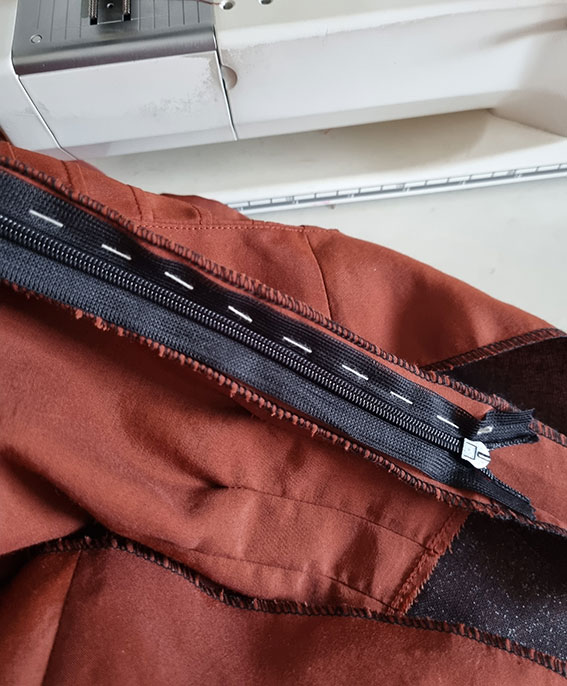
Finally, attach the short edges of the facing to the wrong side of the zipper and press the waist flat. I also attached the facing to the side seams and the c-front seam with a few hand stitches so it won’t roll out.
Pin-Tuck Waist Pants are Done
Here’s the final look. The color of the pants seemed to go nicely with teal, but black was the safer choice! The pant legs are quite wide. However, with this drapey fabric, it’s fine. Very comfy! This was probably even quicker to sew than the previous pants.
If you want to add pockets to these, I’d say a side-seam pocket would work best.

Lightweight Denim Pants
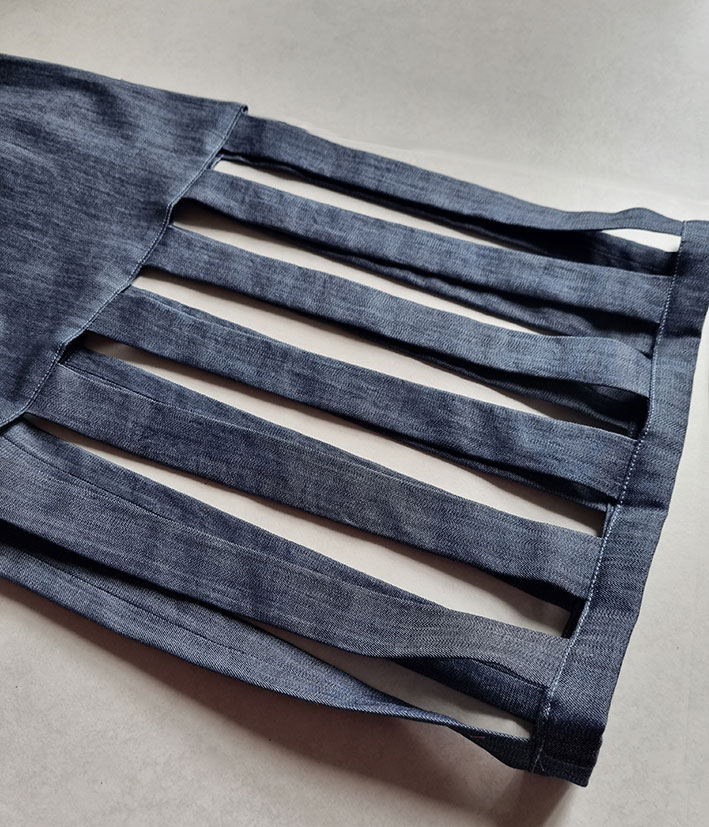
The last idea is about separating the lower section of the pants somewhere below the knee line and remaking it from vertical bands. They leave a series of gaps, so it’s like wearing shorter pants. I don’t know what to call these. They aren’t cutouts. Slits? Anyway, you’ll see.
I made the pants out of lightweight denim. Other suitable materials would be linen and cotton. Just so it’s easier to sew.
This time there will be a fly-front zipper, straight waistband, and pockets. As you can see, I left the most time-consuming project for last.
The Pattern
These pants have rather wide legs, too. You can use the previous pants pattern as a starting point since we used the tracing method to add tuck allowance. Alternatively, start from your basic pants block.
I lowered the waist by 2cm because there is going to be a 2,5cm high waistband.
For the fly-front zip, we’ll need to extend the c-front of the pants from the hipline up. 3cm for the right side and 0,7cm for the left. You can use the same pattern piece to cut both sides. Just mark both lines. Remember to add seam allowance when cutting.

Adjust the hemlines: The vertical bands will be 3cm wide, and there will be 2cm gaps between them. Therefore, the total hemline circumference has to be divisible by 5. I went with 65cm. But you can choose other measurements, too.
So, see how much difference there is between the target measurement and your current hemline measurement. Then, divide the number by 4 to add the same amount to each side.
Next, decide how high you want the bands and add a hemband height to this measurement. You see, there will be a kind of hemline border where the bands are attached. For example, 28 cm + 2,5 cm.
Mark where the vertical bands start. The pant legs should be completely straight below this line. The easiest way to do this is to draw the sides at a right angle from the hemline up.
Cut off the lower section.
You don’t need pattern pieces for the vertical bands or the hem band; just write down the measurements, adding seam allowance to each side. Double the desired width of the vertical bands and the height of the hem bands as they will be folded in half.
You can cut separate hem bands for the front and back, or cut both in one piece.
Calculate how many vertical bands you need in total. For me, it was 13 per leg.
You’ll need another rectangle for the fly front zip: the fly shield. Measure the length of the opening and add 1cm. A nice width is 3+3cm. Add seam allowance to each edge.
The Pocket and Waistband
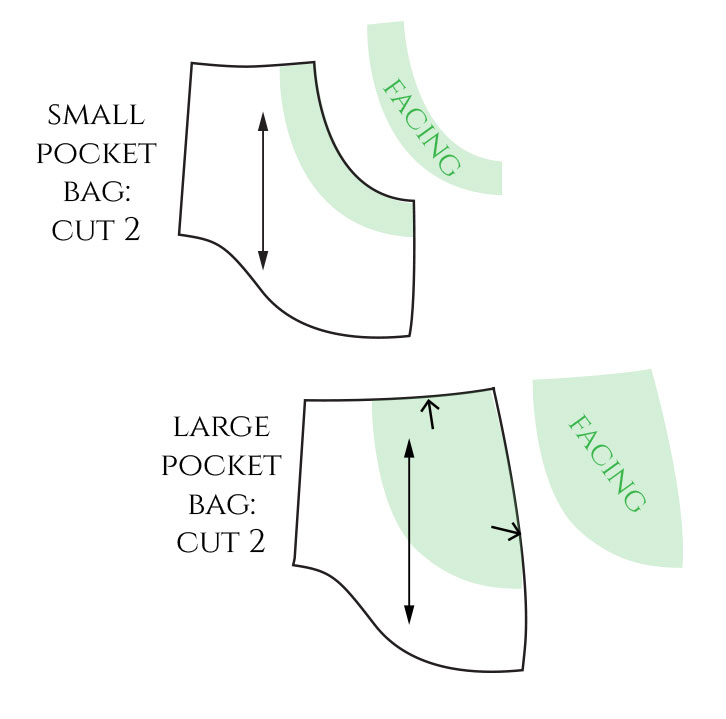
Here’s how to draft the pocket. You can use the measurements here as a reference. My pocket opening is rounded. It starts 7cm from the side seam and ends 2,5cm above the hipline at the side seam. Extend the opening by a few millimeters at the side seam to create ease.
The pocket bag reaches the c-front. Here, too, we have a couple of millimeters of ease (see the green arrow).
If you don’t want to cut the pocket bag pieces in the same fabric as your pants, you’ll also need facing pieces for both pocket bags. I colored them green in the illustration. Ensure the two edges won’t overlap to avoid extra bulk.
Then, trace the pieces:
The large pocket bag starts at the side seam and follows the pants’ original shape. Mark notches where the pocket opening is.
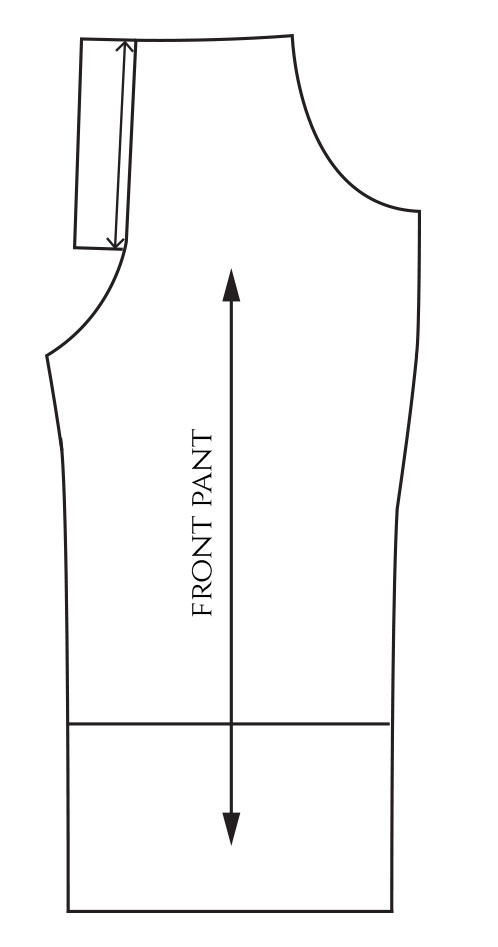
The small pocket bag starts at the pocket opening, and you follow the wider shape along the side seam to account for the ease. This also goes for the front pant pattern piece, by the way. Trace the facing pieces, too.

Finally, we have the waistband. Measure the pattern’s waist, front and back pieces separately. The left and right sides of the pattern will differ: the right side ends at the c-front, while the left side has an overlap created by the fly shield. This could be, for example, 3cm.
Draft a rectangle using these measurements. The height is twice your desired waistband height. Mark notches for the c-back and side seams.
Here are the pocket pieces and the front pant. The pocket grainlines match those of the pants.
Sewing
Here’s how I cut the various bands. On the right, is a picture of the fly front opening and how to use the same pattern piece for both sides.
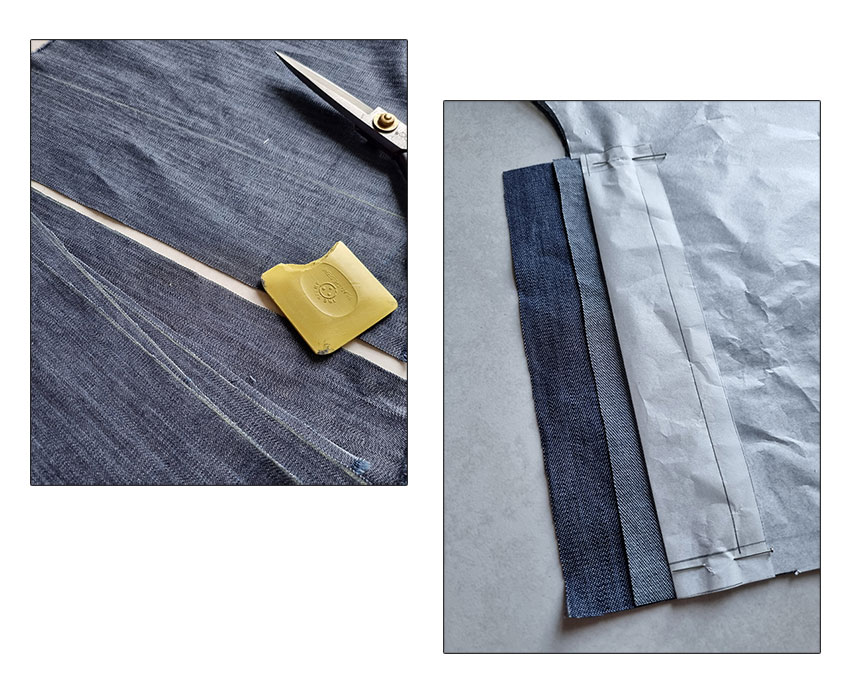
There were lots of little details to sew this time. I started with the bands. There’s also a video.
The Bands
Here are the steps: close the seam, turn the right sides out, and press flat so the seam remains centered.
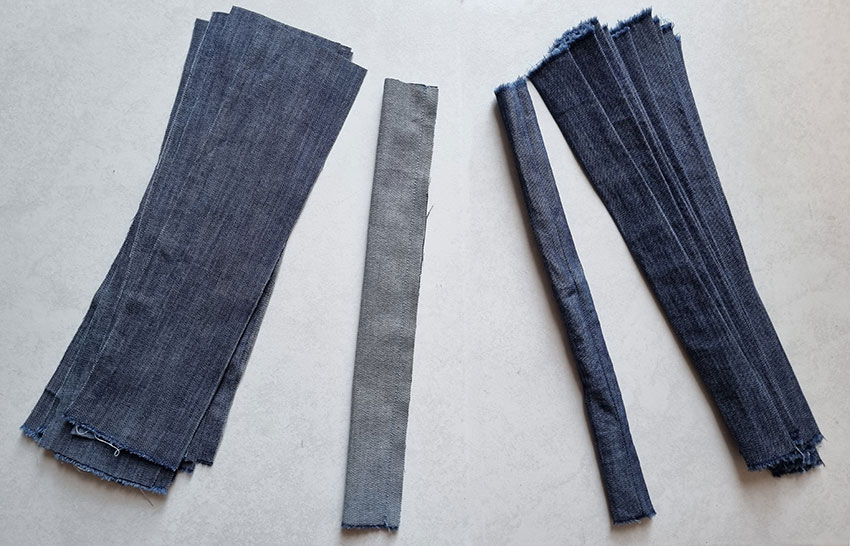
After this, close the side seams of the hembands and press the seams open. Then, pin the bands (here: 13) to one edge, right sides together, distributing them evenly, and sew them in place.
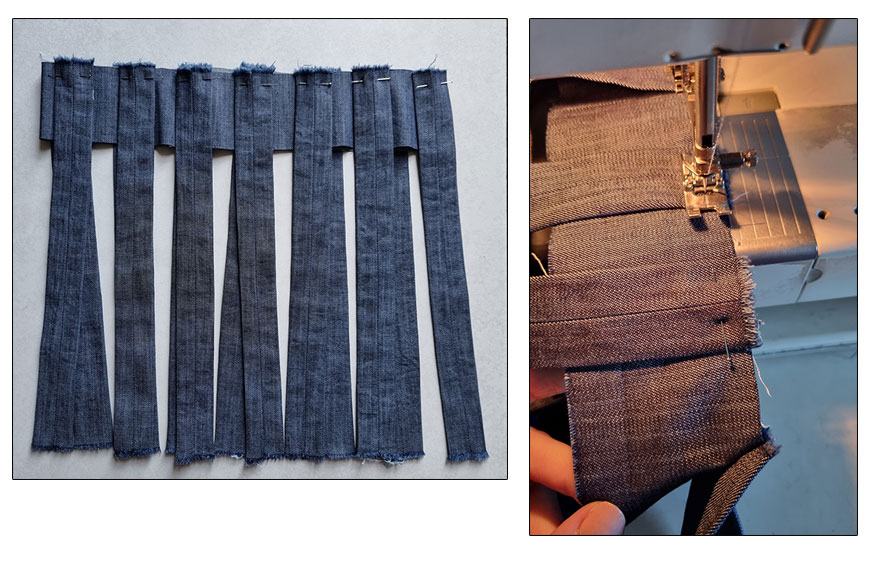
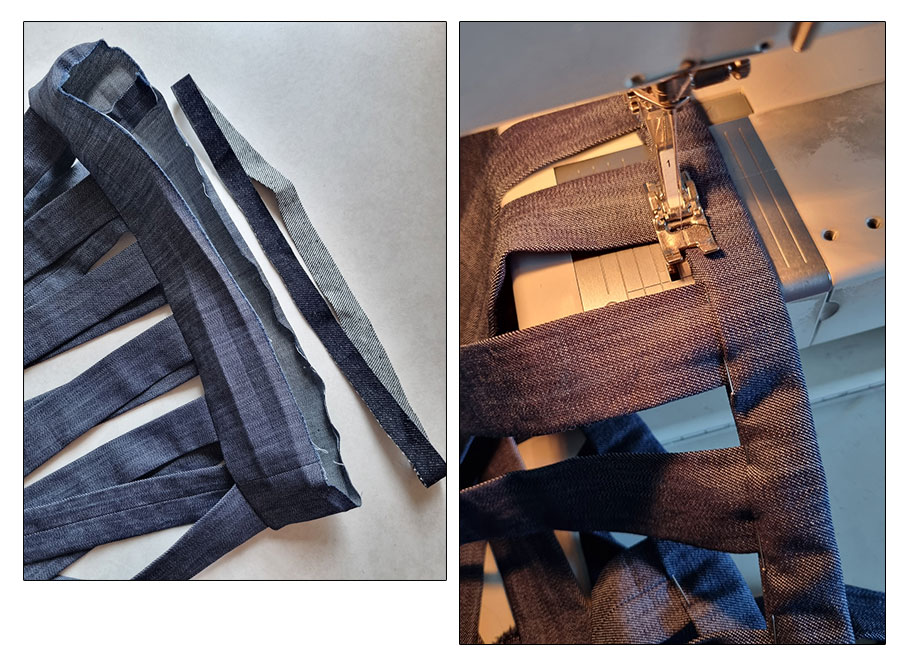
Press the seam allowance towards the hem band, press the band in half, and also press the opposite long edge under, while you’re at it.
I wanted to add structure to the hem band, so I cut a strip of heavyweight denim and closed it into a circle (the size matching my hem).
Then, I placed this strip inside the hem before closing it.
The Pockets
Now that the lower section was ready, I proceeded with the pockets. Because you cannot close the side seams before you have the pockets.
As I had separate facing pieces, I started by attaching those to my pocket bag pieces. My original plan was to use a piece of light blue cotton from my stash, but it wasn’t large enough to cut the pocket bags, so I had to go with this instead.
The inside edges of the facing pieces are folded and sewn near the fold. But you also need to stitch down the remaining edges.
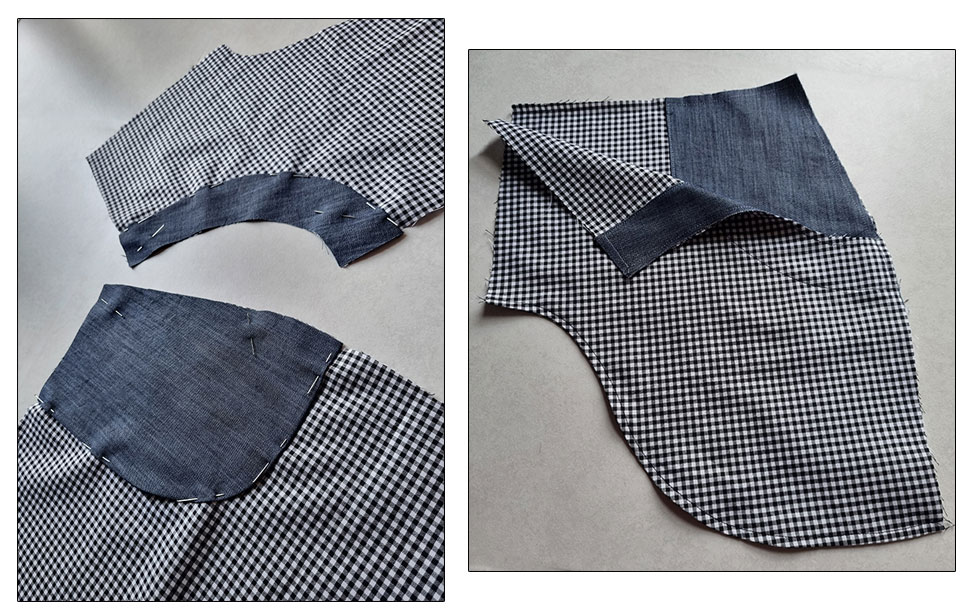
Then, I sewed the two pocket bag pieces together along the curved lower edge with a French seam.
And that’s it. Then you attach the small pocket bag to the pants’ front piece along the pocket opening, right sides together. I also sewed a strip of stay tape to the pocket opening seam so it wouldn’t stretch.
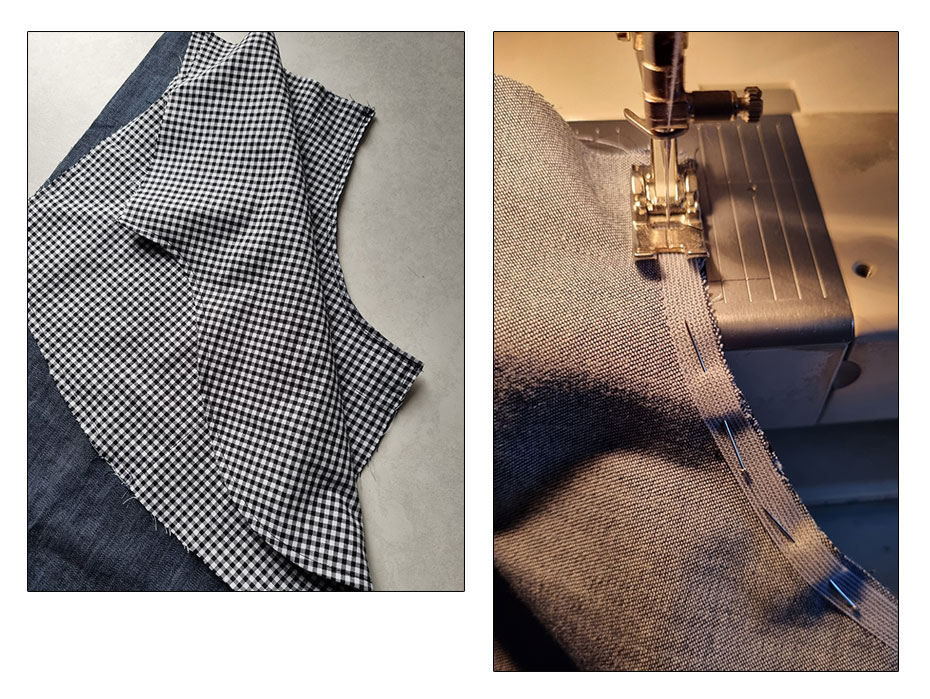
Trim the seam allowance, clip if needed. Then, turn the right sides out and press flat. In addition, you can top-stitch along the opening to keep it flat.
Pin and stitch the pocket bag in place along the waist and side seam.
Press the fly front opening to trim the pocket bags to match. The right side will be pressed along the c-front, while the left side extends by 0,7cm.

Finishing the Pant Legs
Then you can close the side seams and inseams of the pants and attach the lower section.
Pin the vertical bands in the same positions as at the hem. Right sides together, of course. Sew and press the seam allowance upwards. Finish the edge and then edgestitch to keep the seam allowance in place.
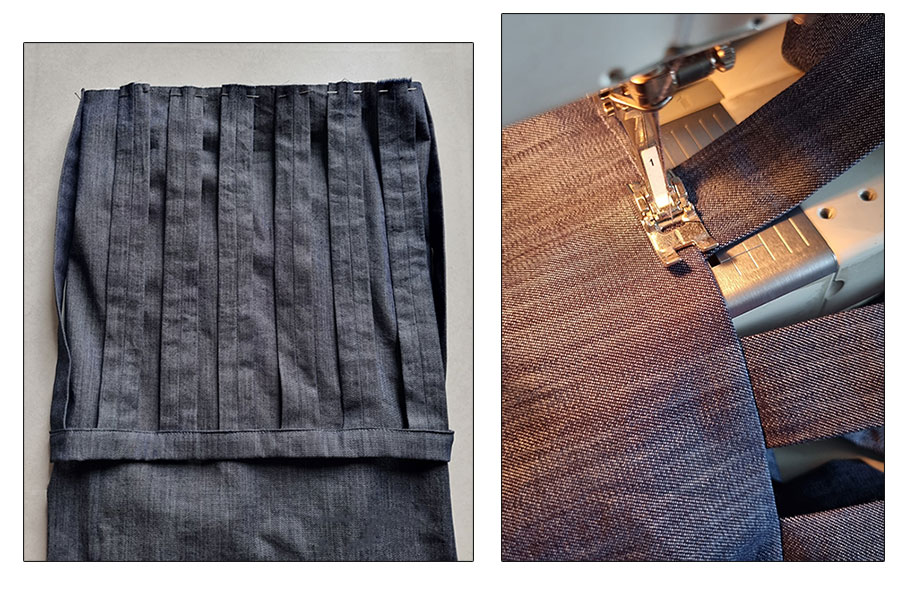
Now the pant legs are done. You can close the crotch seam.
The Fly Front
Then there’s the fly front zip. You’ll need a regular zipper that’s slightly longer than the opening.
Sew the left side first using the zipper foot. This is the side that extends by 0,7cm from the c-front. Pin the pocket bag so it will be caught into the stitches, too.
Interface the fly shield and close its lower edge. Turn the right sides out and press flat.

Then, place the fly shield under the zipper so that it extends by 3cm from the c-front (see the arrow). Pin and sew it to the previous zipper seam using the zipper foot.
Finish the edges with your preferred method (the right side edge, too). Close the zip.
Pin the right-side fold on top, aligning it with the c-front. This will give you the correct point to pin and baste the right side of the zipper.

Baste the zipper only to one layer of fabric. Open the zipper. Sew it in place.
Close the zipper again and re-pin the fold along the c-front, this time catching the pocket bag, too. In addition, pin the fly shield away so it won’t end up in the stitches.
Use tailor’s chalk or a similar marking tool to draw a line where you will top-stitch the fly curve. This curve will end at the c-front, where the zipper opening starts. Ensure the stitches won’t go outside the edge of your folded fabric on the wrong side.
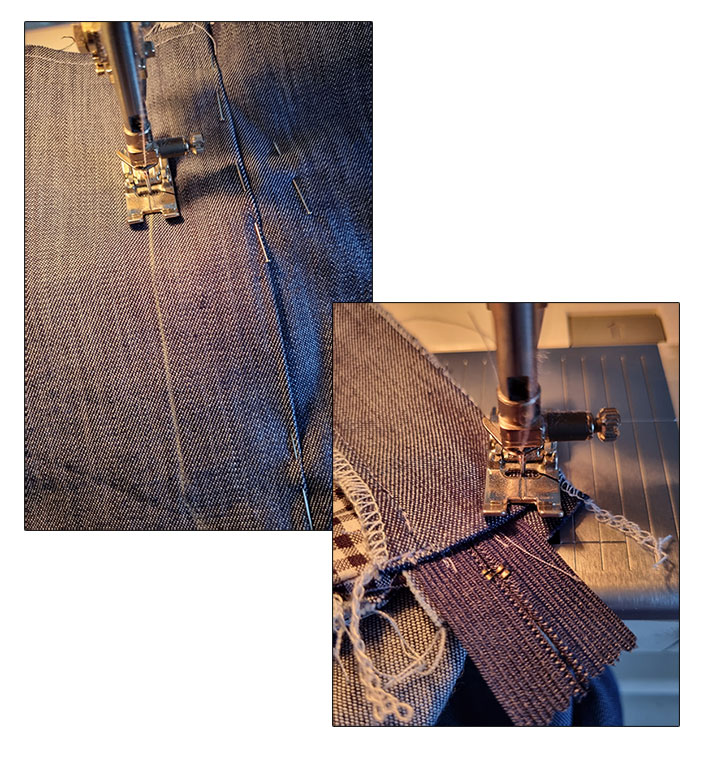
Sew along the line. Be careful not to break your needle when stitching over the zipper.
Finish the fly front opening by attaching the fly shield to the seam allowance at its bottom corner.
The Waistband
Interface the waistband. Then, pin one edge to your pants waist, right sides together, matching the various notches and seams. Sew. Close the short edges, too.
Press the seam allowance towards the waistband and the opposite long edge down.
Then, pin the remaining edge in place with the right side on top so it covers the previous seam. Stitch near the lower edge of the waistband.
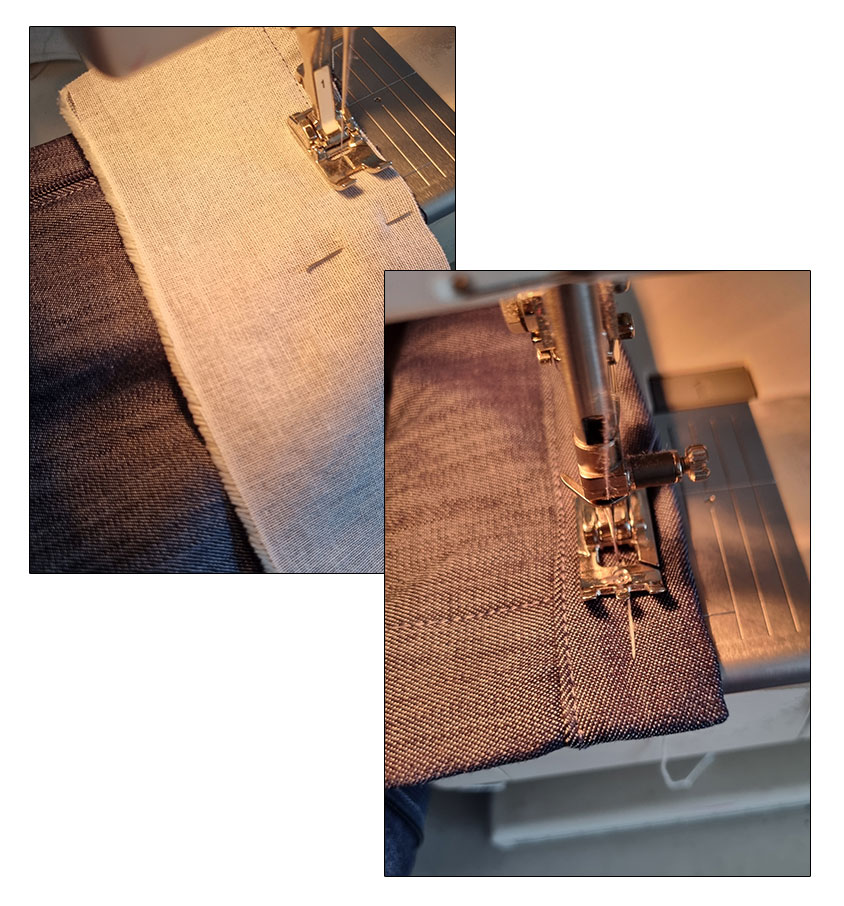
Lastly, sew a buttonhole to the right side of the waistband. It should be slightly longer than your chosen button. Attach the button.
The Denim Pants Are Complete
Here are my new denim pants. I must’ve mentioned before that I don’t own any jeans. So, making wide-legged pants in lightweight denim is my only chance of wearing this material 😀
I think I could’ve at least used a contrasting color for the topstitching. Oh well. Next time.

Which was your favorite style? I think I’ll go with the first one!

8 Comments
Love the denim pants🤗
Thanks!:) I think I’ll wear them more in September. The other two are more adapt for the Italian summer temperatures.
Hi Milan,
Thank you for your tutorials. They always bring a new sewing perspevtive and are always helpful. By the way, the denim pant was my favorite.
You’re welcome. 🙂 So happy to hear. Denim is a nice fabric to work with. Thank you!
So cute! I love pin tucks or the flounce would win. And thank you for the pocket tutorial, most pants on the market have shallow, useless pockets. It’s in top 3 reasons I’d rather sew my own. Thanks Minna, for stirring up the imagination with new made-easy to apply ideas.
Thanks so much! 🙂 Always happy to inspire. Yes, these are large pockets for sure! 😀
So cute 😍. I can’t wait to try!
Thank you! 🙂 Send me a pic if you do. Curious!