Now that I have explained how to add pleats, the perfect subject to write about next is layering. It’s kind of like pleats. It’s a technique you can use, if you want to create pleats that have another shape. Something you can’t fold.
I have done several pieces using this technique, so it was difficult to choose some examples. In fact, I ended up choosing many!
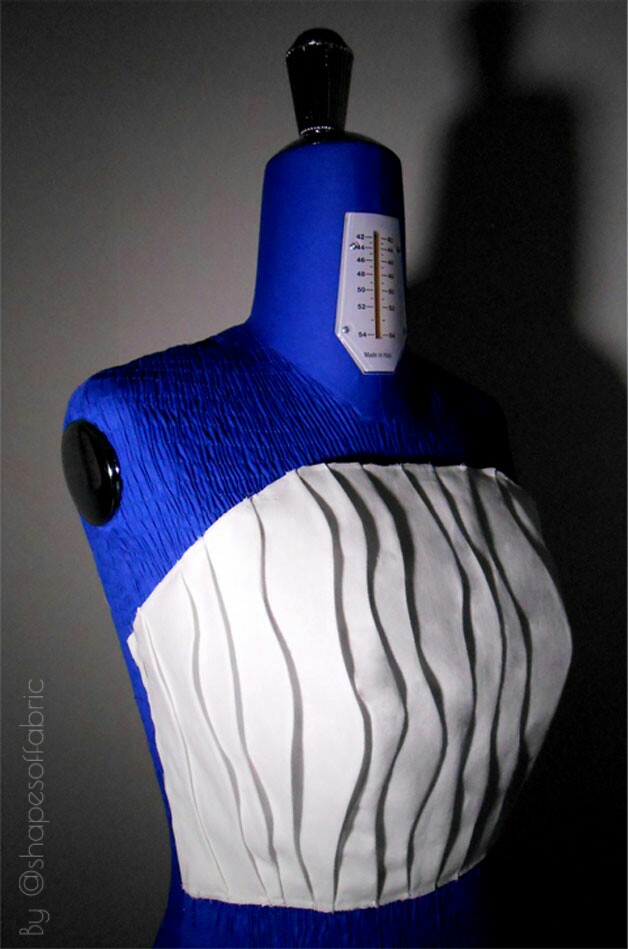


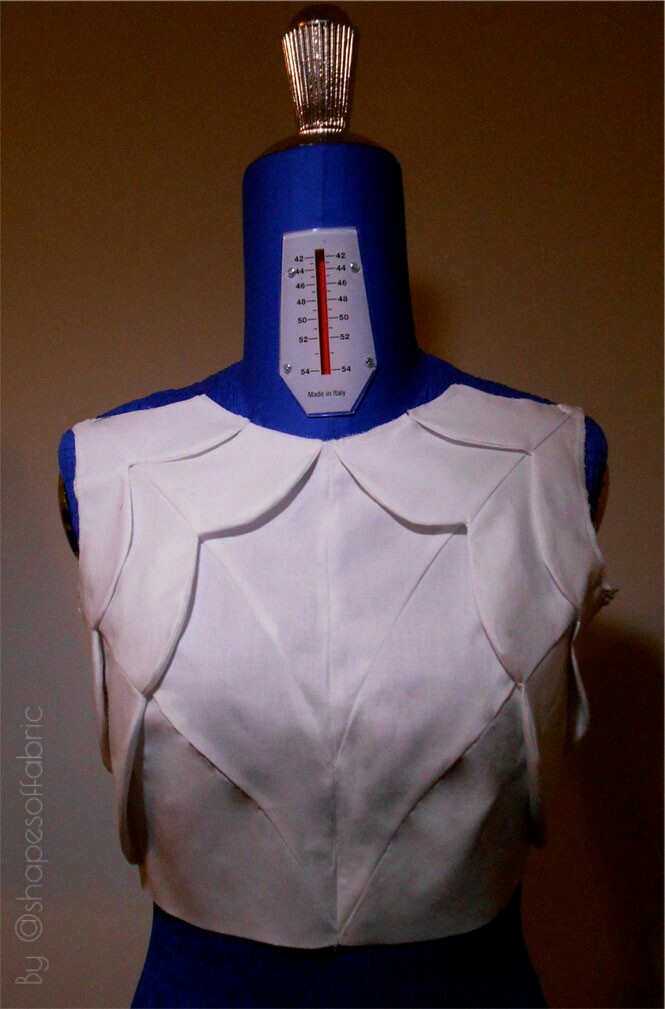
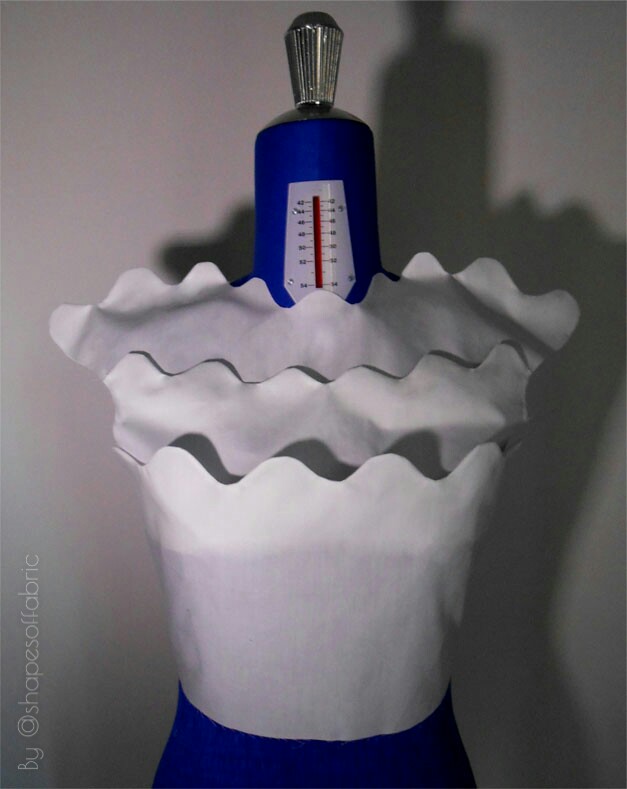


As you can see, layering is a great way to create all sorts of surface patterns. You can place them anyway you want. When drawing the pattern, just try not to make the design too complicated. For example, it can be difficult to sew really tight curves.
Basics
To make this technique easier to understand, think about a knife pleat and how it’s built. Layering works exactly the same way. It’s just that there’s a seam at each turn.
So here is an example of a shape you couldn’t fold like a pleat. It has 3 layers. Each layer has a facing and the following layer starts from it’s base. As was the case with the separated pleats in the last post:
https://www.theshapesoffabric.com/2018/03/25/more-pleating-techniques/

These are the pattern pieces. The ones I colored in the previous picture are marked with an X.
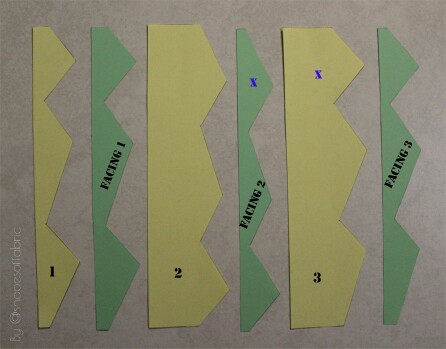
Try not to make the facing too wide, because then you’ll have to do lot’s of hand stitching afterwards to keep your design in shape.
This is how you’d put these pieces together. The first picture shows how the layer 3 starts from under the facing 2, at it’s base.

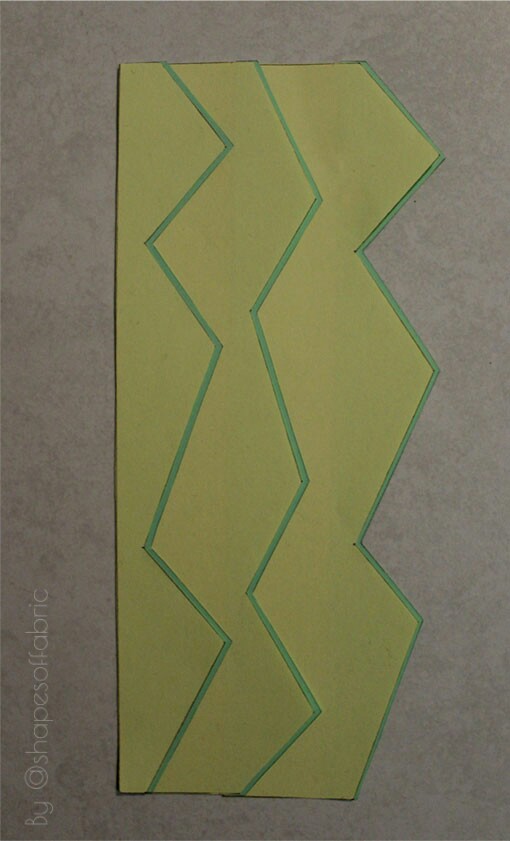
Applying layering on a skirt
When planning this, I had in mind a pleated skirt, but I wanted the pleats to have this particular shape. So here’s how I added layering to the pattern.
The starting point was a slightly flared skirt pattern (I closed the dart to get some flare).
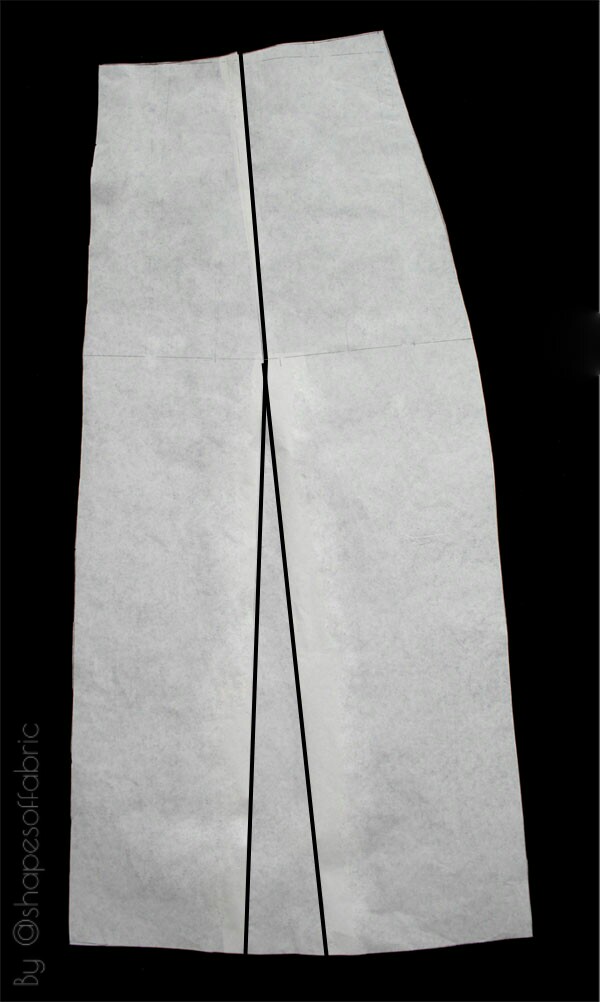
I drew lines approximately where the ”pleats” would go.

Then I drew the actual design of the layers and separated the facing (the blue lines).

I colored the facing-pattern in blue. The purple piece is demonstrating how the different layers always start from the base of the facing of the previous layer.
Here you can see the final pattern-pieces after I copied them: the layers and their facings. When cutting fabric, I didn’t add seam-allowance at the inner-edge (=base of the layer).

Sewing starts from attaching a facing to each layer.

After pressing, I simply sewed all the pieces together and stitched at the waistline to keep them in place. Normally I would also stitch the other edge, but this time I wanted a pleated skirt -effect, so I left the hemline free. Sometimes you’ll also need to add hand stitches in the middle to keep all the pieces where they need to be.
Anyways, here’s my skirt:

Next time I’ll write about another version of layering, the crossing layers.

18 Comments
You are just so amazing ? I love what you do.
Wow! Thank you. 🙂 Well, I hope I can help others to create amazing things, too!
Just want to see what it’s all about
I hope you found some valuable info. 🙂
Incrível. Adoro aprender técnicas novas. Obrigada
Thank you! 🙂 I’m glad you found the tutorial useful.
Thanks, you’re so generous with your knowledge
You’re welcome. 🙂
This is the first time, I am coming across Layering, I am so excited about this new information, can’t wait to give it a try. It looks quite complex though, but you have given a lot of details, so I will keep reading it over and over till I get the hang of it. Thanks for your generosity Minna.
You’re welcome. 🙂 It’s quite a time-consuming method but will result in very cool garments. Happy learning!
You are awesome! Thanks for all the tutorials. They have been helpful. Will love to know more.
Thank you! 🙂 I’m planning on lot’s of new tutorials, so will keep you covered. 😀
Wow
Amazing tutorial……Thanks for inspiring me, would love to try this out!🙂
God Blessings 😘😘
You’re welcome! 🙂 Always happy to inspire. Happy drafting!
I recently came across your work. I appreciate your mini tutorials. I feel like I can create something beautiful and unique because of you! I am putting this is my artillery for sure!
Thank you! 🙂 That’s so awesome. Layers can be used for adding some cool details.
Absolutely amazing, impressive, and innovative. I adore this idea and can’t thank you enough for sharing.
You’re welcome! 🙂 Yes, layering is one of my favorite techniques. Thanks so much!