So, as promised, here’s another post on pleats. They are so versatile that I wanted to introduce a couple of other variations: the pleated stripes and pleats across pleats. Because why make things too simple, right? Both techniques are easier if you already read the first post https://www.theshapesoffabric.com/2018/03/17/speaking-of-pleats/
Pleated stripes
This is a prime example of my bad habit of shattering one pattern piece into several smaller pieces.

The skirt represents this technique, but the main piece will be a bodice, as it’s a bit easier.
So, take your basic bodice pattern and divide it in two, absorbing the dart(s).
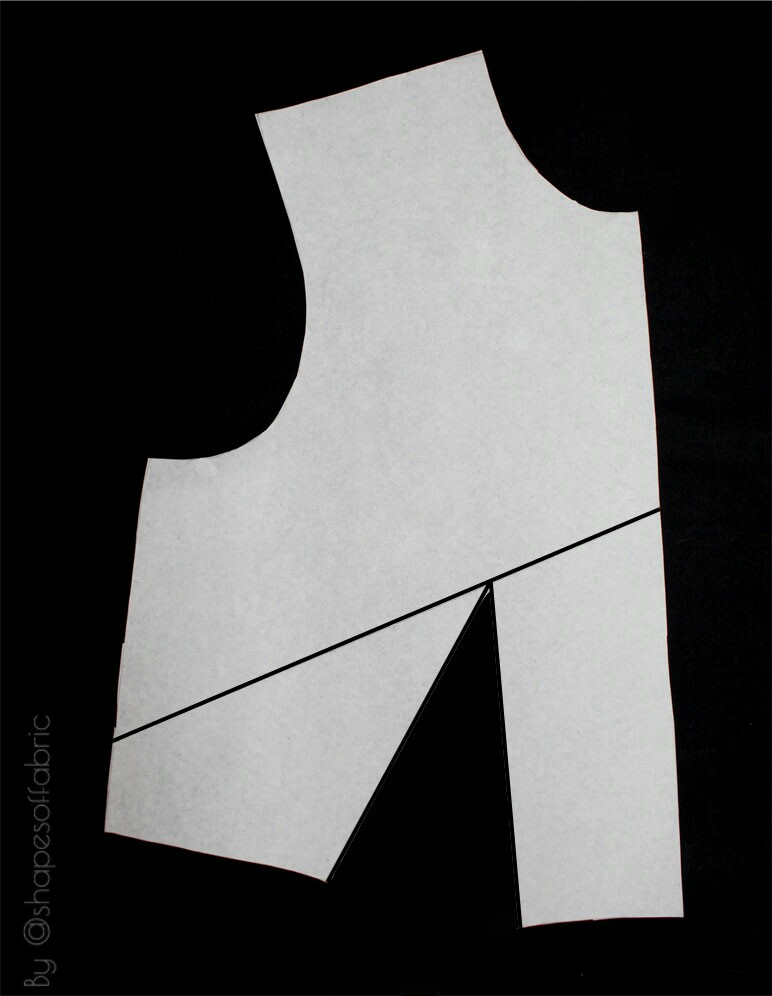
After separating the two pieces, draw lines where you want the pleats to be. These will also be stripes, so decide how wide you want them. Number each, and add the color-codes. To get stripes, this piece is made with two different colors of fabric, in my case black (B) and white (W).

Now you can add pleats normally, following the procedure I wrote about last time. Don’t forget to add seam-allowances. The upper part doesn’t have a seam at the centre front, the lower part does.

Time to separate the pleats! I colored them in blue. Basically, you’ll divide them in the middle, at the base of each pleat, so the area remains hidden in the final garment. Don’t add any seam-allowances, as you’d end up with overlapping layers of fabric.
The pattern-pieces are ready.

First sew all the separated pieces together again.

Press the pleats and fix them in place by stitching around all the edges.

Sew everything together.
Here’s the final piece. As you can see, it looks like a stripy bodice. It’s just that each stripe is pleated.

Uneven pleats
Sometimes you might want to add uneven pleats. I did so in the previous piece. It’s just a bit different from normal/straight pleats. You can’t add them in 90 degree angle, because the pleat is slanted.
Instead, do like this:
Copy the first section as usual, but then just draw a line, without caring about the 90 degrees. In my example the pleat will be 2 cm wide on the left side and 4 cm on the right.

Fold the pleat right away, adding marks where the first section ends.

Now you know where to copy the following section. The rest is done the same as with normal pleats.

Pleats across pleats
To have an idea what I’m talking about, you might remember this pleated bodice-back I posted on Instagram several months ago.

Preparing a pattern to this kind of pleats is not so difficult. You just have to do it in two phases. First one direction, and then the other.
The more difficult part is pressing all the folds!
I thought it would be fun to actually create something while doing a little exercise. This is a bit different from what I usually do, but I hope you’ll like it: a pincushion! It doesn’t take much fabric. Just choose something that’s easy to press, and not too tightly woven.
The pattern
This will result in a 10 cm x 10 cm pincushion. You can use different measurements if you want. The technique is the same. First draw the final design; how you want the pleats to be placed.

Start copying in the first direction. I added 4 cm between each section to get 2 cm pleats. Trace also the lines of the remaining pleats.

Take another paper and copy from the previous one, adding the pleats in the other direction. Add also seam-allowances around and mark the starting and ending points of all the pleats.
This is the final pattern. Edit: You can now download the pattern as a pdf from the sidebar!

Sewing
Cut one piece of fabric with your pattern, clipping all the pleat-marks. You’ll also need a base, which has the size of your final pincushion+seam allowances. And another piece of the same size, that’ll become the backside.

To start, press the pleats, first in one direction, and then in the other.


To fix the pleats in place, stitch all around the piece. I also recommend adding some hand-stitches on the wrong side. Finally, attach the base.

Now the front piece of the pincushion is ready and you can attach the back piece to it, right sides together. Leave an opening so you can turn the right side out. Trim the corners.

Turn the right side out and press.

Fill your pincushion and close the opening with tiny hand stitches.

Your pleated pincushion is now ready and hopefully you have a better understanding on pleats across pleats!

This seems like something that could be found on Pinterest, so I’ll download the whole tutorial there, conveniently in one picture! -In case you want a summary.
Let me know if you think this was useful and you’d like me to prepare some other similar exercises in the future!
15 Comments
Very helpful. Thanks
Awesome! 🙂
This is so helpful
Thanks for the explanation. Very helpful.
I had a question about closing the dart. You said we should close the dart before drawing the pleats. However in the pic where you draw on where you want the darts to go, you appear to overlap the panels either side of the dart rather than simply having them meet one another. Please could you explain why you did that?
You’re welcome. 🙂 If you’re talking about what I think you’re talking about, it probably just Seems different as in the first picture the pattern doesn’t have the dart intake. So in the second picture it looks like it’s overlapped, when in fact it’s the dart intake of the folded dart that’s showing from underneath.
Excelente su página. Felicitaciones!!! Gracias por los aportes!
Muchas gracias! 🙂
Hi, very well explained, I will try this as I like it very much, thank you for sharing
You’re welcome! Happy pleating! 🙂
nice idea
Thanks Duncan. 🙂
very creative .i like the the way how you explained it .Thank you very much.
happy pleating .
You’re welcome! It was my pleasure. 🙂
This is absolutely amazing. I will definitely try this 💕 Thank you
Thanks so much! 🙂 Have fun.