Sometimes my tutorials here can be quite advanced, but I have received requests to write about pattern making basics, too. So this time I have prepared a tutorial about more basic stuff, things that are definitely useful to know before venturing into the more complex designs.
In my head I went back to my very first sewing and pattern making classes, trying to remember what we were taught there. First came sewing, as one needs to know that before making patterns. There were lots of samples for sure: sewing different types of seams, pockets, and collars. Tailor’s tacks and basting, hemming by hand…
The very first patterns were skirts, as that’s the easiest type of garment to start from. I seem to remember we made panel skirts before drafting the actual skirt block. But circle skirts don’t require a pattern block either.
Tools for Pattern Making
You don’t really need a lot of tools to draft patterns. I mostly just use different types of rulers, a measuring tape, pen, eraser, scissors, tape, glue, pattern weights (=washers), and a calculator. Sometimes I need the compass, too.
To help you be preferred for even the pattern making basics, here’s a picture of a variety of tools that could be needed at some point I actually never use the French curve, though, but I know that many people do. And the notcher isn’t all that essential either.
You’ll definitely want to have a type of ruler that enables you to draw 90 degree angles.
Choose a tape that you can draw on. The pencil should have a narrow tip. I prefer 0.7 as it won’t break so easily. But I also use a normal soft drawing pencil for “freestyling”.
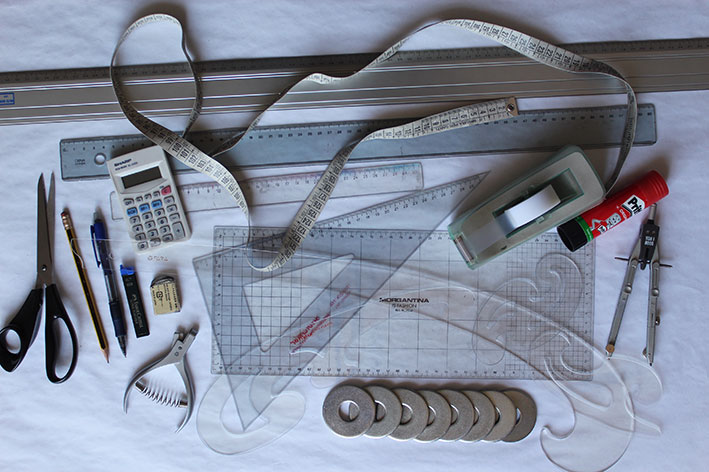
There’s specific paper for drafting patterns, but the important thing is that you see through it, as you’ll be doing a lot of tracing.
Pattern Making Basics You Need To Know
Basic Pattern Blocks
But what are pattern blocks, or slopers?
Well, they are patterns that you use for drafting the actual garment patterns. They can be drafted to industrial measurements or to your own measurements. Naturally, if you want made-to-measure clothes, it’s best to use your own measurements right from the start. If you’re on my mailing list, you can download a body measurement chart with instructions for taking measurements. It’s in the resource library.
There are different pattern blocks for different types of garments. Here on my blog, you’ll find instructions for the women’s basic bodice, dartless bodice, basic skirt, and basic pants. Have a look at this tag.

Other than these, also different jackets and knitwear have their basic blocks.
I’m only specialized in women’s wear, but men’s wear and children’s wear have dedicated basic blocks, too. For example Winifred Aldrich has published books on those, if you’re interested.
Just to make things a bit more confusing, you can have basic pattern blocks with different amounts of ease, depending on the garment you’ll be making. I have written a tutorial on ease, so I won’t add more, here.
As mentioned earlier, start from the skirt block, which is the easiest. Then you could do the dartless bodice block, the basic bodice, and finally the pants. Make toiles of each basic block so that you can fit and adjust them, and finally copy the pieces carefully on a cardboard.
When making patterns, you just choose the best basic pattern block for the project, trace it, and then you’re ready to create the actual pattern.
Pattern Details
Each pattern piece needs to be named, and have a grainline marked. It’s usually a line with arrows at both ends, and generally it’s straight – parallel to the c.front or c.back of the pattern.
You need it when cutting fabric: place the pattern pieces on the fabric so that the grainline follows the direction of the fabric selvage, which is also the direction of the warp threads of the fabric.
The warp threads are stronger and stretch less than the weft threads. You don’t want your garment to stretch lengthwise, right?
Sometimes the garment will be cut on the bias, which means that it’s placed on the fabric in a 45 degree angle to the direction of the warp threads. This makes the garment stretch more than usual, and you can take advantage of it, for example, when making collars (to make them turn more softly).
So, to prepare a pattern to be cut on the bias, you draw the grainline arrow in a 45 degree angle to the c.front/c.back of your pattern.
The pattern pieces should also have notches marked. You could, for example, have a notch at the waistline or the hipline, a notch where the zipper starts, notches for the dart, armhole notches for the sleeve, etc. These help you to align the pieces correctly when sewing.
The patterns only cover half of the body circumference. This is why the horizontal measurements are divided in half. Often the front piece will be cut on the fold, which means that you fold your fabric lengthwise (=the direction of the fabric selvage) in half and align the center front line of the bodice pattern piece with the fold.
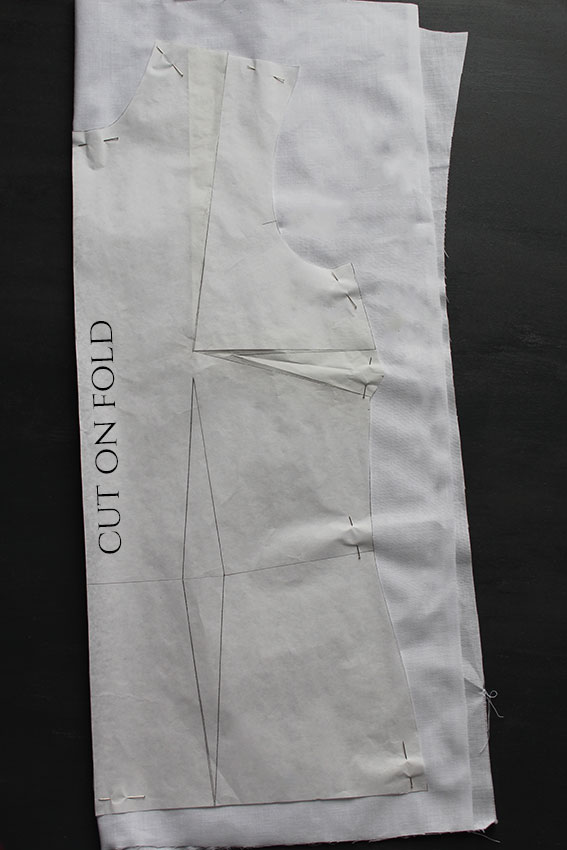
After having cut the piece, you open the fold and find a symmetrical bodice front piece that covers both sides.
Smooth Lines
Especially with fitted clothes, it’s a good idea to give a nice shape to the outlines of the pattern.
Here you can see an example of the skirt and the basic bodice. Obviously, for the skirt this means the hipline curve.
Add just a slight curve or otherwise you’ll find empty space at the hips when fitting the garment. The curve should be united smoothly to the rest of the side seam, without leaving an angle at the hipline.
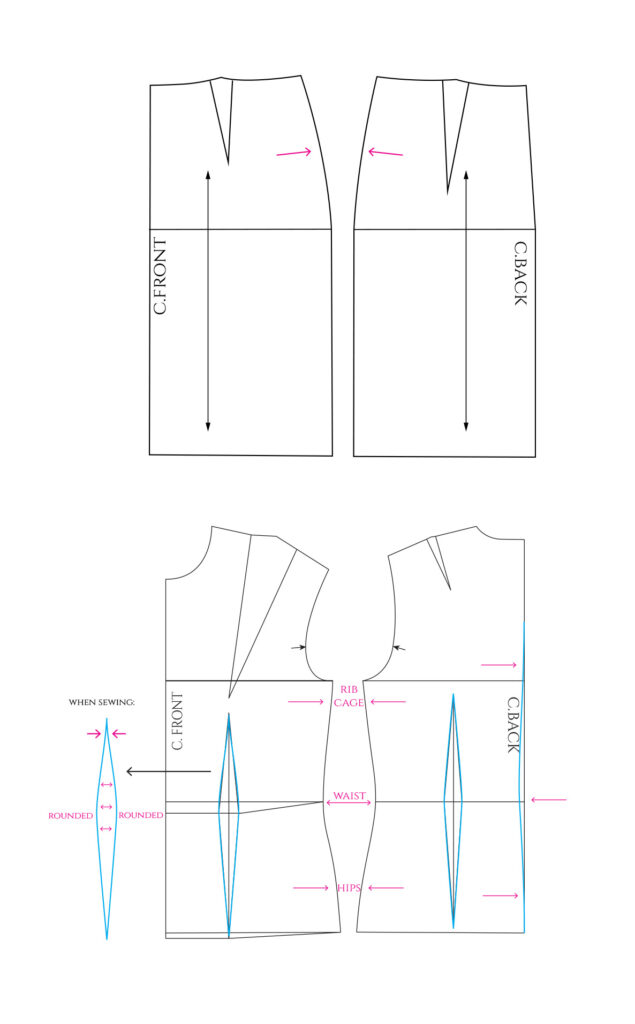
The bodice is a bit more complex. When drafting the side seam, think about the body shape: the rib cage creates a slight outward curve, then there’s a hollow area at the waist, and an outward curve again at the hips. No angles!
If you want to shape the c.back line as well, you can curve in at the waistline there, too.
Although the darts are drawn straight, you should give them a rounded shape when sewing.
Dart Rotation
There’s a dedicated tutorial on Dart Manipulation, but I wanted to include this passage as it’s part of the pattern making basics.
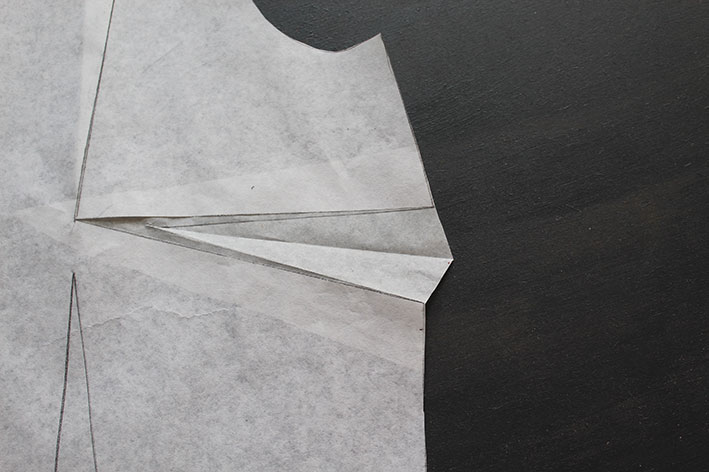
So, one of the most fun parts of pattern making is dart manipulation. You can rotate the darts in any direction to create different looks. In this example we’re uniting the waist and bust darts into one and placing the new dart at the side seam.
Whenever you’re rotating the darts, remember to always move the new dart tip 2-3cm/1 in. from the bust point. Or even more, if needed.

Here’s a “live” example of this, but only rotating the bust dart.


As a result of cutting with the dart folded, you’ll get the correct dart allowance shape.
But in which direction should the dart allowance end up then?

Usually always towards the c.front or c.back. This goes also for the skirt and pants. If the dart is at the side seam, it may be turned downwards.
Dart to Volume & Slash and Spread
The dart volume always needs to go somewhere, so if you don’t want to simply rotate the dart in another direction, you can also turn it into volume, as shown in this skirt example. You just cut the pattern open between the dart tip and the hemline. Then close the dart and fill the gap with paper.
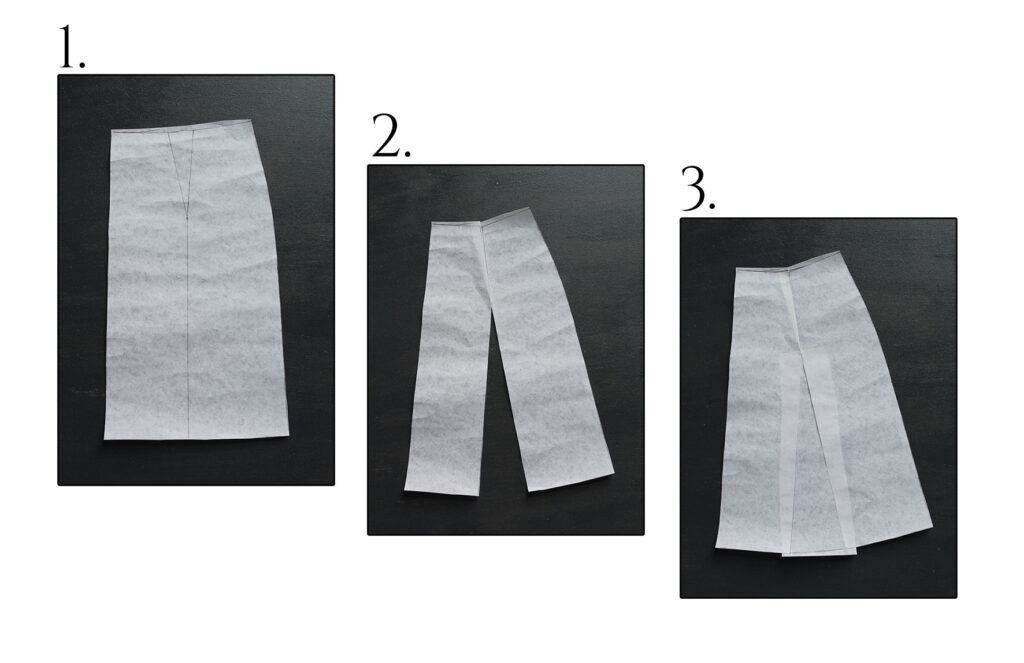
Slash and Spread method comes into play if you want to add volume but there’s no dart you could use. It’s definitely part of the pattern making basics, as it’s a method you’ll be using a lot!
So, you literally slash the pattern and spread it by the desired amount, fill the gap with a piece of paper, and then re-draw the lines.

However, if you want to add lots of volume, you should make more slashes and divide the volume between them.
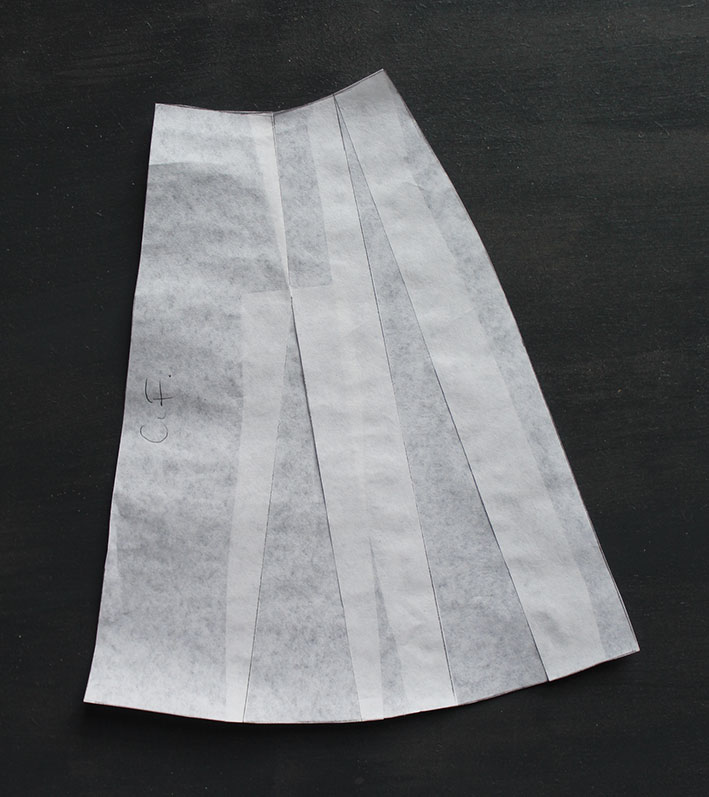
Here’s the final skirt front piece with added volume.
The Slash and Spread method is present in several tutorials here at my blog!
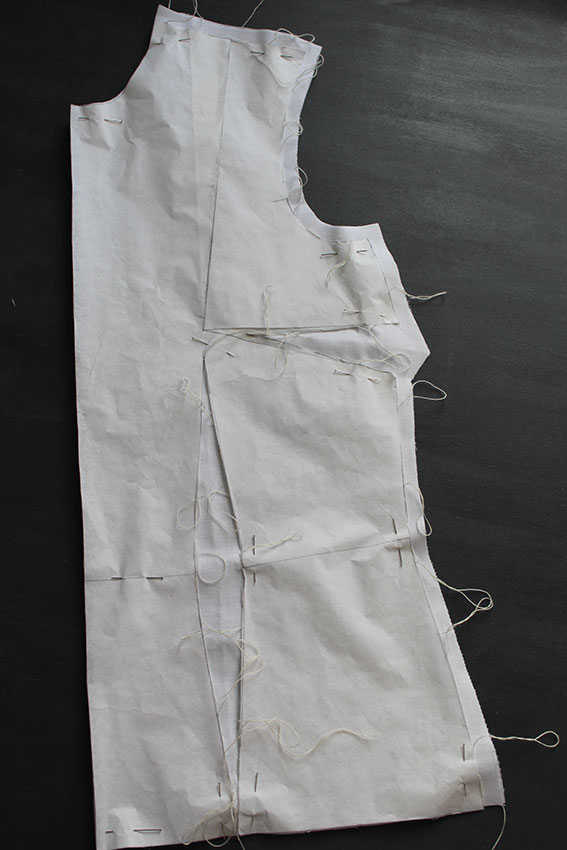
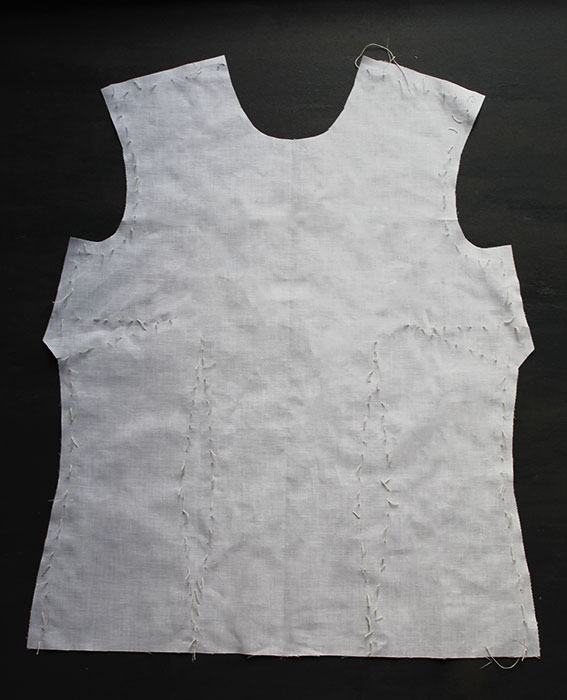
Checking the Pattern Pieces
Once you’ve drawn your pattern pieces, you should always check them before using them. This means checking that the seams that will be sewn together, such as side seams, match in length, and ensuring that the waistline, the hemline, the armscye line, and the neckline flow smoothly between the front and back pieces.
See these examples:
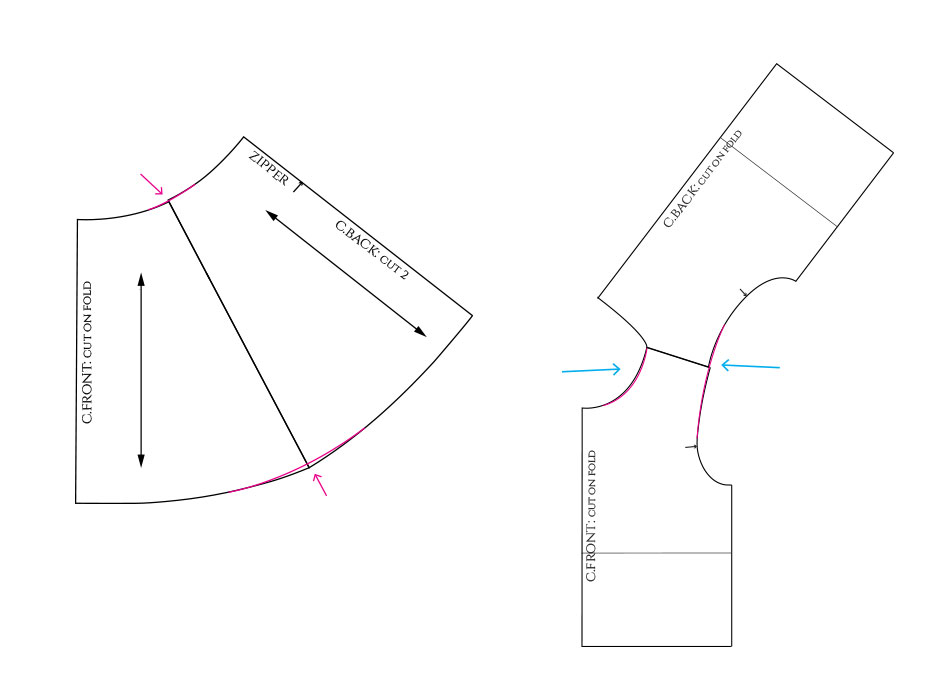
Adjust the lines where needed. For example flared skirts always need to have an angle removed at the hemline near the side seam.
The hemline, (the neckline), and the waistline also need to start in a right angle at the c.front and c.back.
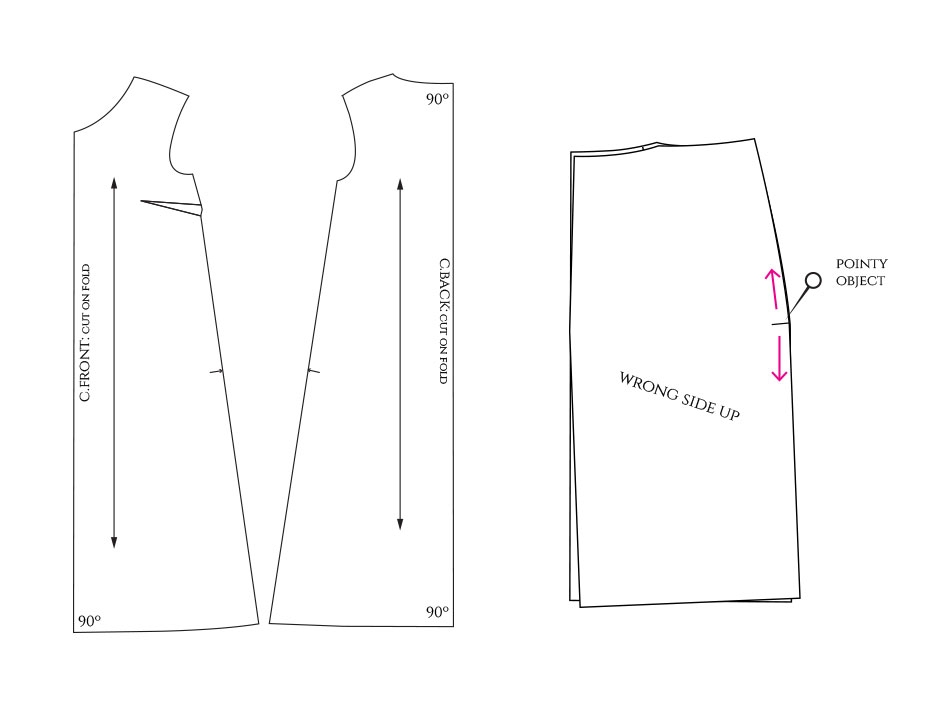
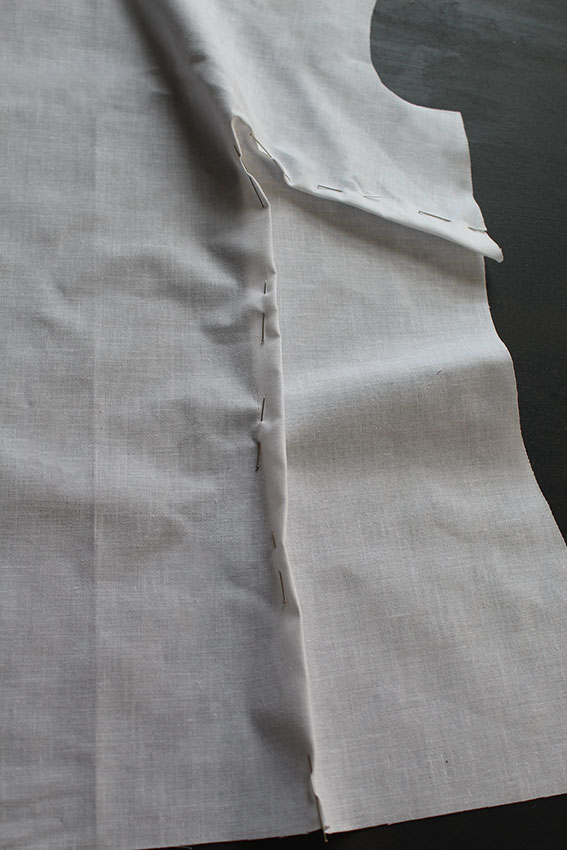
If the seams you’re checking aren’t straight, you can use the so called walking method: place the back piece wrong side up on top of the front piece, and with the help of a pointy object, such as a pencil, “walk” the seam to check the length. The pointy tip near the edge allows you to turn the pattern as you go.
Begin somewhere in the middle where you have placed a notch: in this case the hipline of the skirt. Match the notches and then “walk” upwards and downwards from the notch.
Seam and Hem Allowance
There are different preferences when it comes to the seam allowance. Some prefer to use patterns with seam allowance included, some don’t. Also the preferred amount of seam allowance varies. In any case the basic pattern blocks don’t have seam allowance.
When you draft your own patterns, you need to add seam allowance yourself if you want it.
Personally I add 1cm or 3/8in. for normal seams and 0.7cm or 1/4in. for the neckline unless there’s going to be a collar. But if you want some future wiggle room for modifications, you might add a wider seam allowance.
Also, French and flat felled seams require a wider seam allowance, for example, 1.5cm or 5/8in.
Here are a few examples. For a collar I also leave a narrower seam allowance, except for the neckline.
Notice the flared skirt hemline shape at the side seam.

Also the amount of hem allowance varies, depending on your preference and how many times you’ll fold it. Usually skirts have 4cm or 1 5/8in. hem allowance folded once. Of course it’s up to you. It could also be just 2cm or 3/4in.
When it comes to skirt lining or shirts, it’s better to have a narrow hem, 1.5cm or 5/8in. that you fold twice.
To add the seam and hem allowance to the pattern, you could use this type of ruler. Apparently there are also specific seam allowance rulers. You can Google that.
Don’t worry if the rounded lines don’t look so good. You can correct them afterwards.

I usually prefer to leave my patterns without seam allowance, unless I’m going to be using a fabric that easily gets ruined by pins.
In that case you mark the seam and hem allowance directly on the fabric. There are different tools for that, but if you have none, just use a normal ruler.

I must confess that I usually just cut directly without marking the seam allowance…
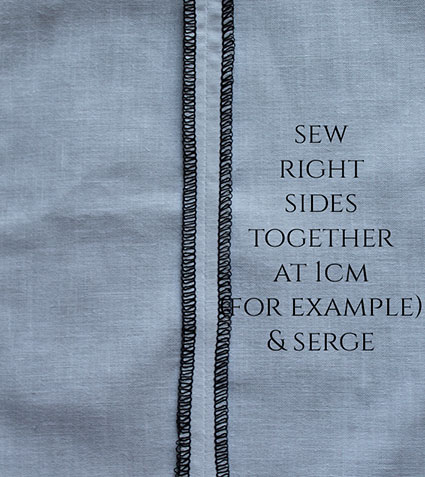
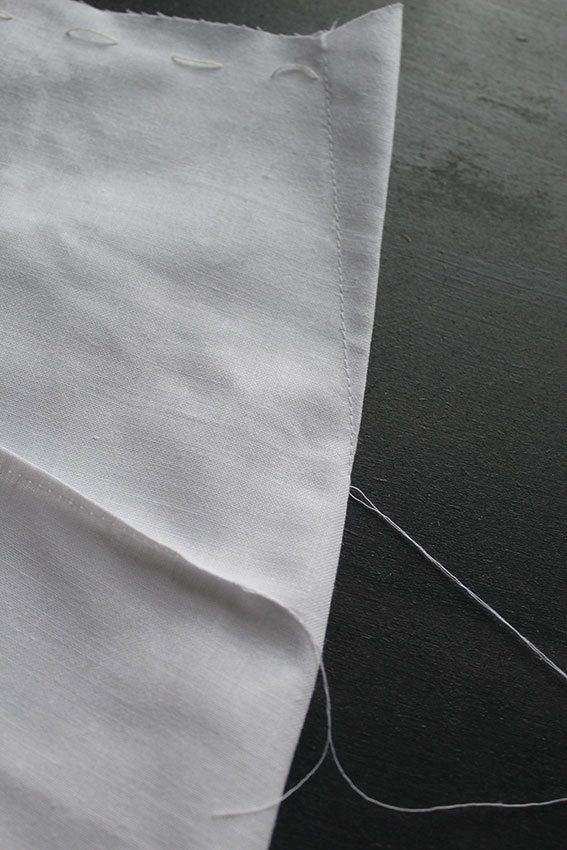
Types of Seams
Here are three different types of seams: the normal seam, the French seam, and the flat felled seam. You have to know which type of seam you’ll be using before adding the seam allowance to your pattern.
The normal seam of course is just sewn once. Then you finish the edges with a serger or zig-zag stitching. You can either press the seams open like here, or press everything in the same direction and serge both edges in one go.
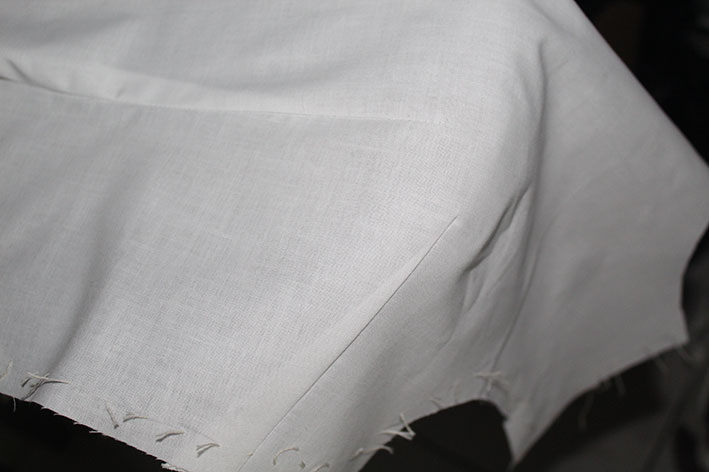
The French seam has more passages. You don’t need to finish the edges as they remain hidden inside the seam. This type of seam works great with transparent fabrics.

The flat felled seam also has two rows of stitches. You can use this type of seam for trousers and classic shirts, but also if you need to create casing for boning structure, as shown in this tutorial.
I find it’s easier to first cut both sides with the same amount of seam allowance and trim the other side after the first row of stitches is done. The wider side is then folded around the narrower side and stitched in place. Both edges remain hidden inside.

Tailor’s Tacks
If you draw and cut the seam allowance accurately, you should automatically be able to sew the seams correctly, following the shape of the edge.
However, there’s also a thing called tailor’s tacks. This allows you to trace the exact shape of the pattern on your fabric. You sew the tailor’s tacks by hand with basting thread when the pattern piece is still pinned to the fabric. Combined with basting, you don’t need to cut the seam allowance accurately.
Using double thread prevents the threads from coming off so easily, but in this example I used a single thread. You alternate between normal stitches and loops, following the edge of the pattern.
Here I even emptied the darts so that it’s easier to mark the dart shapes. With this method you can mark rounded dart shapes, too, if you prefer to draw them first on the paper.

When you’re done, you can remove the pattern. Then pull the two layers of fabric apart as shown, so that you can cut the threads in the middle.

You’ll end up with the exact contours of the pattern.
Then you can baste the darts, following the tacks. Remove the bits of thread before going to the sewing machine.
Marking the Darts
How to mark the darts if you don’t want to do the tailor’s tacks?
One option is to mark just the dart tips and corners with a piece of basting thread. Otherwise you can use pins. Remember to cut notches at the side seam. Place pins on both sides of the fabric.

Now you have the reference points to sew the darts.
Here are the two versions. You’ll either follow the basting line or the pins to sew the darts.

Don’t do back stitch at the dart tip. Instead, make a knot.
Press the dart allowances downwards and towards the c.front. Pressing on top of a tailor’s ham will make it easier to get a nice shape.
So there you have it, some pattern making basics, and related info. I’m not sure if this was a very well structured text, but I hope I didn’t forget anything essential! Hopefully, when it comes to pattern making basics you now have a good idea of what is needed and how to start with your own pattern making projects – good luck & enjoy!


22 Comments
I’m an experienced seamstress (been sewing for over 57 years!) and learned to draft patterns while living overseas in South America. I must say that your website is one of the best I’ve seen. I appreciate the explanations and the photos. I was so fascinated with your blog on the tucked bodices and sleeves. This is the kind of stuff I asked my Bolivian teacher to show me, and because I was an experienced sewer, she let me have free reign to do make whatever patterns I wanted in class.
Since returning to live in the U.S.A., I sometimes teach other ladies to sew & alter or draft their own patterns, and I frequently recommend them to take a look at your site for preliminary or supplemental instruction.
Thanks a lot for all the work you put into this website. It’s so nice to find a kindred spirit!
This is such a pleasure to hear! 🙂 Thank you so much! I’m flattered and happy that my tutorials are helping people all over the world.
really nice and explanatory
Thank you! 🙂
Thanks for this guide! I’m a relative beginner but have read most of these here and there before. Still, it was nice to see them all together, it helps a lot to organize all this info in my head finally. Also, the tailor’s tacks were new to me and I did have problems marking my patterns correctly, so it will help in the future. 🙂
You’re welcome! 🙂 Every now and then it’s good to go through some basics, too.
I am Iranian and I enjoy your site because it is clear that you are a noble and generous person and you provide your knowledge for free without doubt and without any bias. I thank you very much and I wish you the best. Be successful and healthy🙏😍❤️🥰💖🌹🌻🌼🌷
Thank you so much for your thoughtful comment. 🙂 It’s nice to have people from different parts of the world reading my tutorials.
Hi Milan.
Good to hear you are out of lockdown.
It felt really good having a read on the basics again. I learnt one or two new basic ideas and some I had to go back to using again.
Quite an interesting read and thank you for always making the tutorials very detailed.
Yes, it’s great to be back to some sort of normality. 🙂 I’m glad you found the tutorial interesting.
Hi! I’m very interested in learning pattern making (I’m doing a course next year) and I really love your blog. This article explained the basics of pattern making really well, thanks!
Thanks so much! 🙂 You’re going to love the pattern making course then, too.
Hie Milan
I am so fascinated about sewing although i did basic level sewing i still find it great to start my own piece of work from scratch i mean masking my own patterns and increasing my knowledge on fabrics and clothing
As they say, one never stops learning! 🙂 And this is certainly an interesting subject, too.
Hello, Thank you very mucho for your tutorials , They are really very good explained. Since 2 months I’m following your blog.
Please can you suggest some pattern paper. I have bought en Amazon Pattern paper but it’s still very thick.
Thank you.
Oghi
Thank you, Oghi! 🙂 I’m happy that you’re enjoying my blog. I have many new tutorials already planned. Unfortunately I always buy pattern paper locally in fabric shops and sometimes in paper shops, so I don’t have experience on any online suppliers. Maybe someone else can chime in here.?
I found the info on drafting bodice blocks very in-depth except where it comes to choosing measurements based on XS, S, M etc. Is there a section explaining what those sizes are based on so that the correct one can be chosen? For example in some clothes I’m XS, in others S, or even M. How do I know which measurement applies to me?
Thank you!
Thank you. 🙂 I’ve tried to simplify the instructions as much as possible. The RTW measurements are the quickest way to go about for the two points where I’m using these. If you don’t always wear the same size, maybe it’s helpful to think about the different sections separately: the neckline size in the bodice and the arm circumference for the sleeve. In any case, you can finetune the pattern when you make the toile.
Hi,
I like to sew accessories, bags and patchwork or quilted projects. I have sewn dresses with pdf patterns available online. Since last year I thought of learning to draft patterns. I did self draft circle skirt, aline skirt and simple boxy style tops. And now i have got better at sewing necklines and hems.
I am learning via online tutorials and blog posts.
Thank you for these blog post and free guides. I like the pdfs for basic blocks, easy to follow the illustrations. I will start with the skirt block.
Thank you
Hello! 🙂 Welcome to my blog. It looks like you’re making great progress already. Skirts are the perfect starting point! Enjoy the process. 🙂
IT SEEMS I DID UNDERSTAND THIS PATTERN
Excellent. 🙂