Have you ever heard about smocking? Cushion-covers might be the first thing that comes to your mind. But I can assure you that it looks great on garments, too.
Just to be clear, there are different kinds of smocking: the English and the North American (lattice) smocking. I’ve also seen the term Canadian smocking, which is probably the same thing. Well, I’m talking about the North American smocking here. It differs quite a lot from the English one.
Smocking is all about gathering the fabric by hand stitches, following a grid, and this produces different shapes. You work on the wrong side of the fabric.
It’s definitely one of my favourite fabric-manipulation -techniques!
I’ll first explain the basics and then it’s time to reveal the rose-sleeve -tutorial.

Basics
This is a tutorial I have previously published on Instagram, but I thought I could explain the passages better here at the blog.
There are different kinds of grids you can easily find on Pinterest and Google. I also recommend checking out smocking tutorials on YouTube.
The grid consists of dots, some of which are connected by a line. The line means you have to gather fabric between the two dots. If there is no line, you have to leave the thread loose instead (with knots on both sides).

Copy the grid on the wrong side of the fabric. The size of the grid determines the size of the shapes you’ll produce. Personally, I prefer 3cm x 3cm.
Choose a strong thread, matching the colour of your fabric and start by attaching it well at the first dot. Then follow the grid and pick up just a tiny amount of fabric at the second dot.
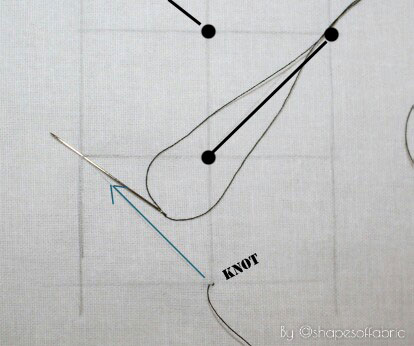
Return to the first dot, pull the thread tight, which will gather the fabric between the two dots. Make a knot to secure it.
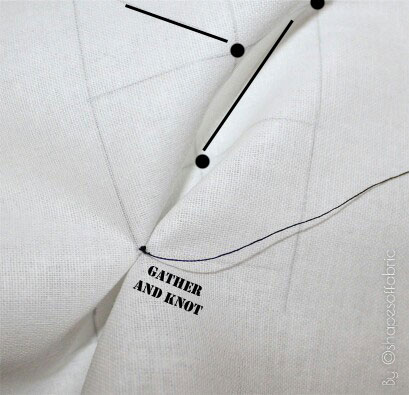
Find the following dot.
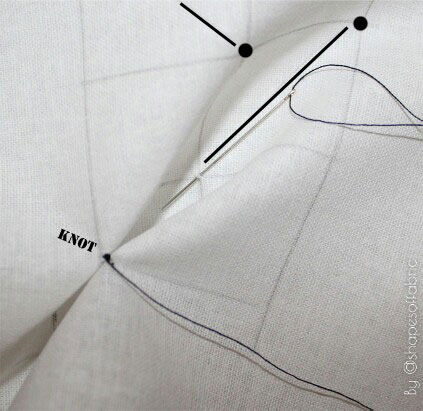
This time there’s no connecting line, so you must leave the thread loose. Make a knot, or you might gather the bit by mistake.
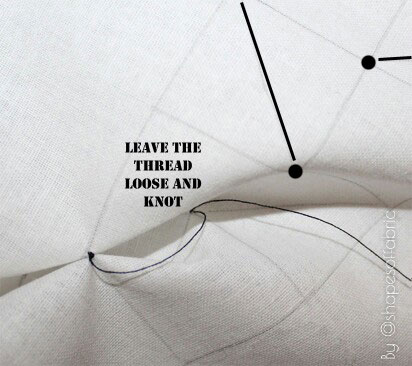
Now it’s time to gather fabric again, so do as in the beginning.
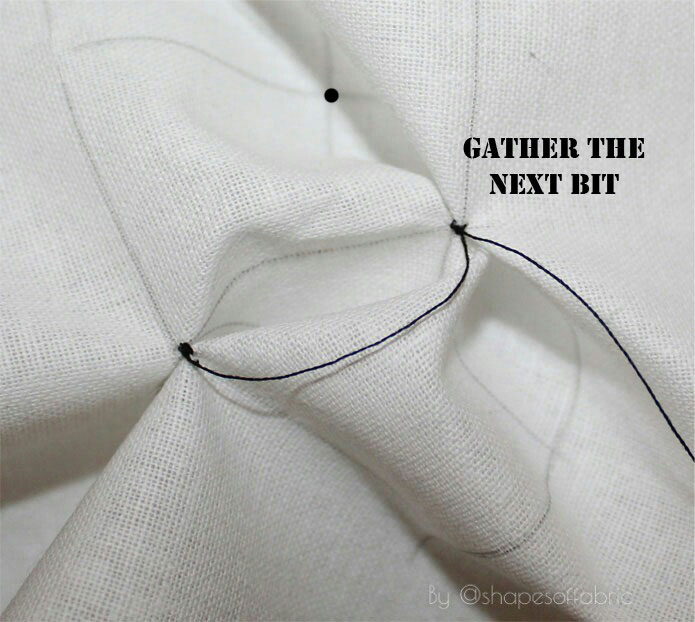
Continue alternating with gathered and non-gathered bits until you finish the grid.
This is how it looks like on the wrong side.
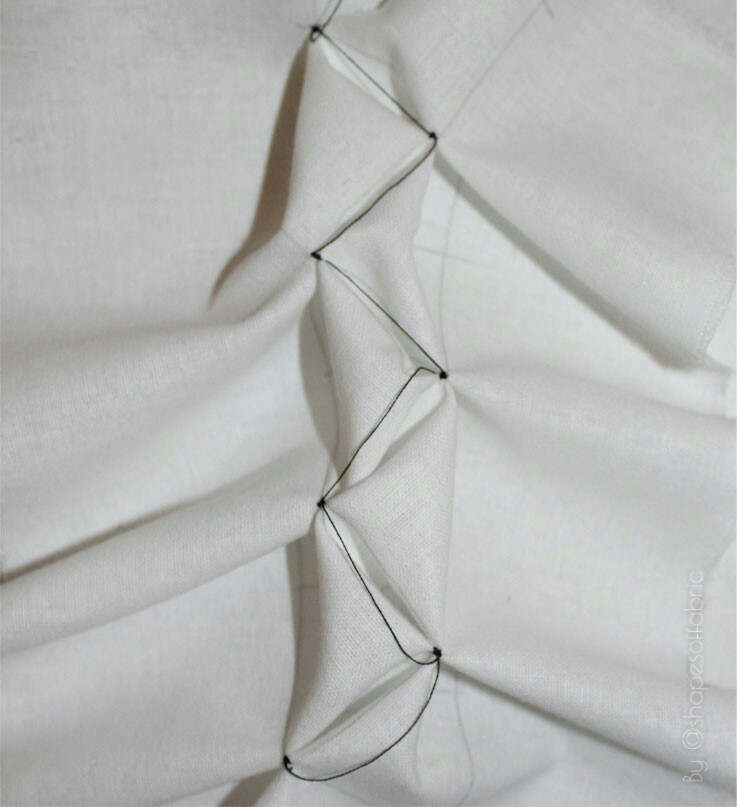
And here’s the right side.
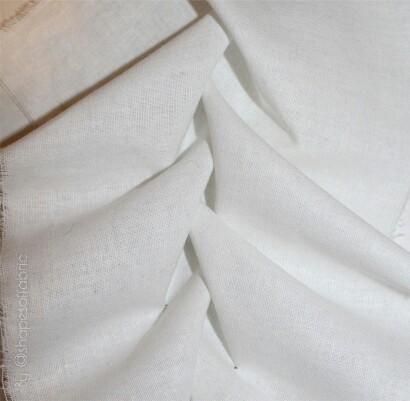
I used this design to make a bodice-back. I attached the smocking-layer on top of a flat bodice-layer. You get lots of folds as a result, which you then need to drape the way you prefer. This creates some interesting designs.

Different grids produce different effects. Here’s another bodice and the grid that produced the neckline-design.
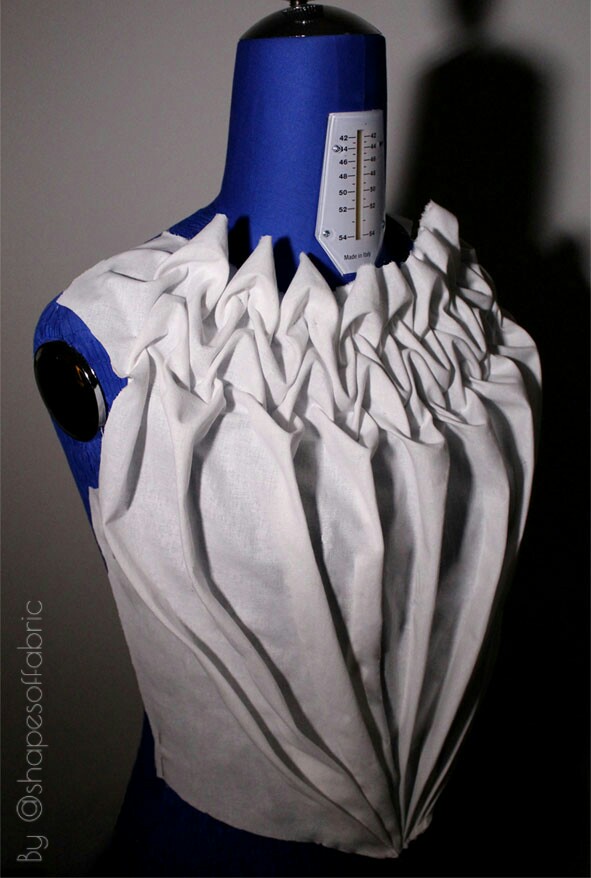

When planning these, you just have to remember that the fabric shrinks a lot while you gather. It’s better to have too much fabric than too little.
Rose-sleeve
And now to the sleeve. It’s a nice alternative to a basic puff-sleeve. I re-made it in half-scale so that I could take extra pictures along the way.
This grid is from Pinterest, so the smocking-design is not my invention. I just separated one rose-motif from the grid and enlarged it into a 20cm x 20cm version.

As a base, you’ll need a sleeve-pattern with some added ease so that you’ll get a bit of puff underneath, too.
Here you can see the original pattern (dashed line) and where I added extra ease.
It’s also a good idea to take off a couple of cm from the shoulder-line of your bodice.
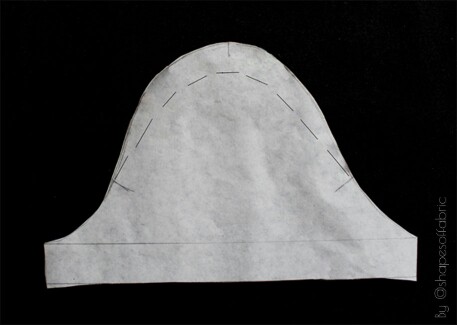
Prepare the sleeve by gathering the ease so that it matches your bodice.
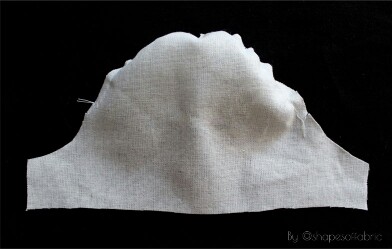
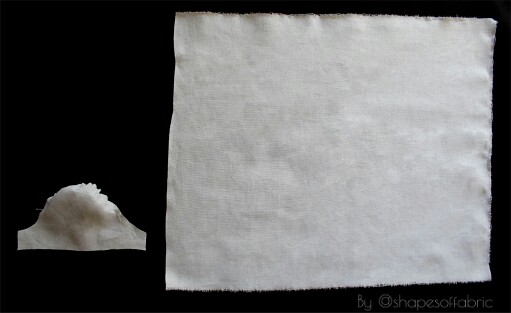
Take a random (big) piece of fabric. To give you an idea, here’s my piece next to the sleeve. I must admit that I exaggerated a bit, though… But creating the rose shape does require quite a lot of fabric and it’s better to have too much than too little. You can also make a test version first, to see how much fabric you’ll need.
Copy the grid on the wrong side. I also added some directions here to make it easier to understand the different passages.

Thread your needle and start by knotting it well to the first dot, where it says “start here” in the above picture.
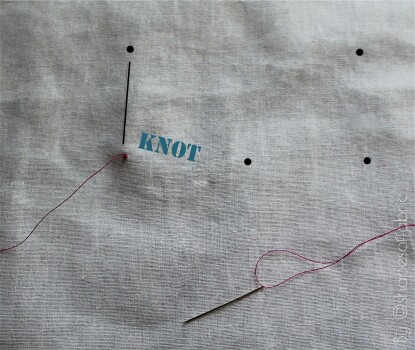
Pick up a tiny bit of fabric at the next dot.
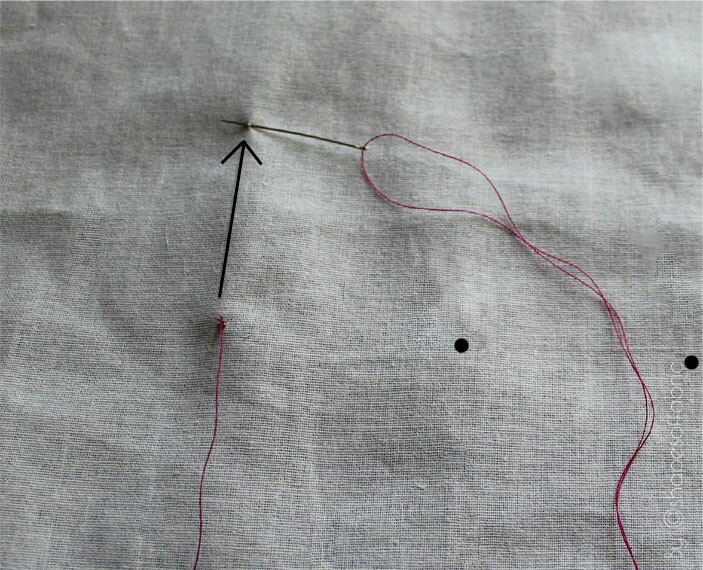
Return to the first dot.
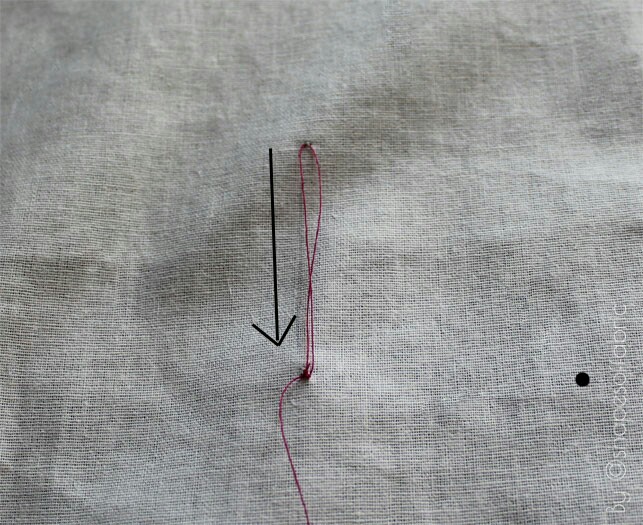
Do the first gather, and knot.
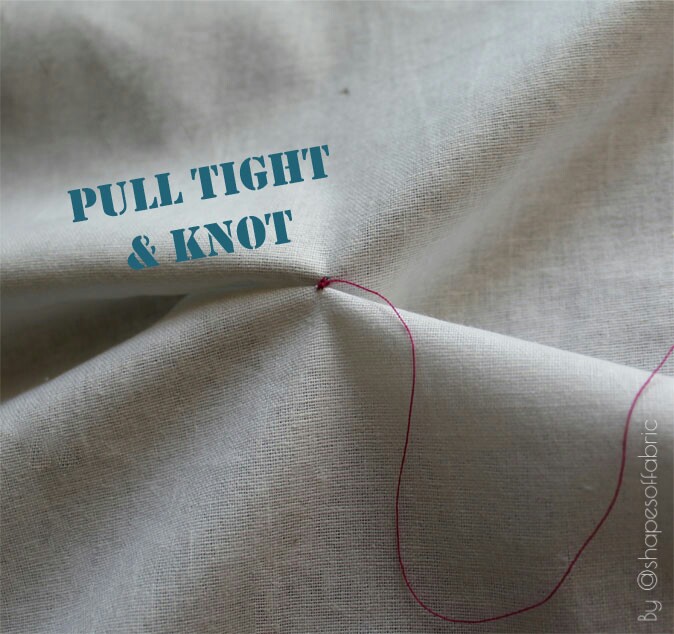
There’s no connecting line between this point and the following dot, so leave the thread loose and make a knot.
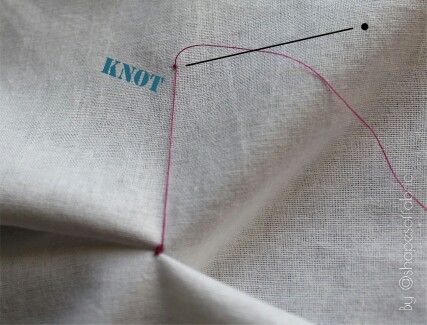
Gather the next bit (=2.gather).


Do the remaining part in the same way, alternating between a gather and a loose thread. In the end, when you’ve done the whole round, you should have something like this:
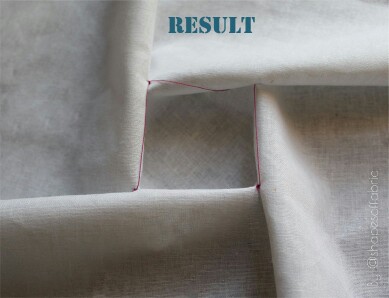
Flipping the fabric around, it looks like this:
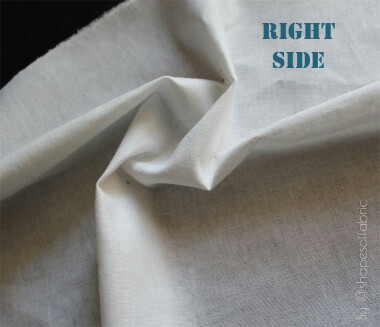
Start shaping the rose by turning the folds around so that they form a spiral. This is basically draping.

When you’re happy with the result, pin.
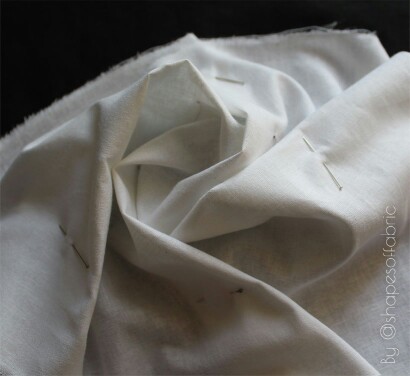
Take the sleeve you prepared earlier and pin the rose on top of it. Cut off extra fabric around.
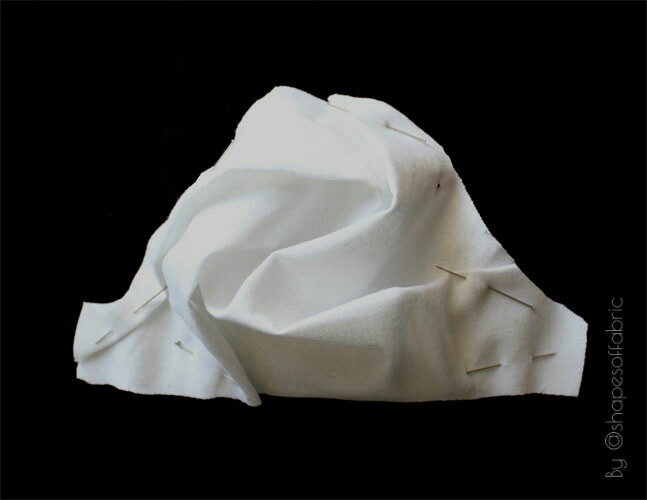
Stitch the edges to fix everything in place.
Sew the sleeve normally. Here’s the cute half-scale version I got. Of course, by choosing a more drapey fabric will create a nicer sleeve. This is cotton.
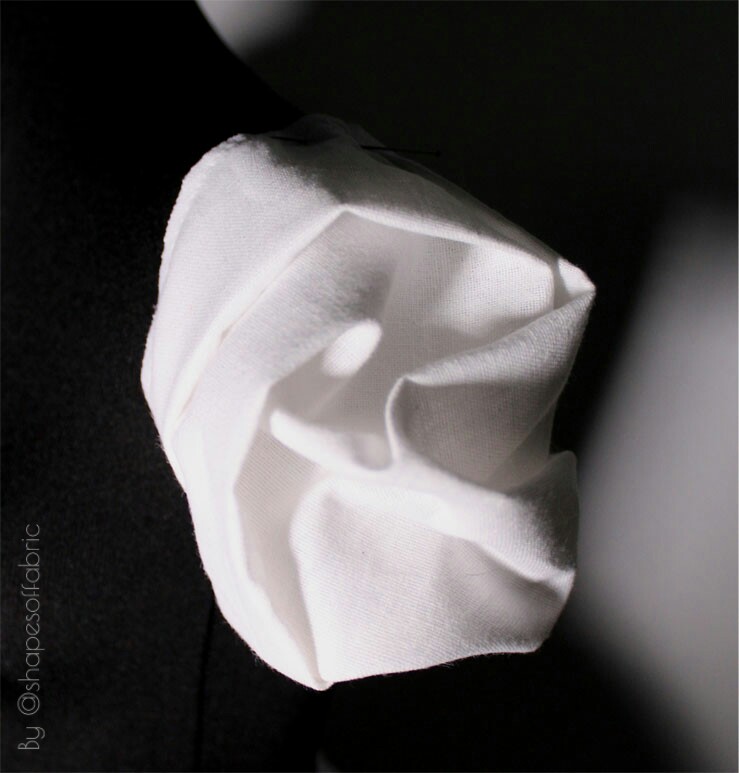
To get a clean edge, you could add a lining, or just simply hem it.
So what do you think? Will you try making one?

28 Comments
This sleeve is wonderful. I might try the technique, to see if I like the results in a fancy fabric, but my first thought after I read the whole post was “How in the world do you launder and press this garment after wearing it? Most North American/Canadian sno king is done on pillow covers for that very reason: it has a finite life due to its inability to be washed.
Thank you! 🙂 Well, when it comes to washing, I think you might get away with washing it by hand (depending how wrinkly the fabric would become after) or alternatively dry-cleaning. you’d have to treat it like a special-occasion garment. 🙂
I liked
Thanks. 🙂
Hello please I would like to know If you are on YouTube
Hi. Unfortunately I’m not. Only Instagram, Facebook, and Pinterest.
I absolutely love this! Thank you so much for sharing! Currently I am trying a jacket with a smocked part in the back, and I am really fascinated by this technique
Thank you! 🙂 Yeah, smocking is an awesome technique if you want to create interesting surface to your garment.
Divina y muy bien explicado, gracias
Muchas Gracias! 🙂
What measurement would I need for a 3/4 length sleeve?
Could you give clearer instructions for the rose sleeve please which way are you smocking and square sizes of smocking squares thanks.
Hi Tracey. I think what might be confusing, is the fact that smocking is usually done in smaller size. To cover the whole sleeve cap you start with a 20cm x 20cm square and each side is divided in 2, so I guess the smocking squares are 10cm x 10cm. I just signed the outer edge of each, because the rest is not needed. I think this design works best for a short sleeve, but if you want to make it 3/4 length, I’d still keep the squares in the same size, but have a bigger piece of fabric so that it covers the whole sleeve. I can’t give you measurements for the fabric unfortunately, because it depends on the kind of folds you drape around the rose. You’d just have to experiment.
I now know the name of this style that i love!!
I’ve learnt more on this fab site than I have scrolling through Google searches for hours. Every style/ technique I like in my clothes are all here with tutorials 😍 thankyou thankyou thankyouuuu
Very pleased to hear. 🙂 You’re welcome.
Thankyou for replying. I am following the stitching but it is not coming out the same I lose direction is there any way you could write out a better instruction I get list where it says leave thread loose and direction of next squares.
Many thanks.
I’m sorry that you’re having difficulties. It’s quite a while since I wrote that tutorial, so I’ll have a look at it and see what I can do tomorrow. I’m sure I can add something to make it more clear.
Thankyou I am using it for a final assessment in Fashion.
Thank you so much! I’m self taught and this is how I learn, thank you for taking the time to blog on this! looking forward to many more, especially the very complicated ones! Thank you once again.
You’re welcome. 🙂 Yeah, fabric manipulation is a cool way to create interesting shapes. I might get back to smocking at some point and make a new tutorial.
This is really the simplest way to teach I got it one go only thank you so much ☺️💕
That’s so awesome! 🙂 You’re welcome.
I love it
Thanks so much! 🙂
está fantástico, me encanta la explicación, yo entiendo fácilmente, no es difícil aprender contigo, enseñas todos los detalles y estoy satisfecha. hoy encontré tu blogspot ,muchas gracias estoy muy feliz, yo coso desde hace 40 años y este tema es importante porque ahora es moda en la ropa de vestir.
Muchas gracias! Y Bienvenida. I should really get back to making something with this technique. Smocking creates such cool textures.
من خیلی دوسش دارم ‘حتما انجام میدم ‘شما لایق بهترینهایید’ممنون که ب اشتراک گذاشتید❤
Thanks so much! 🙂