This tutorial is an attempt to bring sewing instructions to different types of collars together; The instructions I currently have here on my blog are scattered between different tutorials. I’ll link to those, too, as they show the collars in action.
I’m going to use the same collar groups I have in Collar Galore, my collar pattern guide.
The fabric is simple white cotton muslin, because it was the only fabric I had enough of in my stash to make all the collars. Unfortunately I didn’t have enough interfacing for the large facing pieces, so I only interfaced the collar pieces.
Peter Pan Collar
The first group consists of non-convertible collars and the Peter Pan collar is probably the most typical example. These sewing instructions will work also for other collars that have been constructed similarly, such as Chelsea and Sailor collar.
I’ve drafted a basic two-piece rounded Peter Pan collar for this tutorial. To make it more interesting, there’s a button placket and the two sides of this collar will meet at the c-front.
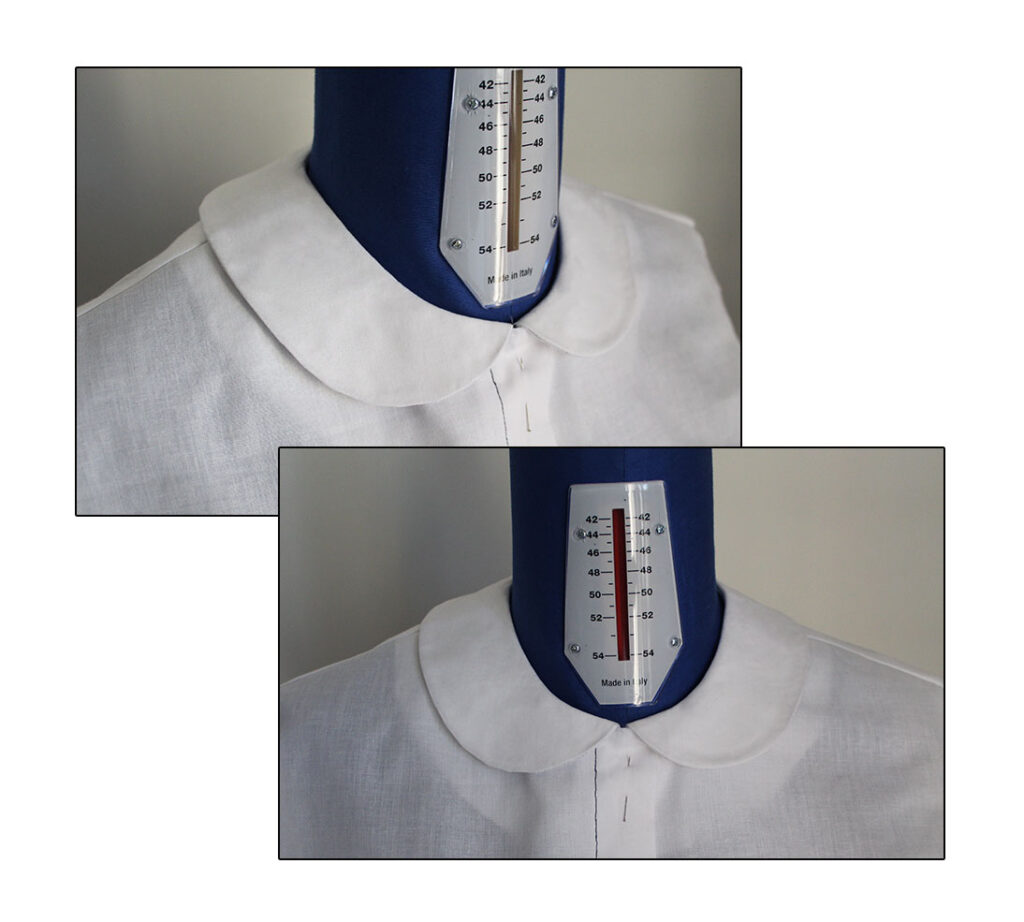
Other possibility would be to have a simple zipper closure at the back, or if the neckline is large enough for the head to pass through, you could leave it without any opening.
The easiest way to finish the neckline is to have either a facing or a lining. The front piece should end at the c-front line in the case of a button placket, as in this example.
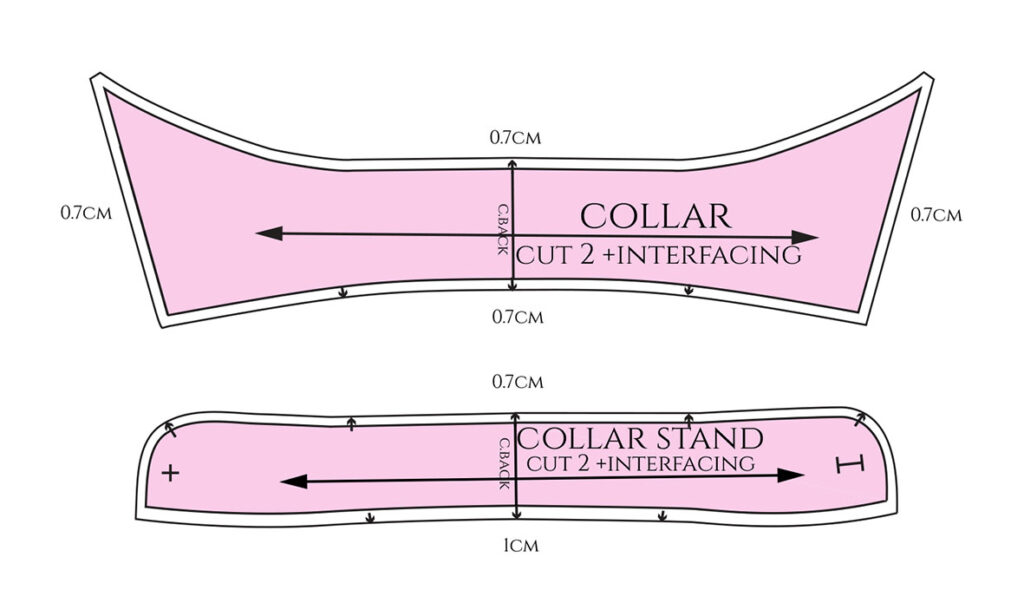
Here’s how much seam allowance to add to the pattern piece. I like to always leave a smaller seam allowance along the outer edge of collar patterns because it will anyways be trimmed.
You should interface the top layer of the collar pieces, but use a lightweight interfacing. It’s a good idea to avoid creating bulk.

How to Sew Peter Pan Collar
Let’s begin by preparing the button placket. You only need to press the folds at this point and then make this tiny seam at the top by folding the right sides together.
The idea is to finish part of the button placket’s top edge; the collar will start from the center of the placket. Clip the seam allowance as shown.

Then, sew the two collar piece layers right sides together along the outer edge. Clip notches to the rounded sections. In addition you can trim the seam allowance.
Turn the right sides out and press.

Now, pin and sew the collar pieces at the right side of the bodice neckline, matching the shoulder notches and the c-back notch. In this case the two sides remain slightly overlapped at the c-back due to the seam allowance. The interfaced side of the collar is on top.
Notice, that you need to leave the button placket folds free and only attach the collar to the outermost layer (see the second picture below).

Then, place the facing (or lining) on top, right sides together, and sew around the neckline. The button placket folds should not be caught into this seam either. Trim the seam allowance in half and make clips to the round sections.
Press the seam allowance towards the facing and understitch near the seam. Then press the facing to the wrong side.
The final step is to slip the facing inside the button placket and stitch, as shown here below.

Stand-Up Collar
The next type of collar is the Stand-up Collar. You might be more familiar with the term Mandarin Collar. In any case, this collar is a simple band that can be overlapped at the front or not.
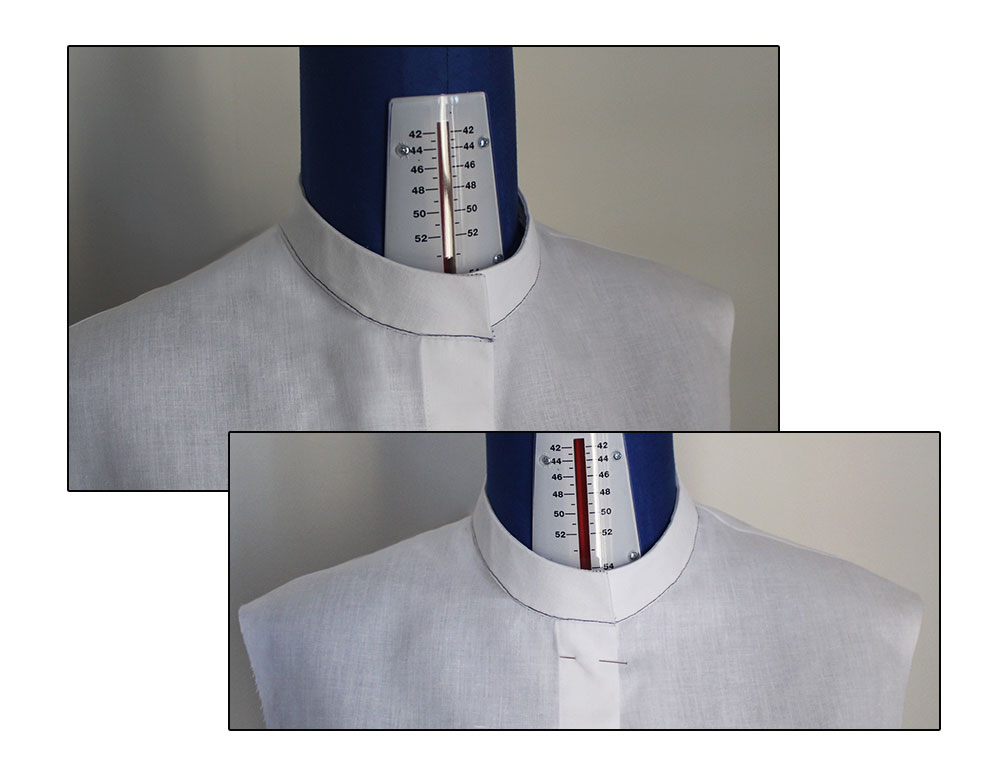
I’m making an overlapped version here without the rounded corners.
You’ll need to cut two layers and interface the top layer.

How to Sew Stand-up Collar
After having interfaced the top layer, place the right sides of the two collar layers together, matching the c-back notches, and start sewing 1cm from the neckline. Also, stop 1cm before reaching the neckline at the other end. This will make it easier to attach the collar to the bodice neckline.
Trim the corners before turning the right side out. You can also trim the seam allowance of the interfaced layer in half to reduce bulk. Press the collar.

Then, pin the upper collar (which has the interfacing) to the right side of the neckline, matching the shoulder and c-back notches, and sew. I like to trim the seam allowance before pressing.
Press the seam allowance towards the collar and press the undercollar’s seam allowance inside.
Pin it along the inside of the neckline and stitch near the edge. You may also hand stitch if you prefer, because this can be a bit tricky to sew with the sewing machine.

Shirt Collar
I’ve been sewing shirt collars in some of the previous tutorials, see for example this one.
Here’s a very basic shirt collar.

This type of collars consist of a collar and a collar stand piece. You’ll need to cut two layers and interface the top layer. For collar stands, the top layer refers to the one closest to your neck.
How to sew Shirt Collar
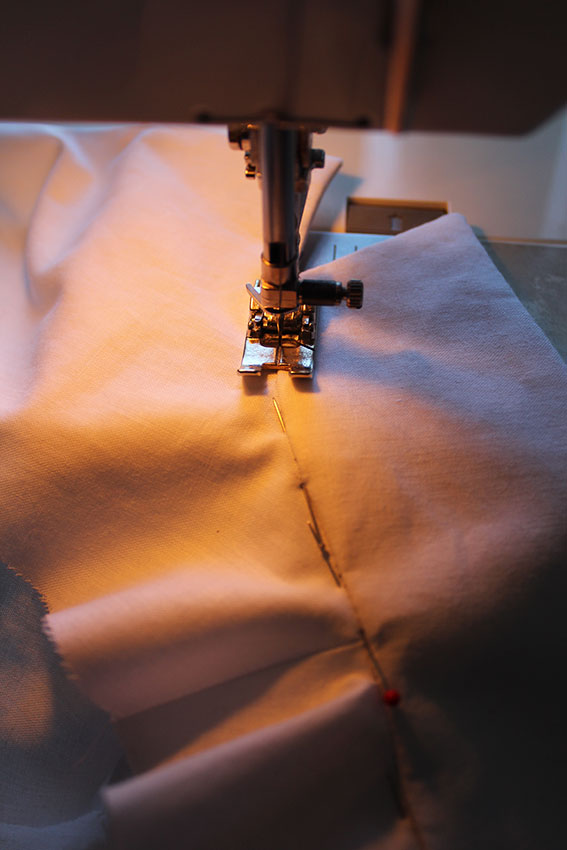
Starting from the collar piece, sew the right sides together along the outer edge. If you look at the other tutorial I mentioned earlier, it shows how to use a piece of thread to turn the corners out more easily.
Trim the corners (and the seam allowance of the interfaced layer in half). Turn the right side out and press.

I usually leave out the top stitching, but if you want your collar to have it, this is the moment. Use a piece of cardboard when stitching around the collar tip to avoid the sewing machine getting stuck at the tip. The cardboard is about as high as the collar, so it balances the sewing machine foot.
Now the collar piece is ready and you can attach it to the collar stand: pin the collar stand pieces on both sides of the collar as shown, placing the interfaced layers on the same side.
The collar should be sewn between the notches marked on the collar stand. Also, match the c-back notches. I matched these three points first, and then added more pins in between. You might also have additional notches to match.

Start sewing 1cm from the neckline and stop 1cm before reaching the neckline at the other end to make it
easier to attach the collar. Trim the collar stand “corners” and turn the right side out. Press.
Check that both sides of the collar are the same size and shape: the collar point length and collar stand shape. Correct if needed, because you’ll want your collar to look symmetrical.
Topstitch below the previous seam to flatten the seam allowance. You can pin the two layers of the collar stand together at the hemline before stitching to hold them in place.

Pin the outer edge of the collar stand (without interfacing) to the shirt neckline, matching the notches, right sides together, and stitch.
Press the seam allowance towards the collar and press the interfaced collar stand layer’s seam allowance inside. Then pin it along the inside of the neckline and stitch near the edge. You may also hand stitch if you prefer.

Shawl Collar
Getting to coat and jacket collars, although nothing says you can’t make a dress with a shawl collar, too.
This type of collar is an extension of the bodice front piece and it needs also a facing piece that is slightly larger. In this example I have a little back facing piece, too, but you might have a lining instead, or nothing at all.

Here’s a different version of the shawl collar that has a separate undercollar piece which allows it to be cut on the bias.
These are the pattern pieces and how much seam allowance I added for this example. As I said earlier, I didn’t have enough interfacing for the facing piece, but you should use it.

How to Sew Shawl Collar
First, close the c-back seams of the two collar layers. Then pin the facing to the bodice front piece, right sides together, continuing around the collar from hemline to hemline. Match the c-back seams.
Stitch. You can trim the seam allowance at the most rounded sections.
Turn the right side out and then press, moving the seam slightly towards the bodice side around the collar (starting from the break point). This is possible because the facing piece is slightly larger. The last picture shows what the bodice side of the shawl collar looks like after pressing.

Sew the shoulder seams and clip the corners of the bodice layer. Then you’ll be able to attach the collar to the back neckline.
Attach the back facing to the front facing shoulder seams in the same way and complete the back neckline. If there’s a lining, attach it to the front facing first and then sew the shoulder seams.

You can also close the side seams.
The last step is to unite the two collar layers along the c-back seam, so press the seam allowances towards the collar and then pin the two layers along the seam. You can either stitch with the sewing machine or by hand. The stitches should remain inside the previous seam so that they won’t show.

If you don’t have back facing or lining, you can simply press the remaining collar’s seam allowance towards the collar and stitch it to the inside of the bodice back neckline.
The Notched Collar
This is the typical jacket collar that consists of a separate collar piece and a lapel that is an extension of the front piece. There’s also a facing. The notch forms in the space between the collar and lapel tips.

Another example of a jacket collar can be found here.
These are the pattern pieces. You should have a separate upper collar piece and undercollar piece. The upper collar is cut on the grain and has no back seam whereas the undercollar is cut on the bias and therefore has a back seam. Both are interfaced. Notice that also the interfacing is cut on the bias for the undercollar.

The facing piece is interfaced, too. Both the lapel facing and the upper collar are slightly larger than the bodice front piece and undercollar.
In this example I also have a back facing, but you would normally have a lining, if you’re making a jacket.
How to Sew Notched Collar
Start by closing the shoulder seams of both the bodice and the facing layer. If you have a lining, attach the front lining piece to the front facing first, and then sew the shoulder seams. When making a coat, I usually postpone the attaching of the lining for as long as possible though, because I find that it gets in the way.
Next, sew the facing to the bodice front piece right sides together. Sew from hemline to where the collar will be attached. Trim the lapel corners and clip at the collar notch before turning the right side out.
Press. The seam should move towards the bodice side of the lapel due to the extra width added to the facing.

Now that the lapel is ready, let’s prepare the collar.
Sew the c-back seam of the undercollar and press the seam open.
Pin the outer edge of the upper and undercollars right sides together and stitch, starting from where the collar will be attached to the lapel.
Trim the corners before turning the right side out. If you feel like the seam allowance will create too much bulk, you can trim one layer in half, as with the shirt collar.
Press. Match the lower edges of the collar pieces while pressing, and the seam will roll towards the undercollar. The last picture shows a close-up of the situation.

At this point you’ve got all the pieces ready to be united. So, pin the undercollar to the bodice
neckline, right sides together, matching the c-back notch and the shoulder notches.
Sew and press the seam allowance towards the collar.
Then sew the upper collar to the facing edge of the neckline. The stitching should start precisely at the same point as the undercollar to create a smooth result. If you find that the fabric bunches up near the collar notch, try sewing from the collar notch towards the shoulders on both sides of the collar.

Trim some excess seam allowance around the notch to remove bulk: see the 3 arrows.

Press the seam allowance towards the collar. The other tutorial I linked to in the beginning of this section shows an example where only half of the seam allowance goes inside the collar to avoid bulk. You can use that method when making lined garments because it will remain hidden inside the lining.
As was the case with the shawl collar, you now need to attach the two collar layers together along the neckline seam by ”stitching in the ditch”. It’s easier to sew this part by hand.
I wanted to add a link to my trench coat tutorial here, too, because it shows a different type of jacket collar.
Now you should be able to sew many different types of collars. Although I only presented 5 examples here, the same instructions can be used for a bunch of other collars, too.
22 Comments
Kiitos kiitos sinulle, tämä tuli tosi tarpeeseen!!
selität kaiken niin selkeästi ja yksityiskohtaisesti, olet paras!
parhain terveisin, Barbro
Eipä kestä! 🙂 Mukava että näistä mun sepostuksista on niin monille hyötyä.
I’m just here to say that I love your blog. Just bought the collar pattern + neckline pattern pack last week. Your blog is giving me the confidence to try out creating my own patterns! Thanks a bunch for doing this 😊
Thank you so much for your wonderful comment! 🙂 I’m always happy to hear that I manage to encourage people to learn how to draft patterns.
Aprecio muito seu trabalho!! A qualidade e relevância do conteúdo são admiráveis!! Parabéns!!
Sou professora de modelagem e costura aqui no Brasil e recomendo seu blog aos meus alunos!
Thank you! 🙂 I’m very pleased that you and your students are finding my tutorials helpful for learning new tricks. Greetings from Italy! 🙂
Great work minna 💯❣❣your blog makes the sewing easier. Thanks
Thanks so much. 🙂 That’s what I’m hoping for.
Really this has been a great help
I am really grateful
Thank you for all spent to achieve this
Excellent! 🙂 So happy that it was a useful tutorial for you.
Does the collar book include instructions for making the traditional removable collars? The ones where the collar stand (if I remember the terminology correctly) is integral to the shirt but has holes for collar studs to attach the appropriate collar (which have matching stud holes) over it. This allowed the portion more prone to dirt or wear to be cleaned, replaced, or restyled easily.
Hello. No, unfortunately there aren’t any that kind of removable collars. It sounds like a useful concept though, so maybe I could do a tutorial here at my blog some time. 🙂
Your blog made it so much easier to understand. Thank you so much.
That’s excellent! 🙂
I’d like to put a shawl collar into a shirt without a seam up the back of the shirt. Do I understand correctly that I can eliminate this visible seam by cutting out the collar facing with the center-back seam on a fold? Or is there a reason I really can’t mess with the grain in this piece of the shirt? Thank you for this amazing resource.
The shawl collar usually has the c-back seam because the facing piece covers the c-front section of the shirt, too. This section should remain on straight grain. The jacket (notched) collars are different, because the collar is a separate piece. However, I’m often breaking the rules myself, so you could cut the shawl collar on the fold and see if that works out. 😀
This blog should really be a chapter of a book! There are those like me who want to learn various components of a garment in order to improve their practical ability and this approach of presenting is new and certainly very practical. Thank you.
Thank you so much! 🙂
Wow i really like your technique. can you make tutorial how to make lapel collar
it’s will be fantastic.😄
Thank you. 🙂 I’ll put it on the list. Might make a video if I can’t find a way to include it into a blog post.
So helpful, I love it and hope for more😊
Thank you! 🙂 I will surely be posting more tutorials.