
Please note that this post includes affiliate links, which means that I may receive a commission, at no extra cost to you, if you click through and make a purchase.
Are you familiar with TAUKO magazine yet? It’s an independent print publication for home sewists that is available worldwide. There’s a digital version as well, and you can just get the patterns, too. They publish four issues per year, each with a specific theme. The magazine includes articles, interviews, and most importantly, sewing patterns.
The latest issue of TAUKO magazine came out last month (January 2025), and the theme is denim. Now you might be wondering where this is going… Well, I had the chance to create a pattern for this issue. Actually, it’s kind of two designs in one, a blouse and a dress with two sleeve options.
This is my second time appearing in TAUKO: I also participated in the very first issue. It’s always about the sleeves! But I’d say the previous design was more like a cute princess dress, and this one is something more structural.
Here’s issue 14:

The Designs
My two designs are called Callisto and Echo. Both can be either a dress or a blouse.

I love working with denim as it’s a perfect material for sculptural shapes. So, I decided that my designs should definitely take advantage of this possibility. That’s where the sleeves came from. Callisto has lantern sleeves. Their rounded shape is why I called this design Callisto, one of Jupiter’s moons.
As for Echo, it has panel sleeves. With midweight denim, you can make these sculptural. With lighter-weight materials, the result will be more like a texture. The name comes from the repeating shapes of the panels.

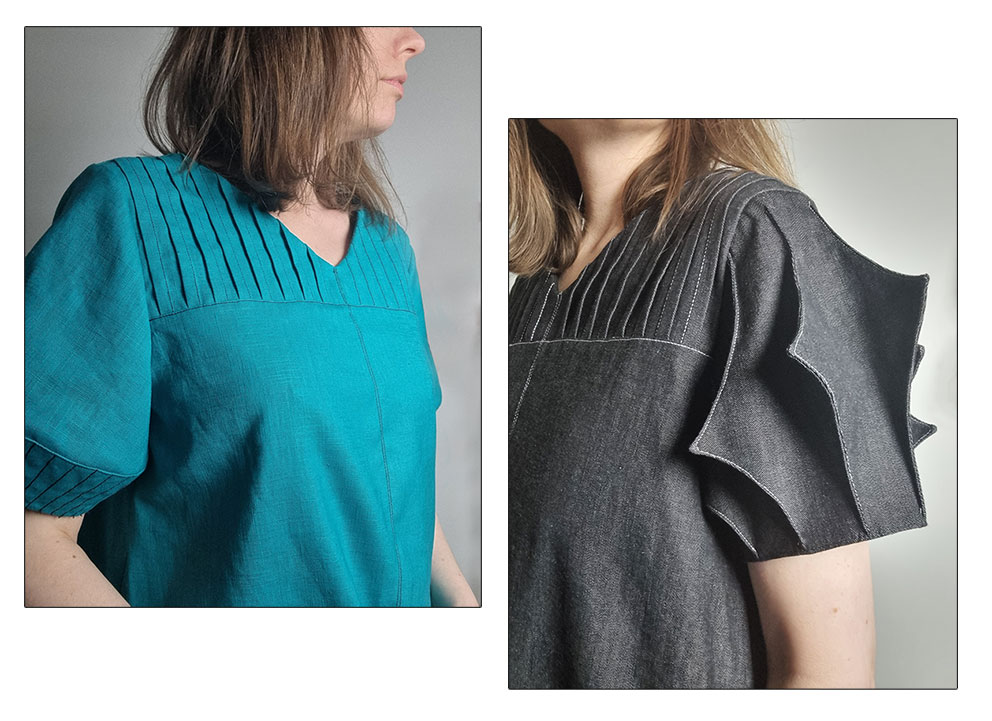
As you can see, both versions also have a yoke with tucks and various top-stitching details.
I’m happy to tell you I’ve already been tagged to quite a few versions of these two patterns on Instagram! There are also pictures on TAUKO’s website. Just go see the Community Makes there.
If you don’t like denim, you can use a different fabric, such as plain cotton or linen. In fact, in this post, I’m showing you a version made in linen.
I created a little sewalong for you. I know it’s sometimes helpful to see actual pictures of the steps.
Sewing a TAUKO Callisto Blouse
So, I got this sort of blue-green midweight linen for my Callisto blouse. Here are the pieces.

There will be a seam at the c-front. The lower section of the lantern sleeve is cut four times so you also get a facing. I interfaced the neckline facing pieces and one layer of the lower lantern sleeve sections to create more structure.
By the way, if you don’t want the blouse to be flared, you can straighten the side seams a bit. Just ensure the hemline flows smoothly between the front and back pieces after the operation.
Adding length is also a piece of cake: continue the side seams down by your desired amount.
The Yoke
Let’s start by preparing the yoke. The tucks are actually quite easy to sew. You just need to carefully mark the placement first on the right side of your fabric. This means either drawing lines with the tailor’s chalk and then pressing, or pressing the folds directly. These should all be parallel to the c-front and placed 4cm (1.6″) apart.
I opted for pressing directly. You can even press the crease with your fingers first to be more precise. With linen, this was easy!

The number of tucks depends on your size. Leave enough space at the armhole side for the seam and tuck allowance. This means at least 3cm (1.18″) after the last fold.
Once you’ve completed pressing both yoke pieces, you can sew the tucks. Each fold represents the outer edge of the tuck, and you sew 1cm (0.4″) away from the fold.
You can use a matching thread or a thread in a contrasting color. A topstitch thread is even better if you have one. Alternatively, use two top threads to increase the volume. That’s what I did.
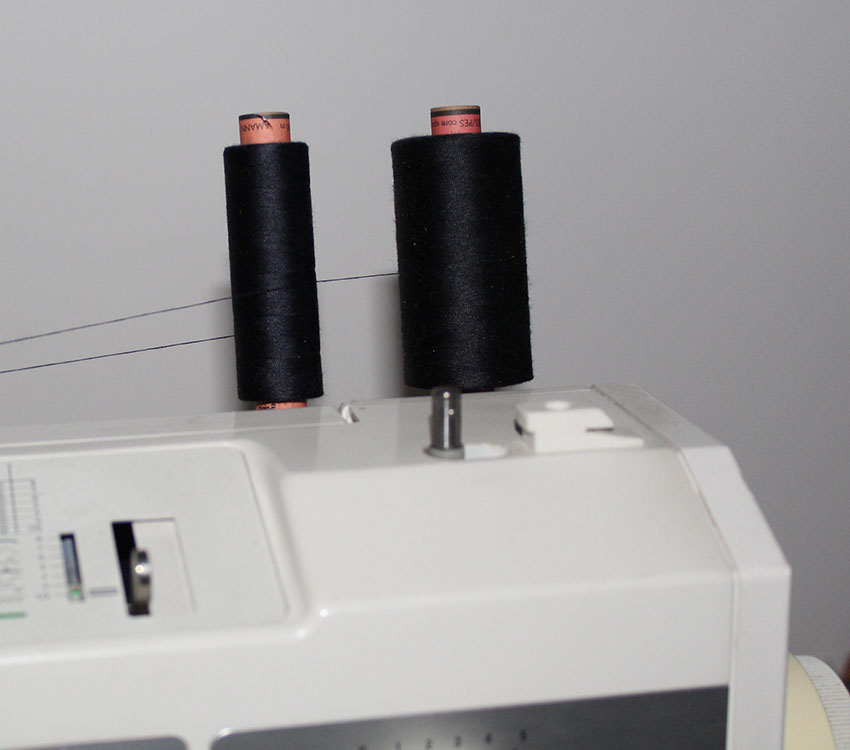
Consider the tucks will be pressed away from the c-front: sew the left side tucks from top to bottom and the right side tucks in the opposite direction. If you’re doing the top-stitching that is.

Then, press the tucks away from the c-front. At this point, the yoke piece is still too large.
The pattern comes with a yoke template piece that we’ll use next to trim off excess fabric. You align it with the c-front and bottom edges and cut off all the sections that remain outside the template at the neckline, the shoulder, and the armhole.
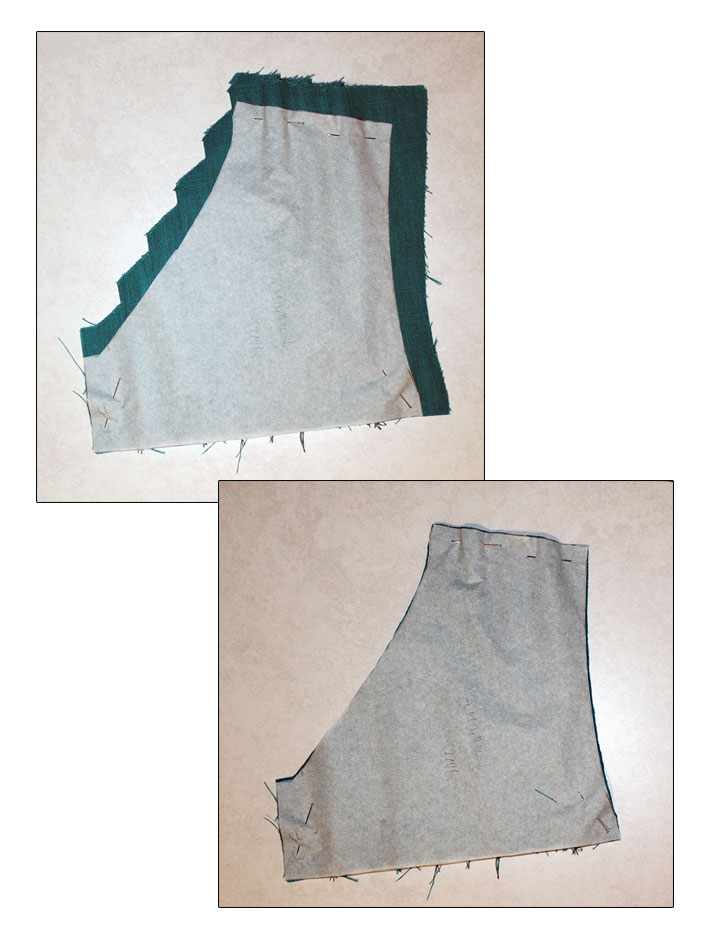
Now the yoke will match the lower section of the front piece. Close the c-front seam and press open. Finish the edges with your preferred method. You might also want to stitch the tucks in place at the neckline and shoulder (see the picture below).
Completing the Bodice
Close the c-front seam of the lower section, too, and press the seam open. I used the serger to finish the edges. Then, you can attach the yoke. Match the c-front seams. Press the seam allowance downward.

To finish the neckline, we’ll use a facing. If you’re using a heavier-weight material, you’ll probably want to leave out the interfacing as the neckline is rather bulky as it is. You know, with the tucks.
We’ll first attach the front and back facing pieces to the front and back bodice necklines. Trim the seam allowance in half and press towards the facing.

And then, sew the shoulder seams, bodice and facing in one go. Press the seam allowance towards the back.
After this, depending on the bulkiness of your fabric, you can either understitch the seam allowance to the neckline facing or top stitch around the neck to flatten it. I finished the free edge of the facing with a serger.
To complete the front piece, you can do top-stitching on both sides of the c-front seam. This will also catch the front facing into the stitches and hold it down. Make another row horizontally just below the yoke seam.
Additionally, you can sew the facing piece at the shoulders, “stitching in the ditch” (see the pin at the shoulder seam in the picture below).

Finally, close the side seams, pressing the seam allowance towards the back, and finish the hem.
The pattern has a 1+2cm (0.4″+0.8″) hem allowance. You can top-stitch this one as well.

This completes the Callisto blouse bodice, and then we can get to the lantern sleeve!
The Callisto Lantern Sleeve
Start by uniting the upper and lower sleeve pieces along the horizontal seam. If you interfaced one layer, this is the layer you will use now. Then, sew the remaining layer of the lower piece to the hemline. Trim the seam allowances in half and press both downward.

Close all the inseams in one go, matching the horizontal seams. Press the seam open to reduce bulk. Finish the edges.

You can also finish the free edge of the facing with the serger unless you want to fold the seam allowance inward instead. I find that the serger-method will be less bulky and easier to sew.
Press the facing to the inside, flattening the hemline. You can make little cuts to the seam allowance if it won’t turn nicely otherwise.
Then, we’ll pin the free edge of the facing in its place along the horizontal seam. The pins go on the right side; we’ll sew this with the right side on top. You can use a top-stitching thread.

But first, there’s an optional step. I prefer doing this before top-stitching the facing (, after pinning it).
Top-Stitching the Sleeve
You can sew vertical rows of top stitching to the lower part of the sleeve. Mine only cover the front half but you can also do the entire circumference.
You can use the lower sleeve’s pattern piece to make a template for marking the placement. In this case, I traced half of the pattern and removed the seam allowance, which is 1cm (0.4″) on each side.
Then, add guide marks 1cm (0.4″) apart, for example, along the hemline. Don’t worry if the last section near the inseam remains slightly wider. Draw a line from the last guide mark to the top edge, parallel to the inseam.
Count how many sections you got, skipping the one closest to the inseam, and measure the top edge. Divide it by the number of sections to discover the distance of the guide marks that go along the top edge.
Unite the points and your template is ready.
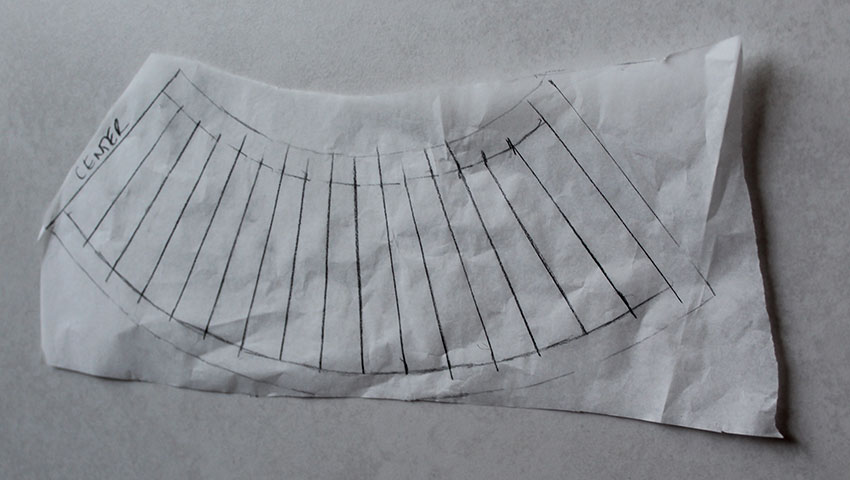
Pin the template to your sleeve and mark the guidelines with your preferred method. I used a more spartan method and marked the endpoints with pins, then drew lines with a tailor’s chalk to unite the points.
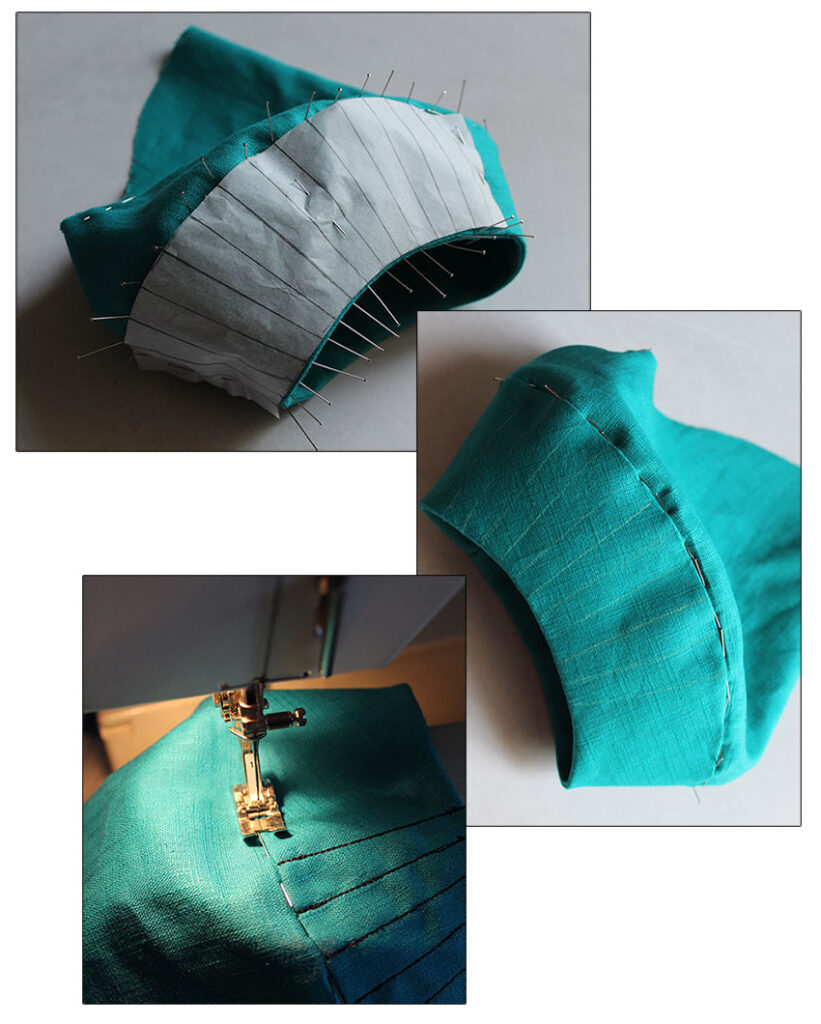
I had a double top thread but also stitched two rows at each line to make them thicker. Stitch from the hemline up so the facing won’t shift.
Complete the sleeve by stitching just below the horizontal seam.
Then, sew two rows of gathering stitches to the sleeve cap between the armhole notches. These will help you set in the sleeve.

Completing the Callisto Blouse
As both the bodice and sleeve are ready, all that’s left to do is attach the sleeves.
Turn the bodice wrong side out and place the correct sleeve into the armhole. Match the central notch of the sleeve with the shoulder seam. Then, match the front and back armhole notches.
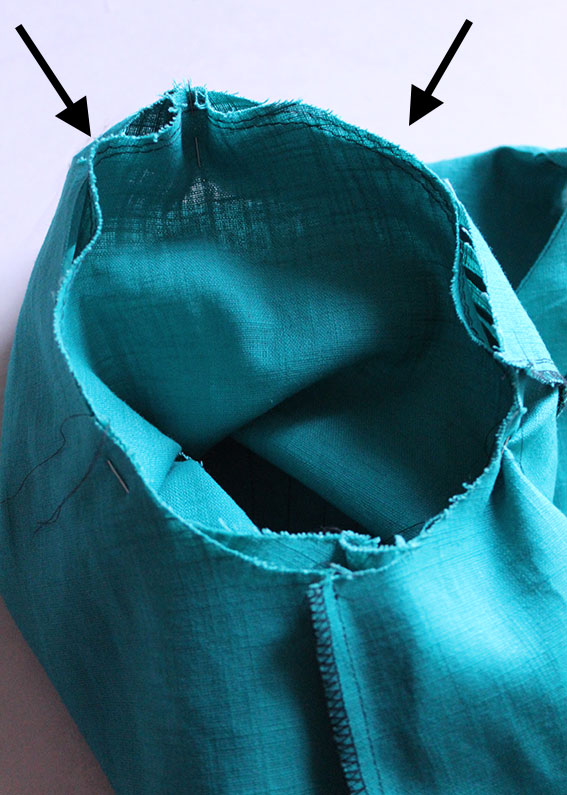
Gather the sleeve cap to match the armhole (see the arrows), distributing the little gathers evenly, and add more pins. Match the sleeve’s inseam with the bodice side seam.
Sew the sleeves in place, finish the edges, and press the seam allowance towards the bodice.
TAUKO Callisto Blouse: The Final Look
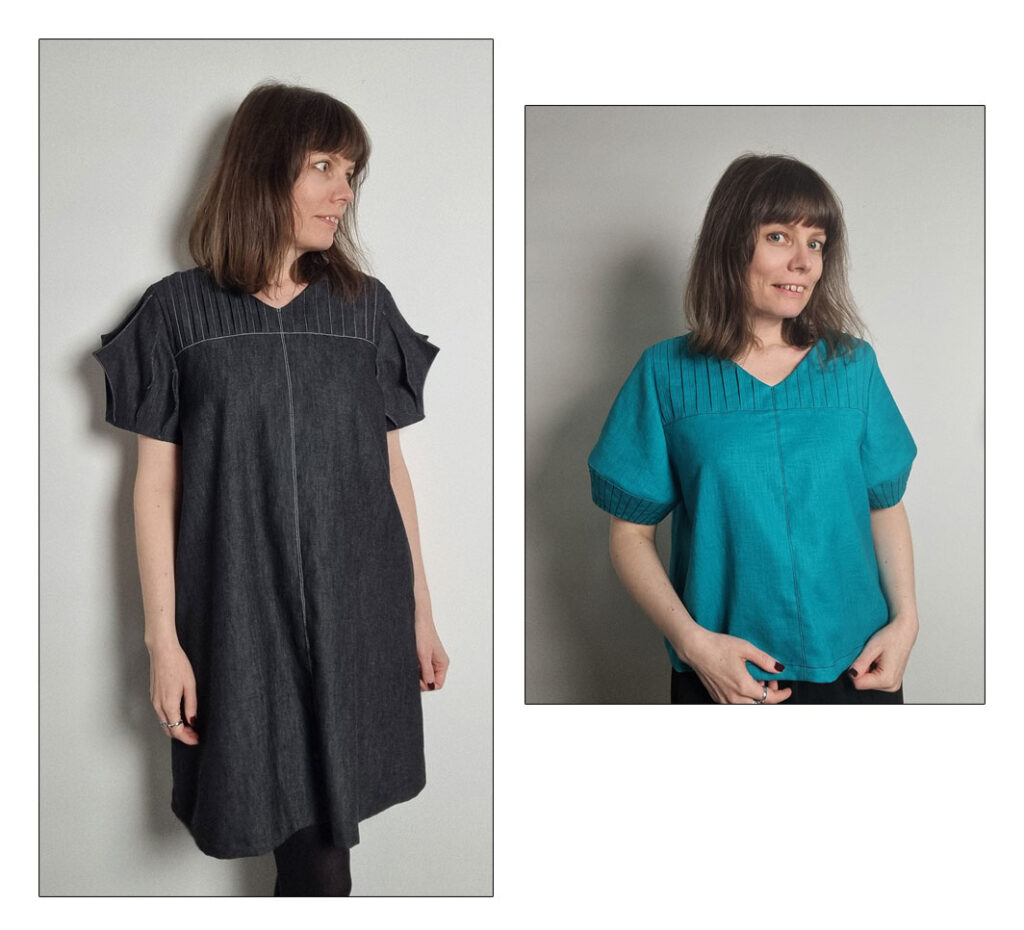
I took a few pics of my Callisto Blouse. You already saw the denim dress version, but here’s the linen blouse. I think with linen it’s best to add the interfacing to the sleeve so it maintains the structure. The topstitching will also help.
The neckline wasn’t too bulky compared to my denim version.

I’ll add a few more pics later in the article.
TAUKO Echo Dress
Well, Echo was obviously going to be a dress then. I used a lightweight dark denim. This was almost dark grey, so I did the topstitching using a white thread.
The first part is the same as the blouse, the dress is just longer. It also has pockets, which I’ll show you.
Here’s a yoke detail pic I took while pressing the neckline.
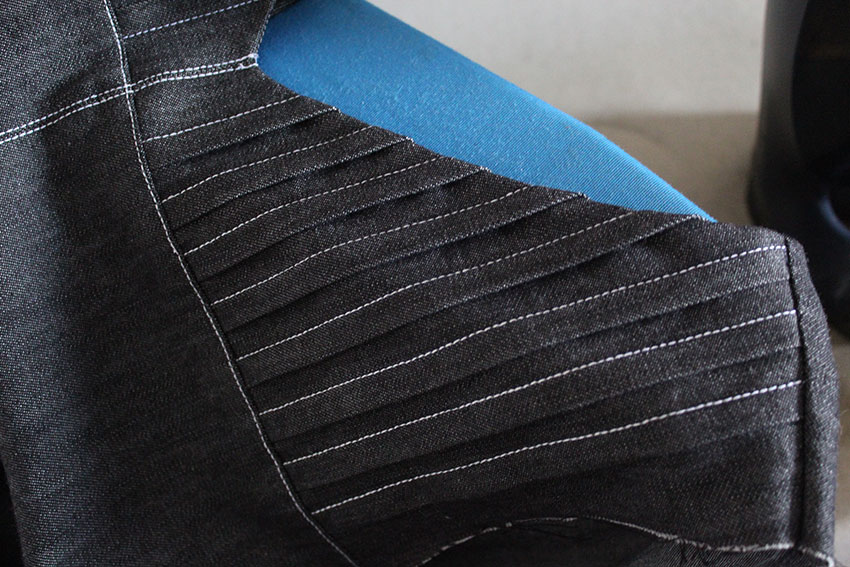
At this point I had completed the front piece and united it to the back piece at the shoulders. The side seams were still open. This is where the pockets make their appearance.

We have side seam pockets, which means two pocket bag pieces per side. There’s a notch along the side seam of the dress that goes with a corresponding notch in the pocket piece.
Attaching the Pockets
Take one pocket bag piece and pin it right sides together to the side seam of the dress, matching the notches.
Measure 1cm (0.4″) from the top and bottom of the pocket opening and 1cm (0.4″) from the edge of the opening. Mark these points and then unite them by drawing a line with tailor’s chalk.
Create a rectangle by drawing a line from the initial dots at a 90-degree angle to the outer edge of the seam allowance. This will make more sense if you look at the pics below.
Sew along the line and cut the corners to easily turn the right sides out. Press flat and understitch the seam allowance to the pocket piece.

Pin and sew the other pocket bag piece to the first one along the rounded edge. This pocket bag will replace the missing section of the side seam. Secure the pocket bag by making a few stitches at both ends of the pocket opening (see the arrows). Then, you can close the side seam.

After completing the pockets and side seams, finish the hem as before.
Sewing the TAUKO Echo Panel Sleeves
These sleeves have 8 pieces each and a plain lining piece. You can also create a facing to finish the hem if you don’t want a lining. I’ll show you how. This just means you’ll need to finish the seams with a zig-zag stitch, as they will remain visible.

Arrange the panel pieces in order and pin them right sides together along the spiked seams. Mark the front side with a pin so you won’t mix up the sleeves.
Sew the seams you pinned and trim half of the seam allowance, plus some extra around the points.

Turn the right sides out and press each seam flat. Then, you can topstitch to enhance the panel seams. However, in this case, just use a normal thread, as both sides will be visible.
It will be a bit difficult to turn at the pointed tips, so use a piece of cardboard or similar to balance the presser foot.

At this point, you can sew the two rows of gathering stitches between the armhole notches. Open the seam allowances as you go.
Take the lining piece. Pin it right sides together to the hem and sew. I used a regular lining fabric but you could also opt for a lightweight cotton or satin. Keeping the panel seams open will reduce the amount of bulk.
Trim the seam allowance in half and press towards the lining.

Then, close the inseam, both layers in one go.
Sew two rows of gathering stitches between the armhole notches of the lining piece.
Pull the lining to the inside and press the hemline flat. Then, top-stitch the hem to keep it flat.

If you prefer finishing the hemline with a facing, you can trace the piece from the lining pattern’s hem at your desired height. For example, 4cm (1.6″). Remember there’s a 1cm (0.4″) seam allowance at the hem.

You attach the hemline facing similar to the lining. Finish the free edge with a serger and attach with a few hand stitches to the inside of the sleeve after closing the inseam and flattening the hem.
This completes our Echo Sleeve and it can now be attached to the armhole.
Attaching the Echo Sleeves
The procedure is the same as with the Callisto sleeves. It’s just that now we have the lining layer to consider as well.
Turn the dress wrong side out and pin the main layer of the sleeve into the armhole, matching the armhole notches and the central notch with the shoulder seam.
Gather the sleeve cap to match the armhole and tie knots to your gathering threads.

Take the sleeve out and pin the lining layer’s sleeve cap to the main layer’s sleeve cap, matching the notches. Gather the lining until it’s the same size as the main layer piece.
Add pins and sew the two layers together around the sleeve cap. From now on, you’ll treat them as one layer.
Then, pin the sleeve back into the dress armhole right sides together, matching the notches and seams.
Sew and finish the edges with your preferred method. Press the seam allowance towards the bodice.
So the Echo dress is done! Here are a few pics.

And detail pics. Here you can see the sleeve panels creating a texture rather than a sculptural shape.

Callisto and Echo Recap
So, these are my two patterns from TAUKO magazine issue 14, Callisto and Echo, that both can be either a dress or a blouse. While denim is the theme of the issue, you can also choose different materials. Just maybe don’t go with very lightweight fabrics as these are structural designs.
If you find both sleeves too intimidating, I’ve also seen a few versions done using the plain lining pattern for the sleeves.
Let’s finish this article with a couple more pictures showing the two designs side by side.
Closeups.
I’m looking forward to seeing your version!
Here’s a link to the pattern if you don’t want to get the entire magazine. But do check out the other designs as well!


8 Comments
Superbe
Thank you! 🙂
Wow! You’re too good to copy. And always so generous to post for us. Someday I will try.
Thanks so much! 🙂 This was an exciting project.
Wow!!! This is just so amazing. Callisto I will definitely try but Echo …… sleeves look a bit difficult. How did you draft it?
Thanks so much! 🙂 The Echo sleeves are panel sleeves. I think I included something in the Inspired by Geometrics -series I posted here on my blog. Maybe the one on triangles.
Hi! I absolutely adore the Callisto pattern thank you so much for designing it, it’s actually got me back into sewing again and I’m enjoying it much more now there are so many cool indie designers breaking through! Can I just check with you regarding the Callisto pattern as printed in Tauko denim magazine, does the design have the hem slightly longer at the front and shorter at the back? I’m having an issue in that my sleeves dont fit the armholes (lantern sleeve) so i will need to gather the shoulder of the bodice to get it to fit. I keep double checking that ive traced off the correct lines and cant seem to find where i went wrong. Do you have any ideas as I would really like to make a couple more versions of this dress and want to get it right next time!! Thanks so much, Anna
Hi Anna! 🙂 I’m glad to hear you adore my pattern design. The front hemline is usually slightly longer to compensate the bust that raises the front hemline. As for the sleeve, the bodice armhole shouldn’t be larger than the sleeve cap. Is it possible the armhole has stretched after cutting?