

After having introduced the Gelato Blouse & Dress -pattern by Liesl & co, now it’s time for some pattern hacks!
As mentioned last time, this is one of March patterns at the Sew My Style 2020 -challenge. In case you didn’t see the previous blog post, here’s how the blouse and dress originally look like.

So the starting point is a ruffled peplum blouse and an A-line dress. Now I’m going to illustrate various ways how to modify the look. And finally, the modified versions I made myself.
Switching Elements
This is the most obvious, and easiest, way to change the look. You can utilize the pattern pieces you already have, either as such, or slightly modified. For example like this:

Starting from the top row, you could use the blouse-sleeve without the ruffle for the dress. It’s a bit longer than the dress-sleeve.
And if you want, you can add the hemline ruffle to the dress, too. In this case you might want to shorten the length of the dress first, and make the front ruffle piece a bit longer, because the hemline of the dress is wider than that of the blouse.
The back ruffle already has some extra length because of the button placket.
I left out the pockets as they seemed too much with the ruffle.
The second picture shows the blouse without the hemline ruffle. Just lengthen the bodice pieces, unless you want a really short blouse!
Then there’s the blouse with the dress-sleeves and the dress with the blouse sleeves (ruffles included).
Other simple thing you can do, is to leave out the back button placket and back seam. The neckline is large enough.
Pattern Hacks
And then there are the actual pattern hacks. I have divided them into different categories. Many of them can be used both for the blouse and the dress.
Necklines
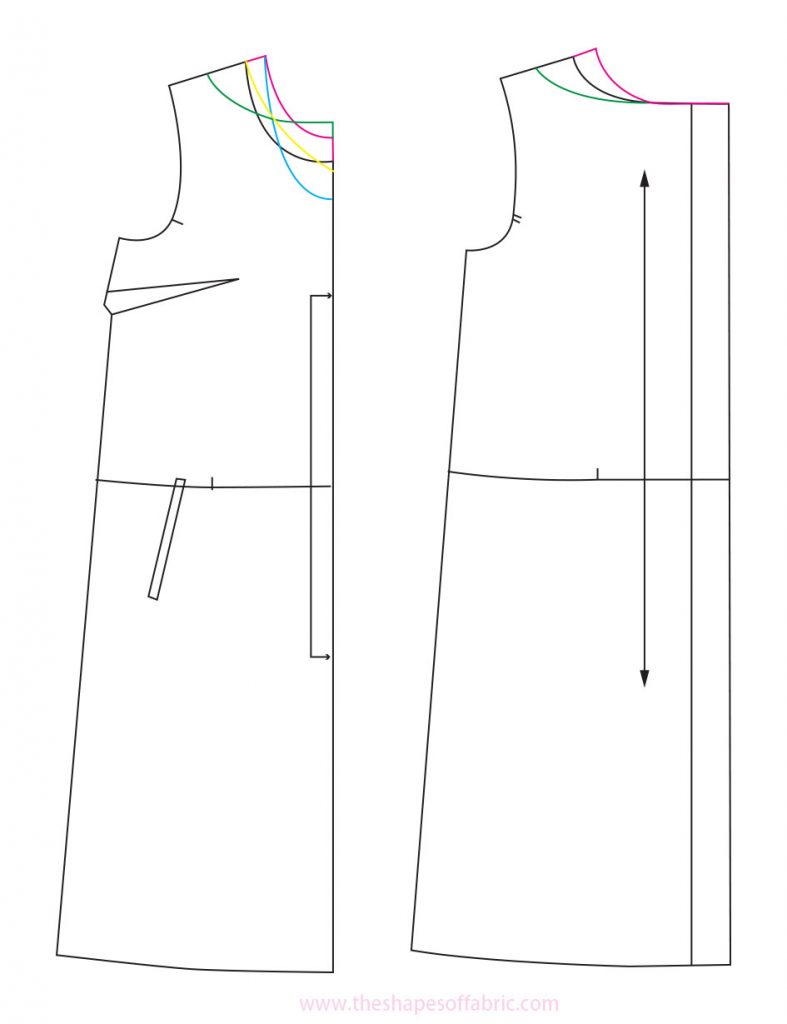
There are various types of necklines, but here I show you 4 ideas: round neck, U-neck, V-neck and boat neck.

For the round- and U-neck you need to make the neckline smaller, so the changes need to be made both to the front- and back piece.
The V-neck is as wide as the original, but I changed the shape at the front.
And finally, the boat neck is wider. And higher at the c.front.
Especially with the round neck, you probably will need an opening, such as the button placket.
Button Placket
Speaking of which, who says the button placket has to be in the back?

Shown here is the dress with a button placket in the front. On the right, you can see how to modify the pattern to have a 3cm/1.2in wide button placket.
The black line is the c.front and the colored section is the final button placket. It will be folded twice.
Sleeve Pattern Hacks
I have various sleeve-tutorials at my blog, but I picked just a couple of examples I thought would work with the Gelato.
Obviously, there’s my favorite, the bishop sleeve. I’ll show that later, because it’s part of my final Gelato dress.
But then there’s also the butterfly sleeve and the pouf sleeve. For both of them, I used the dress-sleeve, because it’s shorter. But feel free to change the length. Here are the illustrations, starting from the butterfly sleeve.

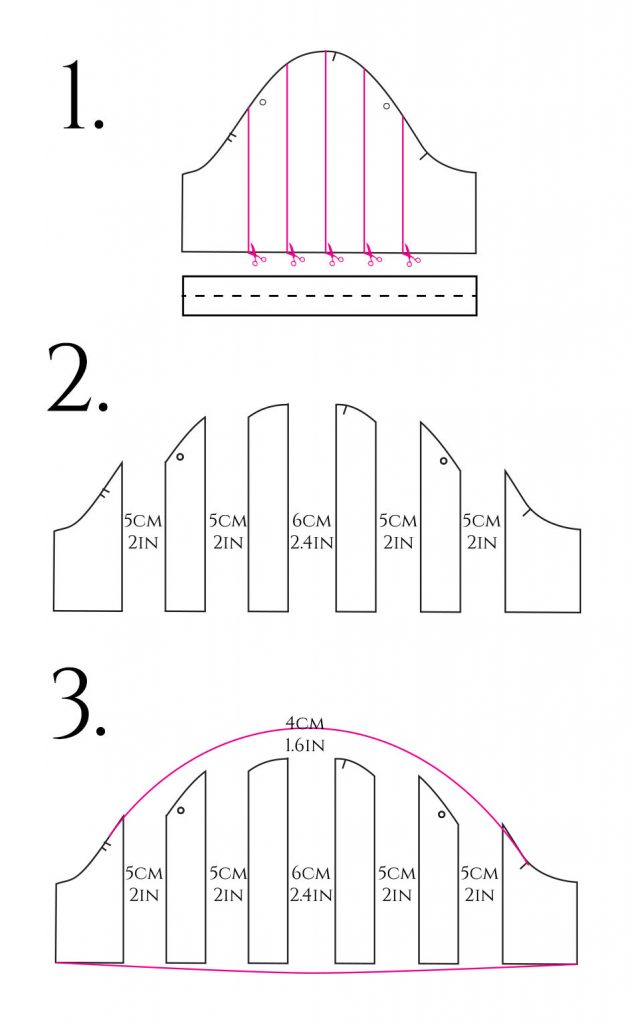
The pouf sleeve will also need a cuff. Measure your arm to define the length. The width is twice the desired cuff height, as it will be folded in half.
You can change the measurements for the volume you add. You could make a sleeve-toile to see if you want the sleeve to be bigger or smaller. And then modify the pattern accordingly.
There’s also an option to not have sleeves at all. Either leave the shoulder slope as it is, or make a tiny cap sleeve:
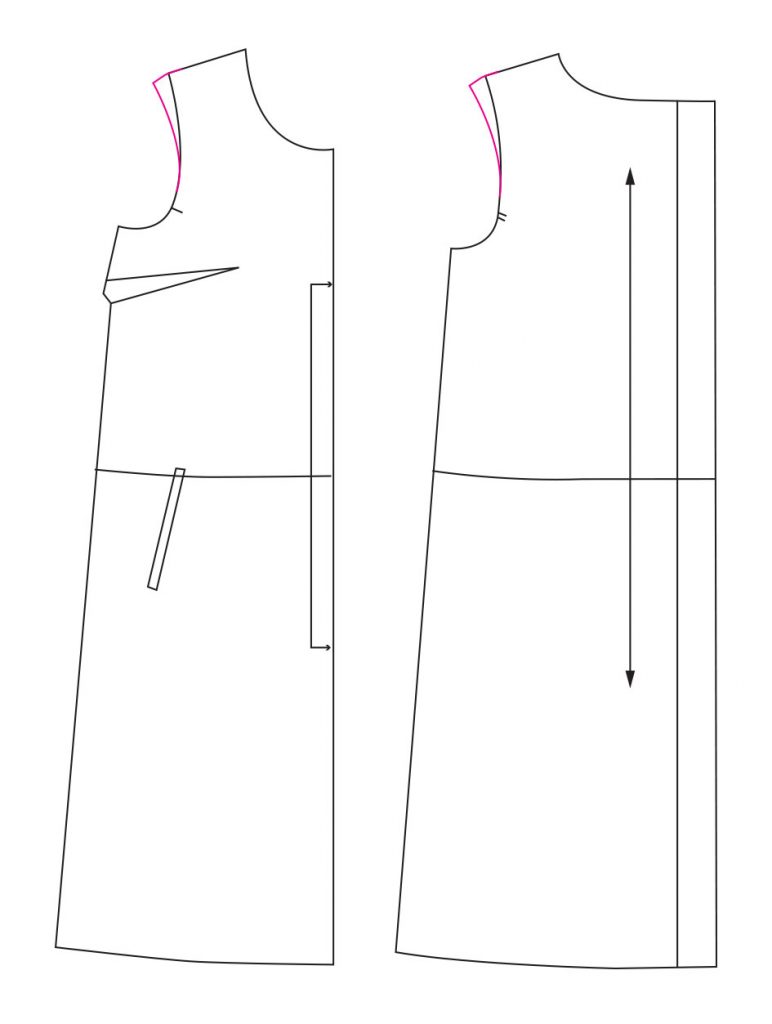
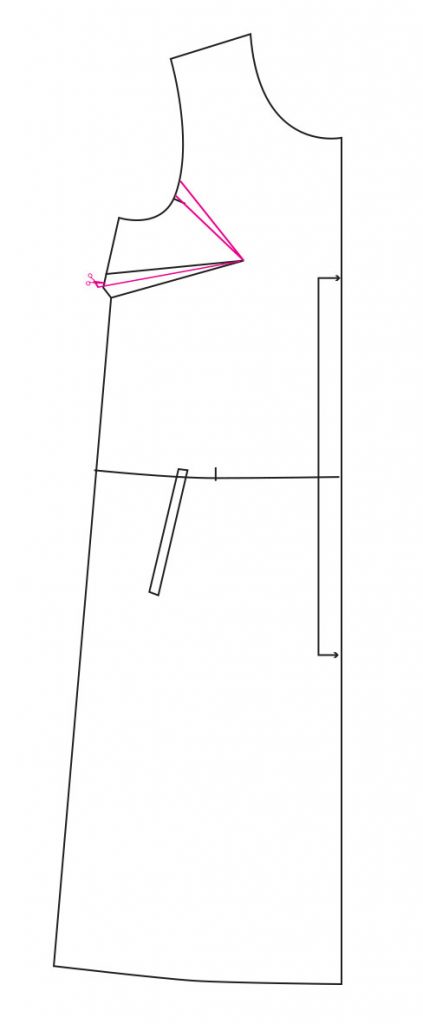
But in this case you might want to diminish the amount of ease at the underarm line, because otherwise it will be gaping. And you will probably find gaping in general around the front armscye. That can be corrected by adding a little dart in your toile, which you will then unite to the existing bust dart when correcting the pattern.
The Ruffles
From sleeves, we get to the ruffles! There are many different ways to change the look. Some are more simple pattern hacks, some require a bit more effort.
Starting from the more simple hacks, you can change the height of the ruffle piece. Here you can see an example where the shorter dress-sleeve is being used with a really wide ruffle. I think this would look great in light weight, flowy fabric.
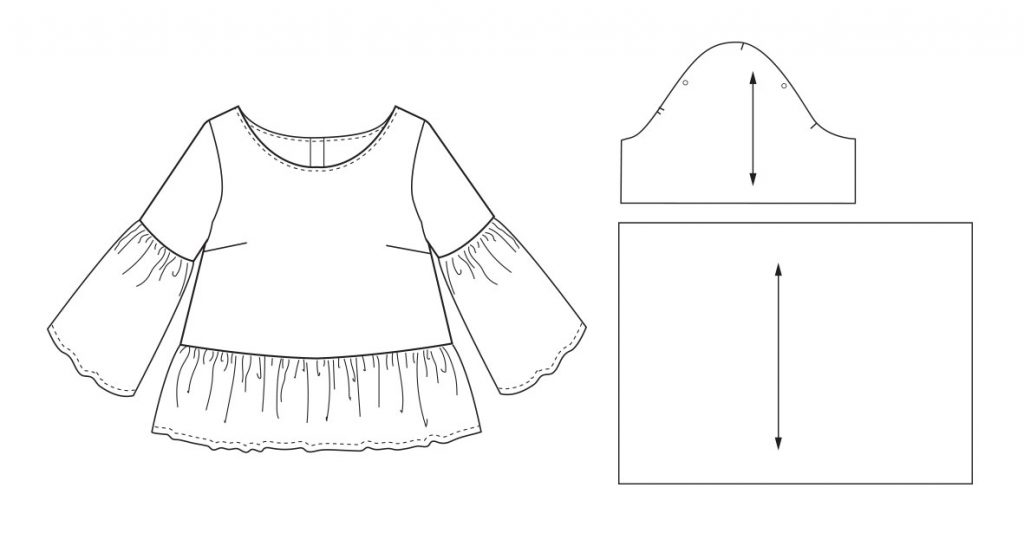
Another idea would be to make double ruffle, the other one being longer.

Other than these, the ruffles can also be converted into flounces. I’ll show you how to convert the existing ruffle here, and later, how to create one from scratch. This is the actual pattern.
First measure how much longer the ruffle piece is, compared to the sleeve hemline. Then divide it into equal sections. For example I divided it into 7 sections, which means 6 lines that will then be slashed open from the top towards the hemline.
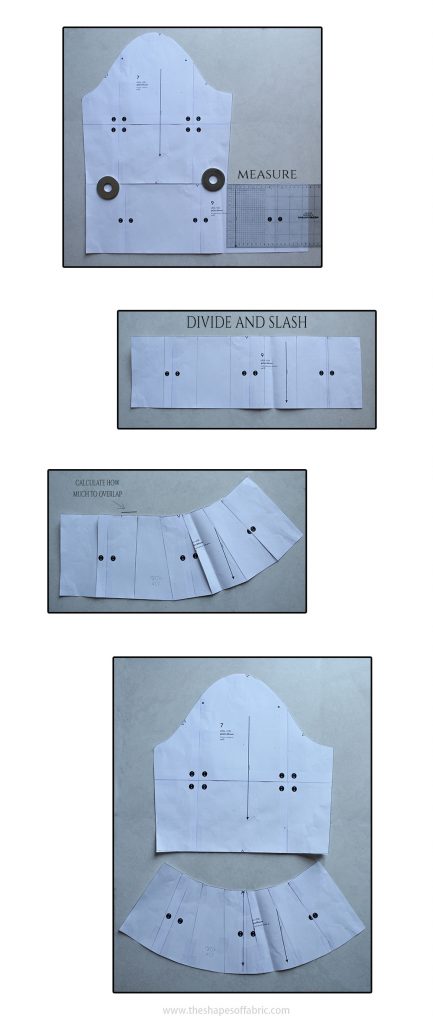
Remember the measurement you got? Divide that by the number of slashes so you know how much to overlap the sections.
After overlapping all the sections, you should have this curved shape with the correct measurement at the top (that will match the sleeve). The grainline will me in the middle.
Instead of a normal ruffle, you could also have a pleated ruffle. If you don’t mind a high-maintenance blouse that is! It’s easier to create one from scratch like this:
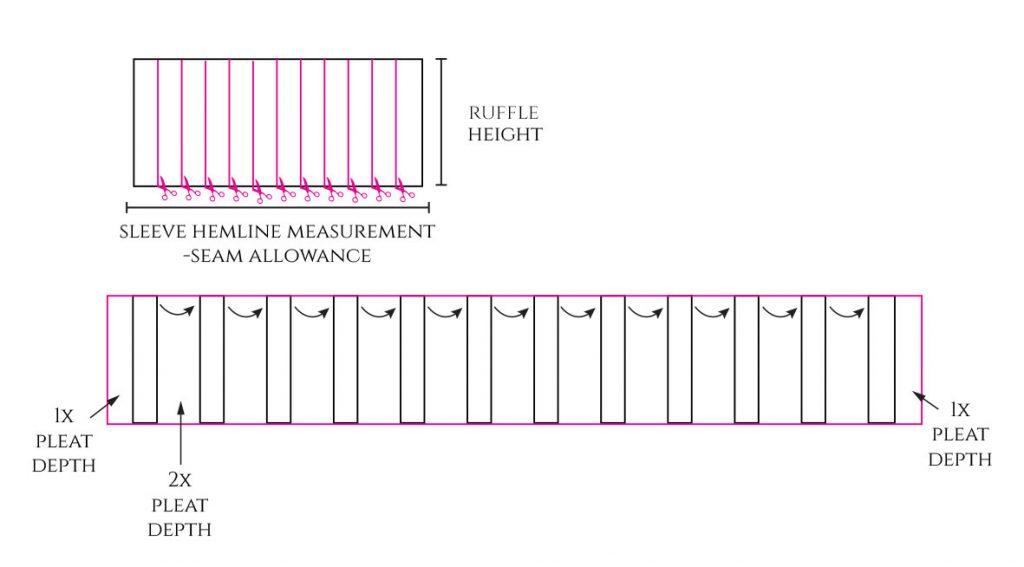
To make things easier, don’t calculate the seam allowance to the short ends. Add it in the end. The pleats can be either knife-pleats or box pleats. The ruffle starts and ends with a “1/2 pleat”. This way the seam will remain inside the pleat.
Notice, that the pleat depth should not be greater than the distance between the pleats. Otherwise it’ll create bulk.
The Pocket
Like I said last time, the original pocket can be quite tricky to sew. So I promised to show you some alternatives.
The easiest is the side seam pocket. You can actually use the existing pocket bag pattern piece. Just add notches to the side seam of the front- and back piece of the dress.

In a bit, I’ll show you how to do a single welt pocket. But in the mean time, if you’re curious about welt pockets, check out this tutorial. You’ll be able to adapt quite a few of them here.
Adding Flare
If you think the dress should have more flare, here’s how you can hack the pattern to achieve just that.
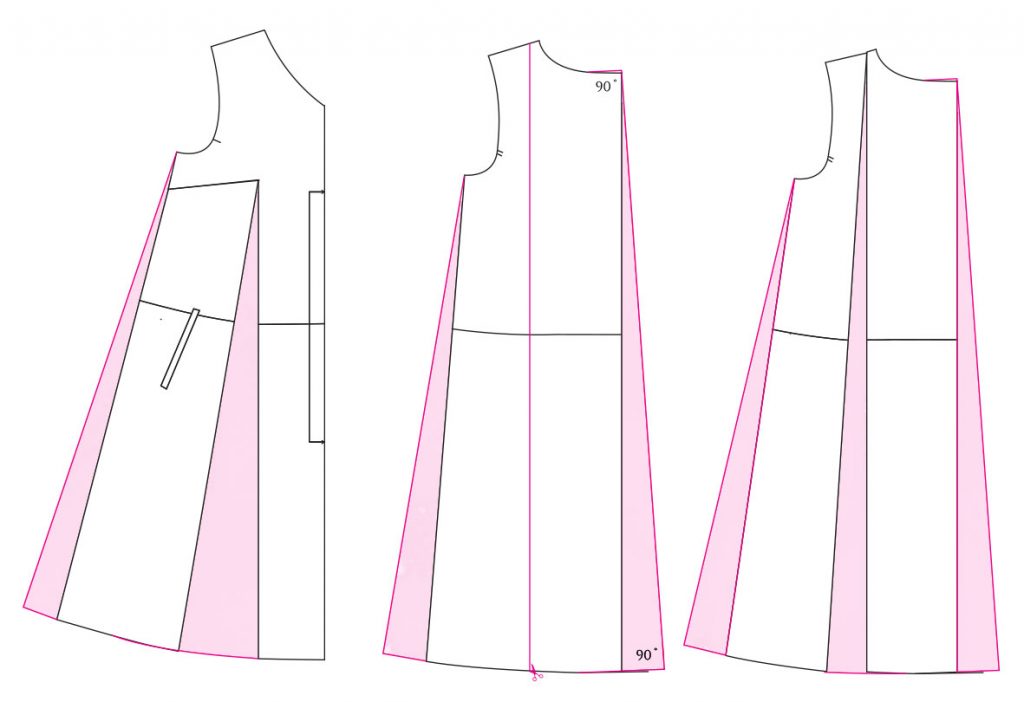
In the front, you can convert the bust dart into flare, but you can also add some to the side seam, both front and back. Then there’s also the centre back, and you can use the slash and spread -method for even more flare.
Gelato Blouse Version 2
So what did I do then? Well, my second Gelato Blouse doesn’t have the hemline ruffle. In the back, instead of the button placket, there’s a slit and a button. The sleeve ruffles turned into high-low flounces.
The fabric is linen and I really surprised myself with the color choice. Orange-red!
Gelato Blouse Pattern Hacks
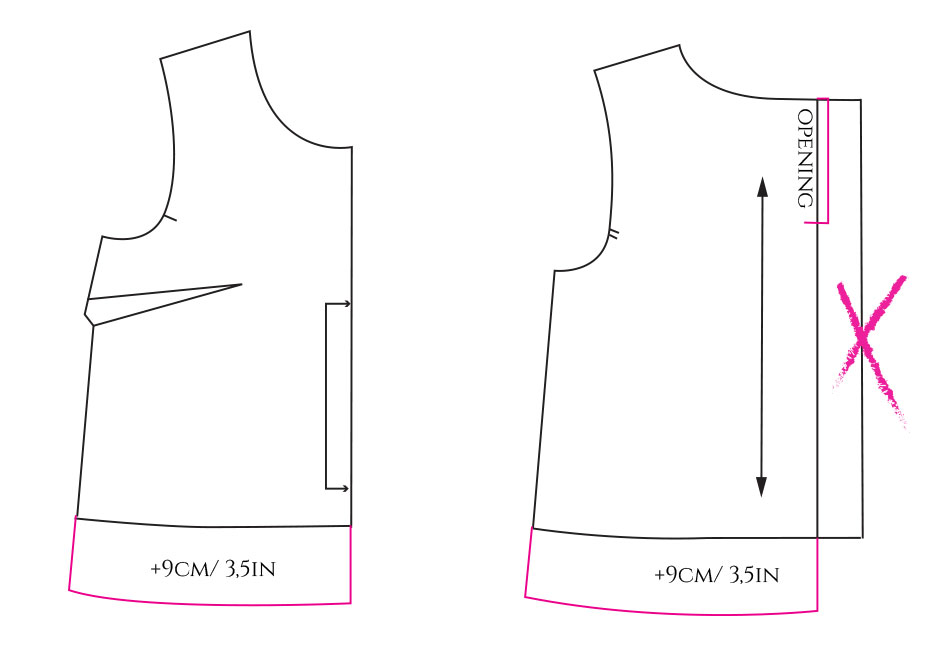
Here’s how I modified the blouse bodice pieces. As there was not going to be a ruffle, I lengthened the blouse by 9cm/3.5in.
Also, I eliminated the button placket so that there was just a back seam and a slit opening. I added some extra width to the slit because I wanted to be able to fold it twice.
What about the sleeve then? I was going to have a high-low flounce instead of the ruffle. First I shortened the sleeve by a couple of cm.
To create the flounce, I drew a rectangle that had an identical width to the sleeve hemline and the maximum height of the flounce. Then I divided it into 6 equal parts and slashed the lines open from the hemline upwards.

Here you can see how much volume I added. To get a more flared flounce, add more. Because the flounce was going to be shorter in the middle, I added more volume there.
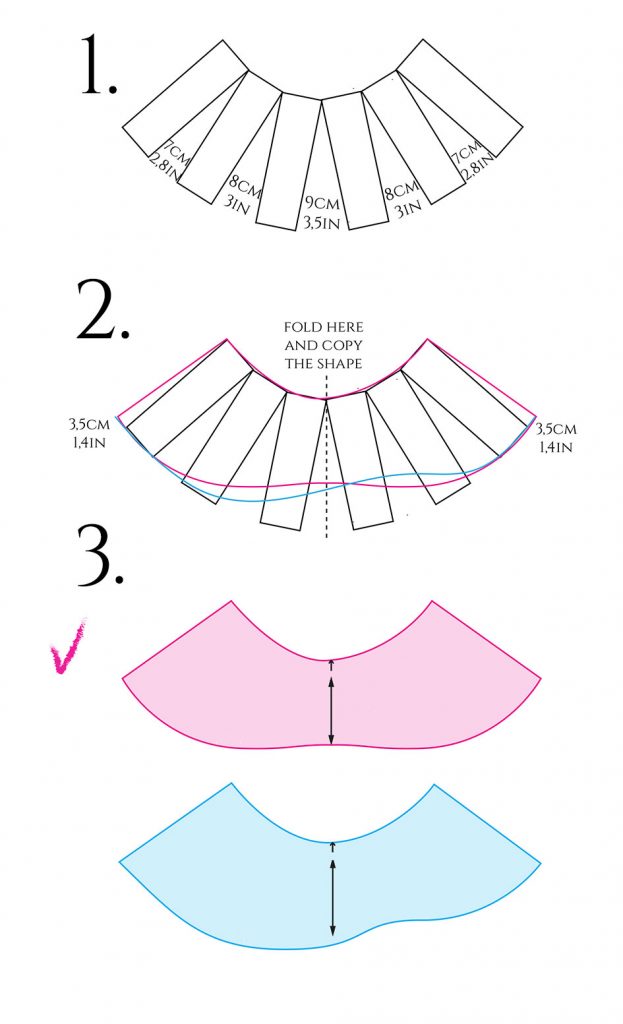
Then you can draw the flounce shape. Here you see two alternatives. If you make a centered flounce, you can just draw one side, fold and copy an identical line to the other side. That’s what I did.
The other alternative is to move the shortest part of the flounce more towards the front (=the direction your arm turns more frequently).
Don’t draw too aggressive curves, because it will be more difficult to hem.
Sewing the Blouse
Just a few notes on the sewing process.
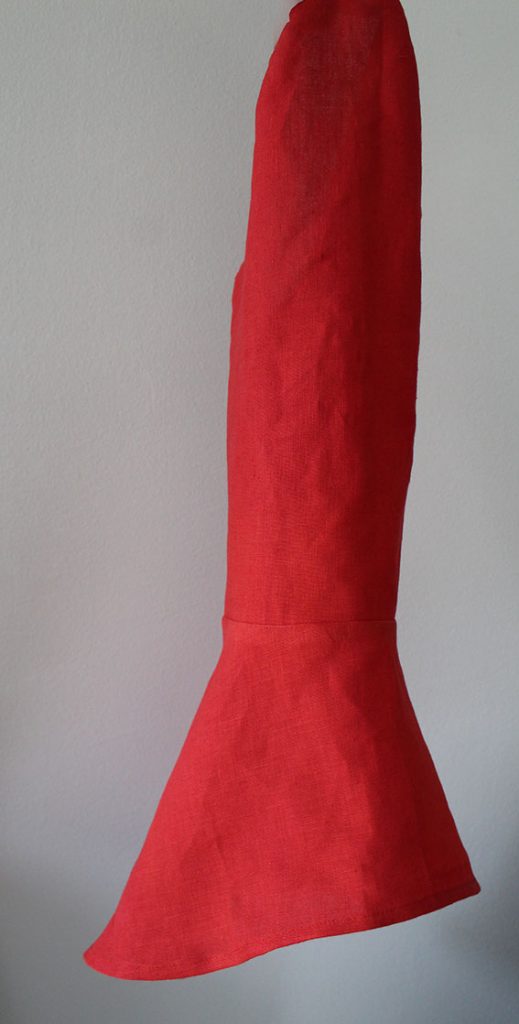
The flounce has french seams, because the inside is quite visible. I finished the sleeve and the flounce separately before uniting them. There’s a narrow hem, because that was the easiest solution.
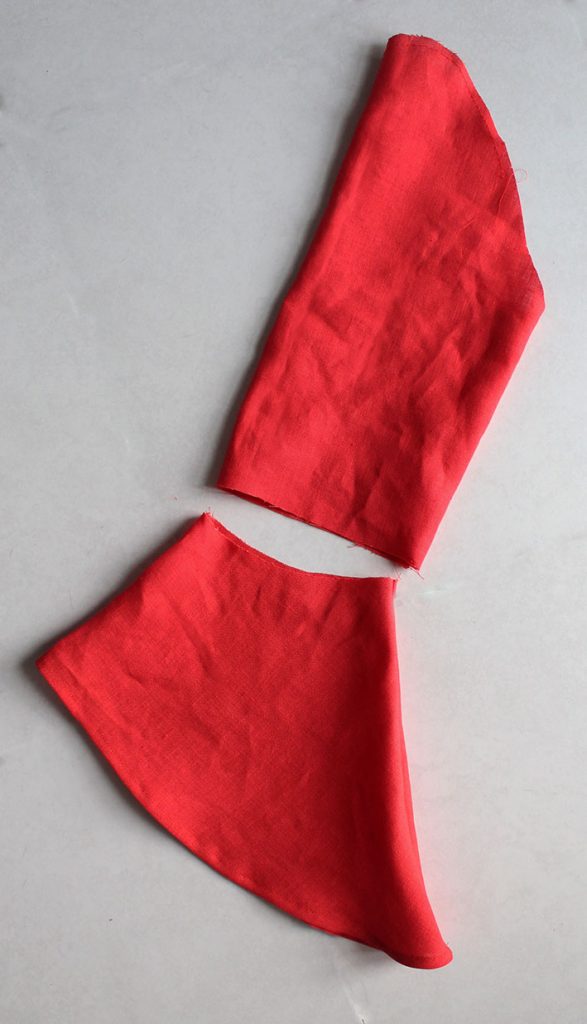
Yes, linen wrinkles easily..
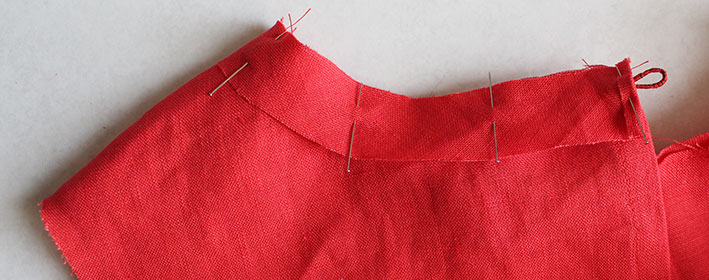
I followed the original instructions for the neckline binding. Here you can see how I first finished the slit, attached the button loop and then sewed the bias strip on top to hide it.
The final result:
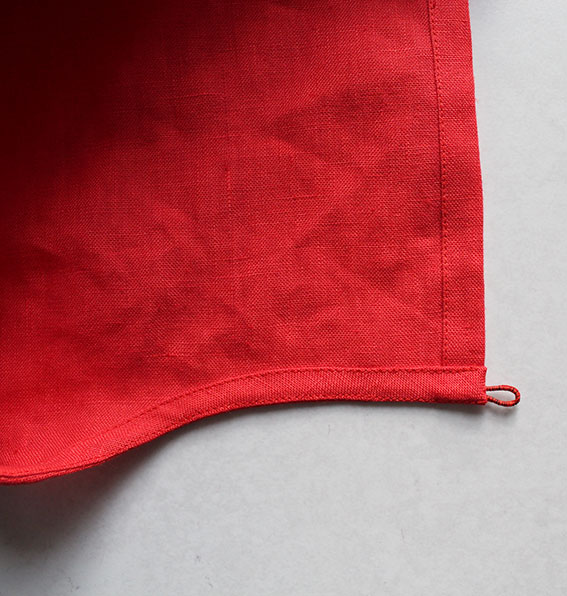
I hand-stitched the short end of the bias strip to finish it nicely.
Gelato Blouse Pictures
Me wearing the new hacked Gelato blouse.
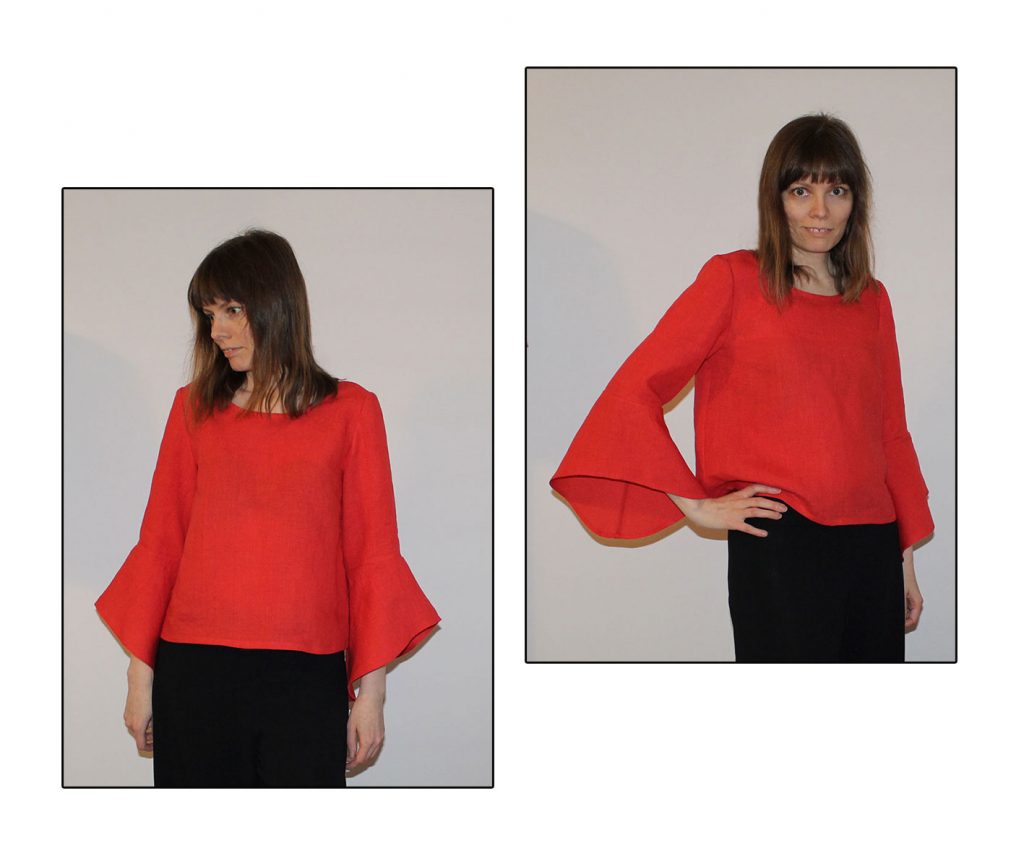
Back detail. I’m glad I found a little red button in my stash!

Gelato Dress Version 2
The blouse didn’t have so many pattern hacks, but the dress does! I changed almost everything: the neckline, the sleeves, the pocket, the back and the amount of flare.
I had this checkered fabric in my stash, but it ended up kind up ruined when I washed it. Part of the stripes shrank and I was unable to adjust them afterwards with the iron. So the fabric – and my dress – now have this wavy look. I decided to pretend that was my intention! 😀
Gelato Dress Pattern Hacks
Let’s start from the bodice again. This is kind of what I already showed earlier, but I didn’t add as much flare.
I started by converting the bust dart into flare and adding a little bit extra to the front side seam as well. Then I measured how much I had added in total, to add the same amount to the back piece.
Notice also the new neckline. There’s no back seam.

The sleeve then was to become a short bishop sleeve. As a starting point I used the blouse sleeve and added 4cm/1.8in so that the final length would be somewhere under the elbow line.

I drew 3 lines around the centre of the sleeve which I then slashed open and added some volume. Finally I adjusted the hemline.
You’ll also need a sleeve cuff. Don’t make it too small, because it will be uncomfortable. Leave a good amount of ease. For example mine is large enough to pass through the bent elbow. The pattern is just a rectangle as before with the pouf sleeve.
The Welt Pocket
So after my previous adventure with the original pocket, I decided that this time there was going to be a single welt pocket!
You might be happy with the pocket placement as it is. Choose your welt height and draw a rectangle as in the picture. That’s your welt pattern.
To make the pocket bag pattern, you can again use the original pocket bag pattern as a starting point. Just make it smaller.
First draw the small pocket bag, and then add 1,5cm/0.6in to get the large pocket bag. Add 0,7cm/0.3in of seam allowance to both (as seen in pink in the picture).

Sewing the Dress
Again, just a couple of things about the sewing process.
I started by putting together the sleeves. Before closing the seam, I gathered the hemline and attached the cuff. The cuff was interfaced of course.
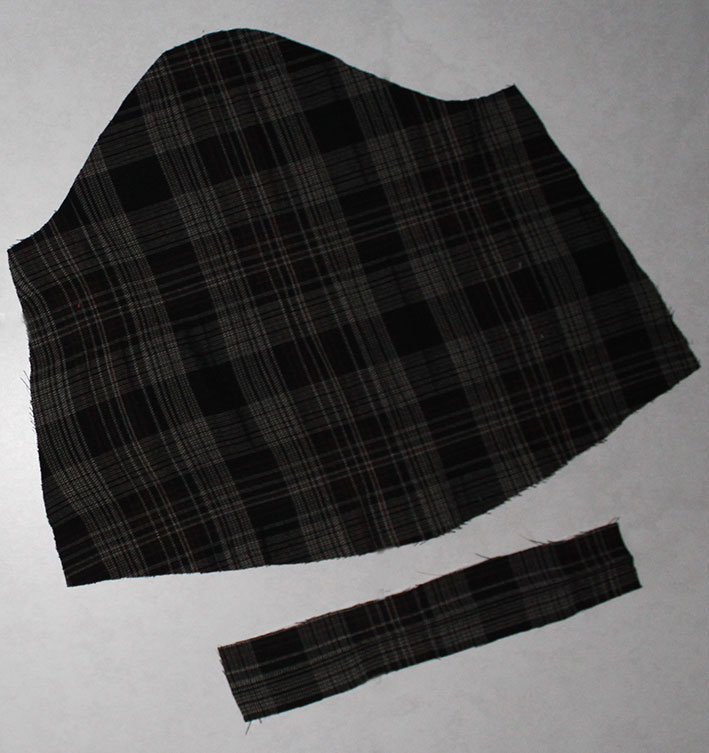
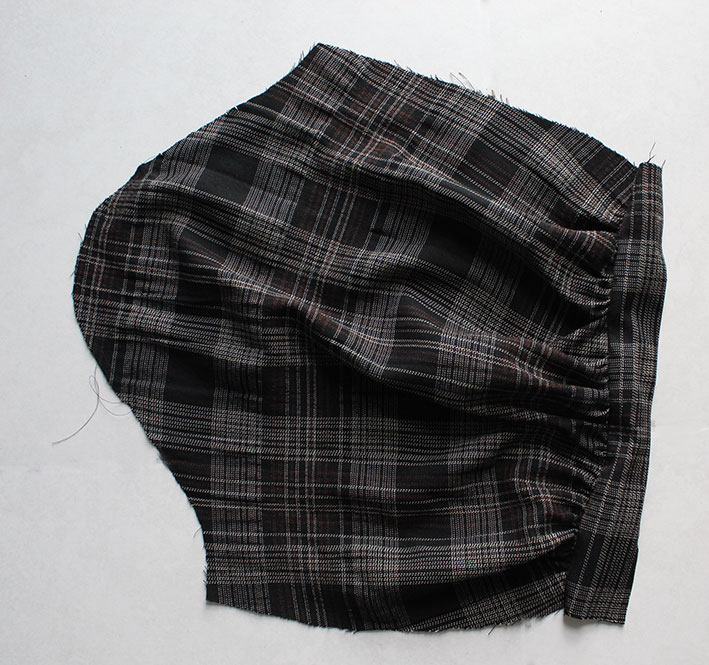
I sewed the pocket before uniting the front and back piece of the dress.
The welt pocket tutorial I mentioned earlier, has more detailed instructions on how to sew the pockets, but here are a few pictures anyways.
The welts are interfaced. I started by closing the short ends. I chose a different fabric, because using the checkered fabric looked too messy with stripes going in all directions.
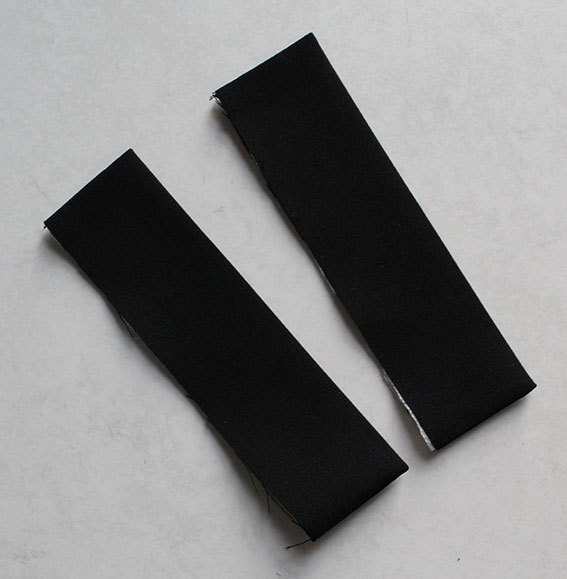
Then I sewed the welts and the large pocket bags to the dress.
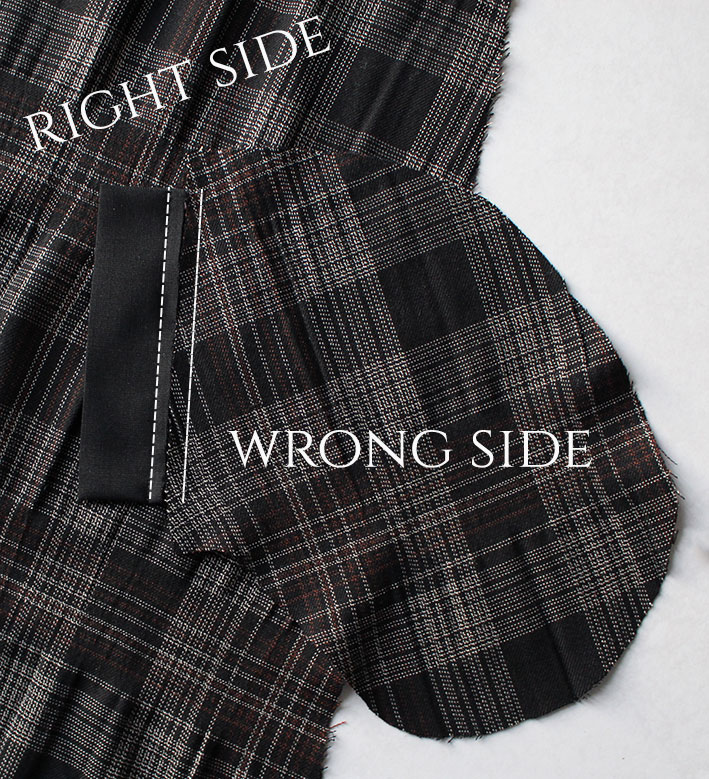
After cutting a slit, I pulled the pocket bag to the wrong side and attached the small pocket bag to the welt.
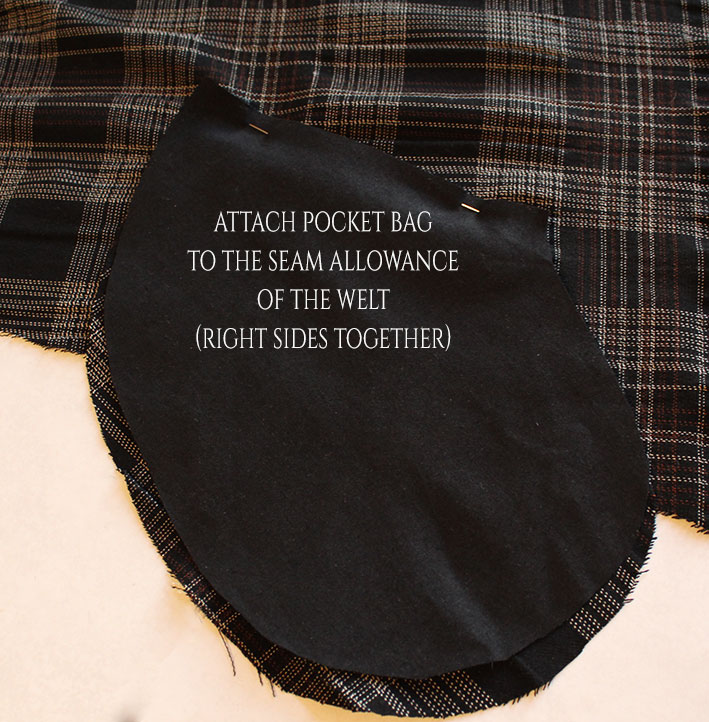
Then pressed all the seams around the pocket opening, sewed the little triangles at the short ends and finally the pocket bag seam.
The short ends of the welts need to be hand-stitched to the dress.
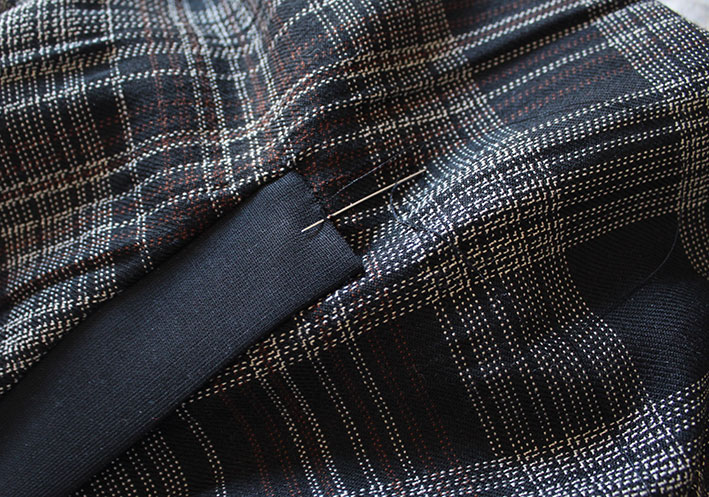
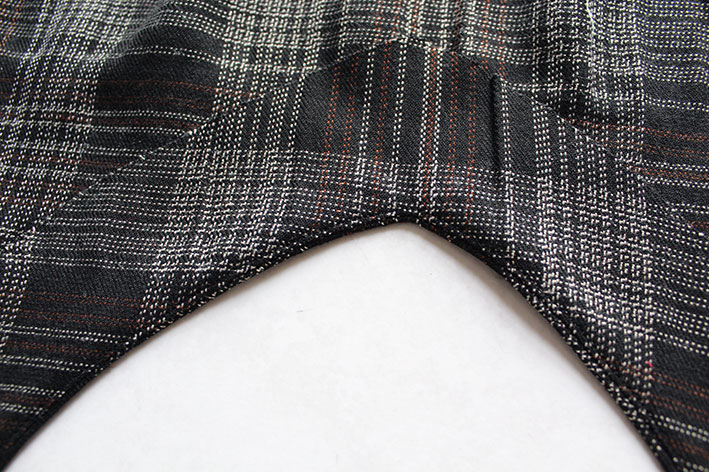
This time I didn’t use bias binding at the neckline. Instead there’s a little facing. I thought this was the easiest solution for the V-neck.
I attached the front- and back facing separately before sewing the shoulder seams.
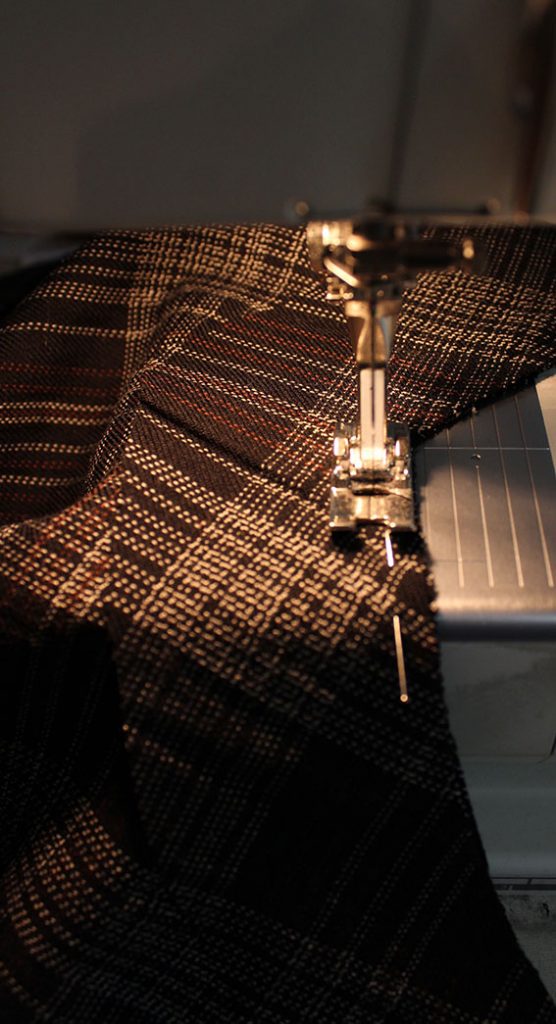
Here you can (maybe) see the edge stitching.
Gelato Dress Pictures
I think this dress looks better with a belt.
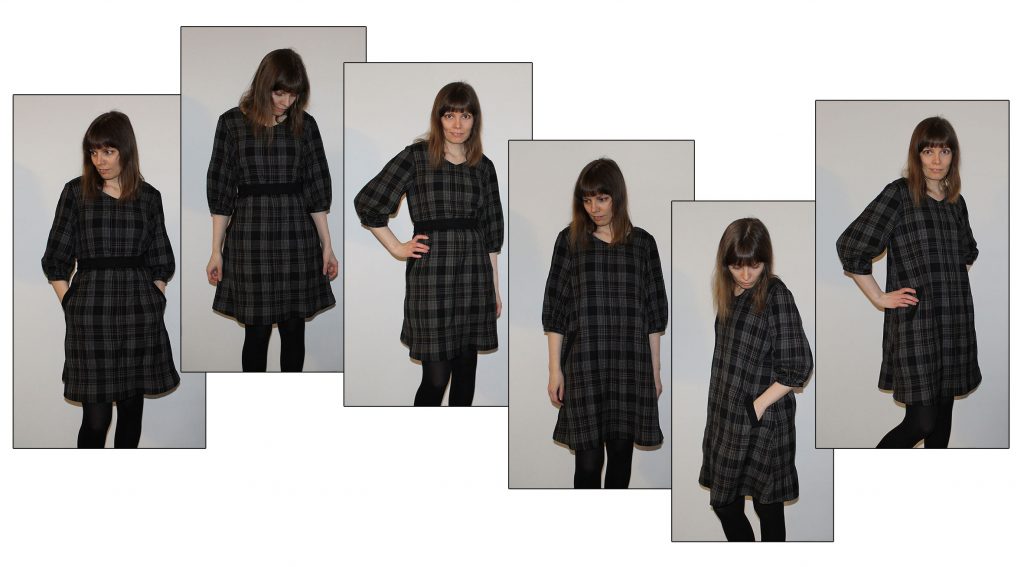
So there you have it! My ideas for hacking the Gelato Blouse & Dress -pattern.
Any other pattern-hacks that come to your mind?
New to Sew My Style? Learn more and join in here.
Sew My Style 2020 includes these talented sewists, catch up on their #SMS20 posts:
Aaronica @ The Needle & The Bell | Leanne @ Thready For It | Ari @ Max California | Minna @ The Shapes of Fabric | Carol @ Chatterstitch | Michele @ WinMichele | Julian @ Julian Creates | Florence @ FTMom3 | Kelsey @ Seam Lined Living | Kris @ Sew Notes | Laura @ The Specky Seamstress | Samantha @ The Rural Sewist | Sarah @ Haraz Handmade | Shelby @ Handmade Shelby | Simone @ Intensely Distracted | and SMS20 Coordinator Paulette @ Petite Font
To stay up-to-date with all the #SMS20 news, pattern discounts and inspiration, be sure to subscribe to the newsletter at Sew My Style 2020.

8 Comments
Thank you. What an amazing amount of work you have done. Some fabulous ideas and clearly explained. Once again thank you.
You’re welcome! 🙂 Somehow this post just kept growing. 😀
Its just fabulous
Thank you! 🙂
Thank you for your post I love the fact that is so neat and tidy, the pictures and explanations are so easy to follow. thanks for sharing
You’re welcome. 🙂 I’m glad to hear that. I’m still practicing the illustrations.
Cool! Thanks!
You’re welcome. 🙂