

Now I must confess that I’ve never had a vest in my wardrobe before, so my latest pattern guide was the perfect excuse to fix this. I decided to make a vest that I could wear kind of like an accessory, similar to a necklace or a belt.
It was such a quick project that it wouldn’t have been much of a blog post on its own. That’s why I also included more vest ideas to this tutorial.
The vests in this pattern guide are quite simple and wanting to keep the patterns easy to draft I couldn’t add any complex features. So, I’m using this tutorial as an opportunity to present some ideas on how to add extra details to the patterns, should you want to challenge yourself more. Naturally, you can apply these to other patterns as well.
This is the pattern guide I’m talking about. The patterns are all based on the dartless bodice block.
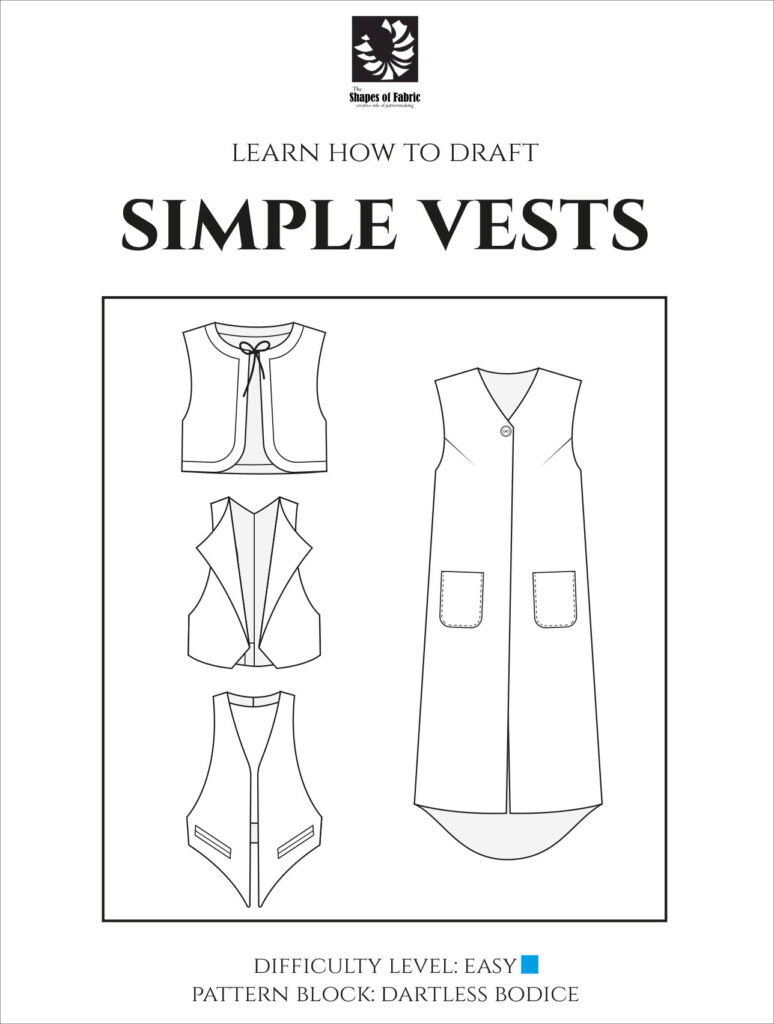
I made myself the one at the lower left corner.
The Vest
This vest has a halter neck and the back piece is basically just a narrow strip of fabric at the waist. The welt pockets are decorative, so there’s no pocket bag. The vest is fully lined.
The welt pockets seemed to call for a pinstripe fabric to create a classic look. I used lightweight cotton as a lining. A bolder person would’ve picked a contrasting color for the lining but mine was black. In the end I needed less than a metre of each fabric and not even the full width.
You’ll also need some interfacing for the faux pockets and a button or two for the halter neck. I know you might be wondering why would you need to have a button closure behind the neck. It’s just to make it easier to sew the vest.
Sewing the Vest
These are the pieces I cut: two front pieces and one back piece in main fabric and lining, four welt pieces (already interfaced and pressed in half here), and two pocket base pieces that you sew behind the welts instead of the pocket bag.
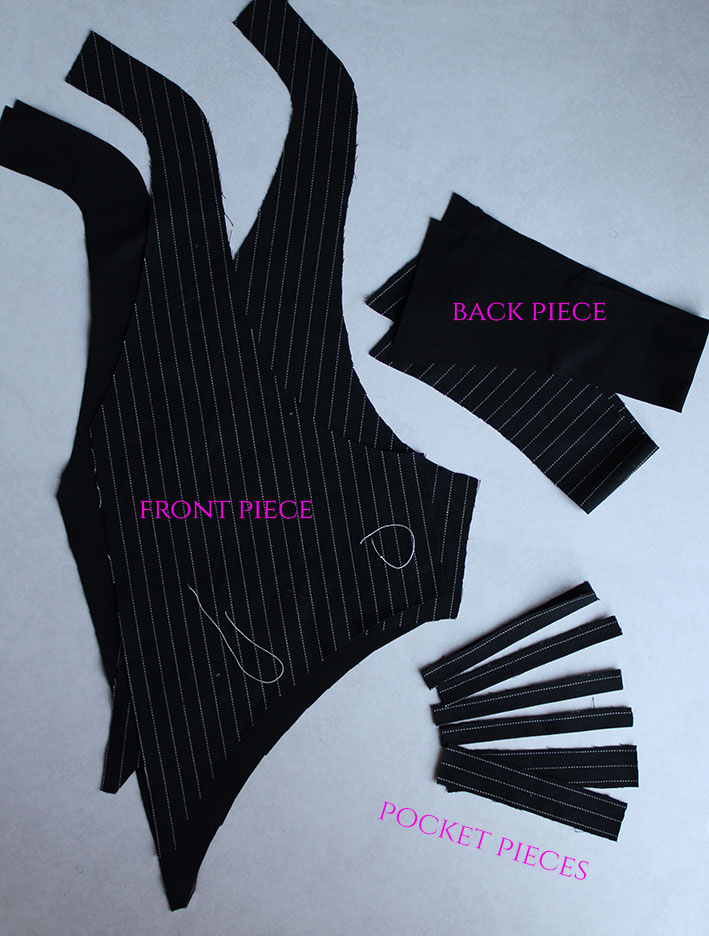
I marked the pocket placement with a basting thread. You should stay stitch the neckline and the armholes right away so that they won’t stretch.

The Faux Welts
It’s always a good idea to start with the pockets.
- Interface the area where the welts will be sewn. This is the wrong side of the front piece.
- Pin the two welts on the right side of the front piece, exactly where you marked the pocket placement. The welts have been pressed in half and the raw edges point towards the center. In the picture below I’ve placed the pins where the seam starts and ends. The welt height has been calculated in a way that you simply sew at a 0.7cm distance from the raw edge, which is pretty much in the center of the welt piece.
- Once you’ve sewn the welts in place, cut along the center between the two welts, and stop about 1.5cm from either end. Then turn and cut diagonally towards the corners. The idea is to stop exactly where the stitches end but without breaking the stitches or going over.
- Pull the welts through the hole to the wrong side and press until you have a neat and flat pocket opening with the two welts, ideally, touching but not overlapping in the center.

5. Sew the little triangles to the welts at the short ends. Pressing the welts will have formed a crease that you can use as a guide. Ensure that you won’t leave a gap between the welts as you sew.
6. Take the base piece and place it over the welts on the wrong side. The size should match.
7. Pin and sew the piece to the previous seam allowance. Leave the welts enough space to lay flat.

The Rest
And that’s the most difficult part done! Now, all that’s left is to close the side seams, and then sew the lining to the main piece right sides together.
I sewed all around the piece leaving just an opening around the c-back at the hemline so that I could then turn the right sides out. I had a 0.7cm seam allowance.
Here you can see why it’s easier to sew this vest keeping the two halter neck sides separate.
There are a few corners to trim and curves to clip before turning the right sides out and pressing the piece flat.
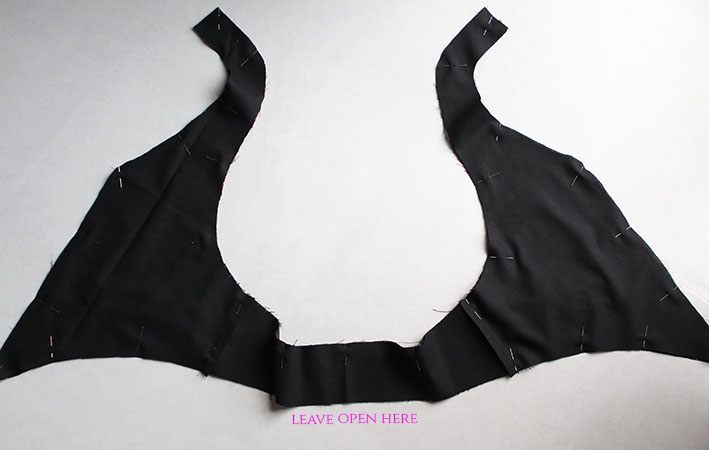
Here’s my vest after pressing:

I hand stitched the remaining hole at the back hemline.
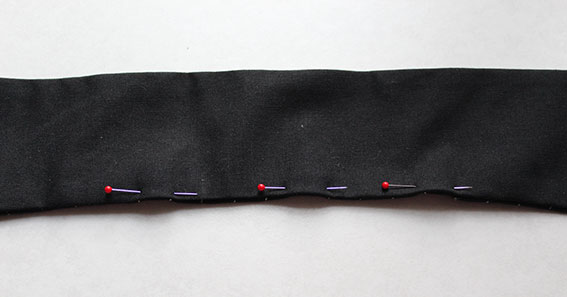
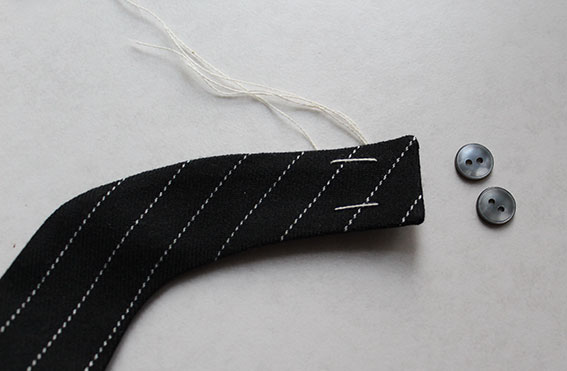
The final thing left were the buttonholes and buttons. I marked the buttonholes with basting thread after having found these two buttons in my stash. The buttonholes are 2mm wider than the buttons and start at the c-back line.
The Pictures
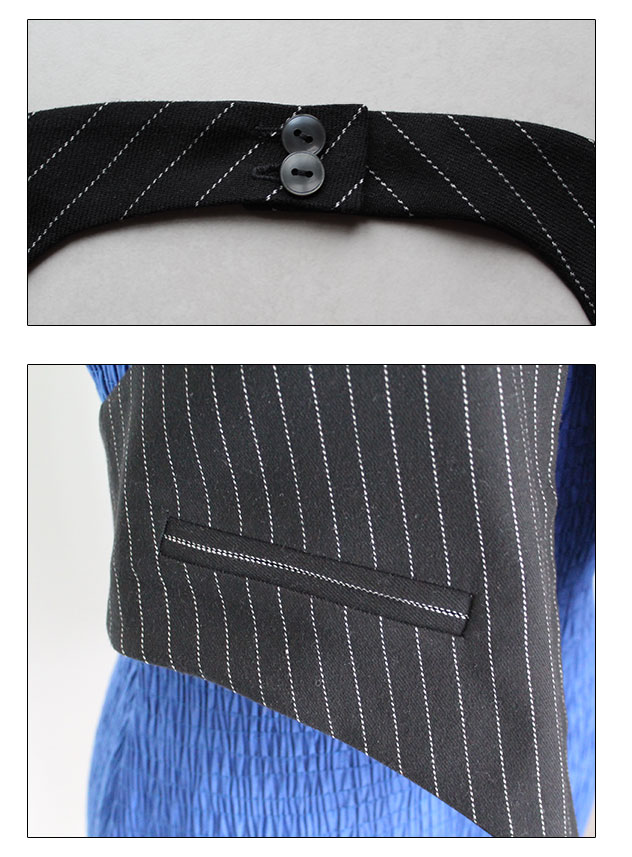
As you can see, it was really quick to make a vest! I didn’t find time to pose for pictures myself, so here’s my vest on the dressform. I’ll add more pics later.

Close-ups of the button closure and the pocket.
Here’s the vest with a silk shirt.

Just an idea, if you don’t like the hemline shape, you could also make it straight like this:

Add Decorative Details to Your Pattern
Let’s talk about the first vest at the top left corner. I was actually going to make myself one, lining it with a teddy fabric, but ran out of time. Maybe in January! The edge would be in teddy fabric as well.
This vest design has a lot of empty space you could fill with different elements. Of course I immediately thought of fabric manipulation: pleats and tucks, but you could also play with the shape of the border piece.
Something like this. I though it looked nicer with a square corner.

The lining piece covers the entire area as there’s no sense making this kind of border design when it remains hidden inside.
Here’s what this vest would look like. I used a contrasting color, too.

These shapes of course are a bit more challenging to sew, but see if you can come up with something similar.
Let’s see those pleats then!
Vest with Pleats
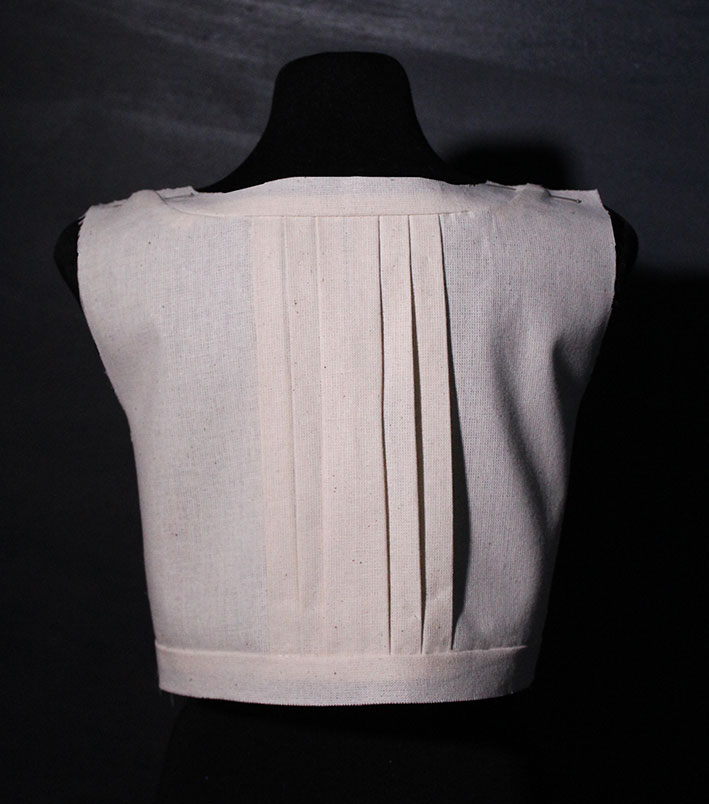
I have two ideas for you. The first one has a box pleat at the c-back and two knife pleats on both sides. They have been sewn in place at both ends. I left the border intact.
After having separated the border pieces, draw lines where the two knife pleats will go. In this example, the first one will be placed 4cm from c-back to leave space for the box pleat, and the second one 2cm from the first.
I added 4cm of pleat allowance for both knife pleats, and 4cm for the box pleat at the c-back. This of course will only form half of the box pleat, as the piece is cut on the fold.
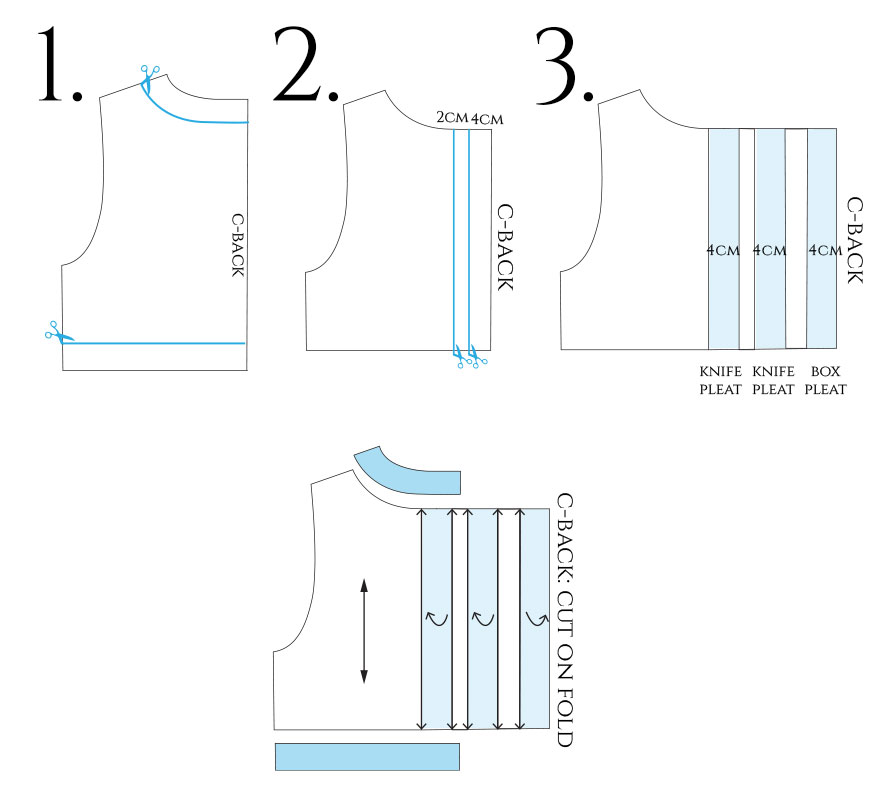
Add notches around each pleat allowance so that you’ll know where to fold.
Press and stitch the pleats in place before attaching the border.

Here’s the final look:
Basket Weave
If you want to go overboard with pleats, you can try this instead. You’ll need both sides of the back piece because the design is asymmetrical. We’re creating a basket weave look.
Start by dividing the back piece evenly into four sections. Then, draw parallel lines onto each section where you want the pleats to go. Alternate between horizontal and vertical sections. In this example, the lines are about 3.5cm-4cm apart. Number the slots.
Separate the sections to add pleat allowance between the slots. You can either use the tracing method, or cut to add the pleat allowance. In both cases it’s added at a right angle. Here’s a basic tutorial.
In this example I added 6cm of pleat allowance between each slot. Fold the pleats before cutting the sides and cut with the pleats folded to get the correct pleat allowance shape.

The grainline is parallel to the pleats. Add notches around each pleat allowance.

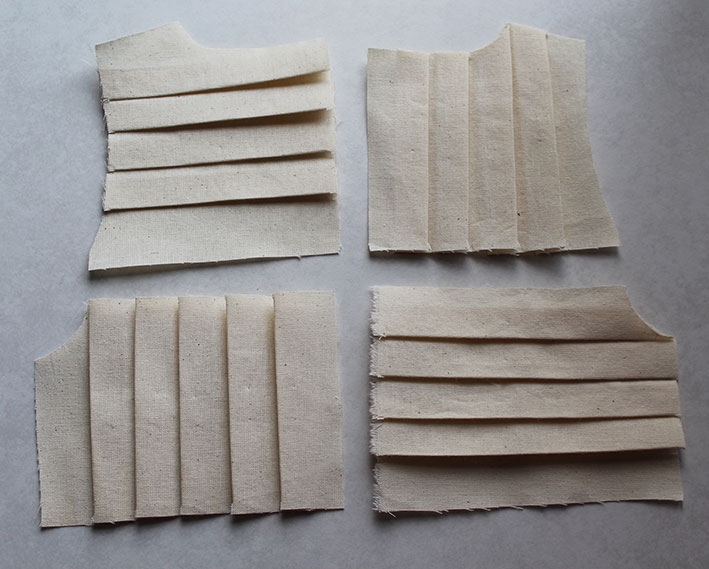
Here are the pieces I prepared by pressing the pleats. After this, I stitched them in place near the edge and sewed the sections together.
And this is what the back piece looks like when finished.

Vests with Tucks
Also tucks offer some cool ways to add interesting details to a simple vest.
You could, for example, create a front yoke with tucks. In this case I removed the border but maintained the rounder corners.
As you know, tucks are like little pleats that have been stitched at their base. This means that drafting the pattern is very similar to the previous examples.
First, separate the yoke from the rest of the front piece. Draw lines where the base of the tucks will be and number the sections.
In this case, the tucks will be pressed away from the c-front and they will cover the whole area between the tucks. So, the tuck allowance will be twice as much as the space between the lines.
For example, if you draw the lines 1cm apart, each tuck allowance will be 2cm. With tucks I prefer to use the tracing method to add tuck allowance.
When you’re done, draw a line in the center of each and use it as a guideline to fold the tucks. Just like with pleats, you cut the pattern with the tucks folded to get the correct shape. The central lines will also act as notches.

Here are the tucks after I pressed them. Pressing before sewing makes the sewing a lot easier.

And here are the pieces after sewing. If you sew with precision, the yoke will match the lower piece.

The final look.

Tapered Tucks
Looking for something more special? How about tapered tucks? These are like triangular box pleats that have been sewn at their base.
As the tapered tucks need to start and end at the edge of the fabric, first separate the area where they will go. I picked the back piece this time and drew a slightly curved line.
There will be a total of 7 tapered tucks, but the pattern only covers half of them. One will go at the c-back. Therefore, I drew three, evenly spaced lines, as shown.
To decide on the amount of tuck allowance to add, plan the shapes first (see the pink line). You can overlap the tucks partially, if you want. Then, measure the width of the base of your triangle; you’ll be adding double the amount of tuck allowance.
For example, if you measured 6cm, you’ll add 12cm.
Slash and spread to add tuck allowance. Fill the gap with another piece of paper. Fold the tuck as if it was a box pleat. Trim off the excess paper with the tuck folded to get the correct shape.

Add the remaining tuck allowance in the same way, and then add half of a tuck allowance at the c-back.
Notice, that this piece will be cut on the fold, so, ensure that there won’t be an overlap at the top once you’ve completed the pattern. If there is, you need to reduce the amount of tuck allowance.
Add notches on both sides of each tuck allowance, and also where the extra creases are (see the dashed lines), and at the tips.
Here you can see my paper pattern. Maybe it will be helpful. The extra lines were my initial plan.

The tapered tucks are sewn kind of like darts.
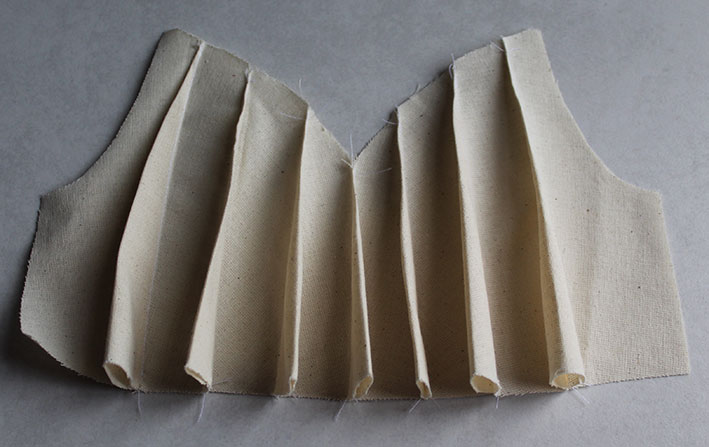
After this, you flatten them with the iron. It’s a bit tricky to flatten the tips neatly.
And this is what the piece looks like when completed.
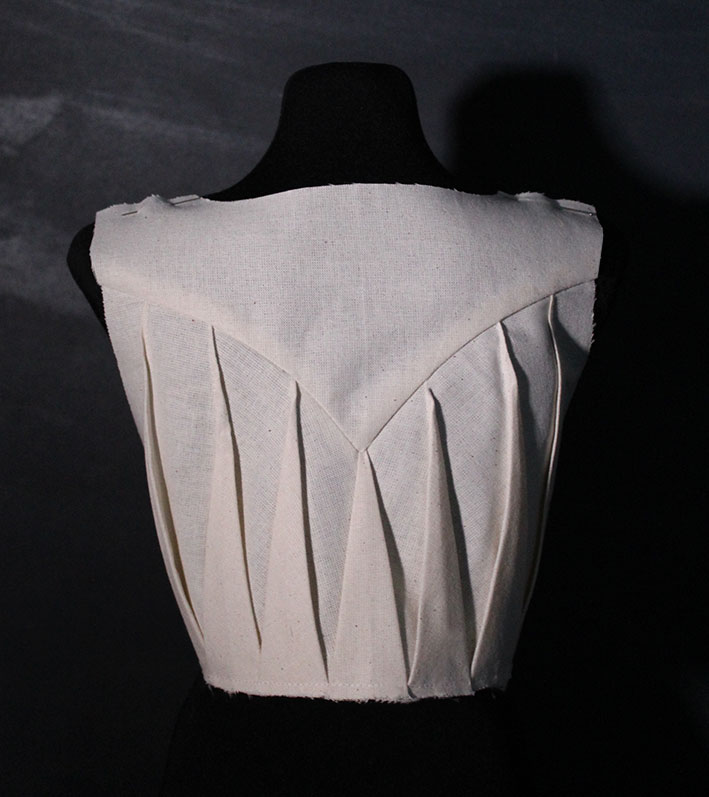
Hope these designs will give you inspiration for your own makes, vests or something else.
The Other Vest Designs
I wanted to address the remaining two vest designs real quick while I’m at it.
We have a long vest with patch pockets. If you haven’t seen my creative pocket tutorial yet, you might find a few ideas there to add more interesting pockets to this vest.
Another quick way to modify the design is to add a back yoke and an inverted box pleat to the c-back like this:

In addition, you could add a bit more flare to the side seams to make it more like a vest-dress.
And how about the vest with lapels? Well, you can make the lapels in a different size or shape. In this picture I imagined a smaller lapel and a rounded lapel instead of a pointed one.
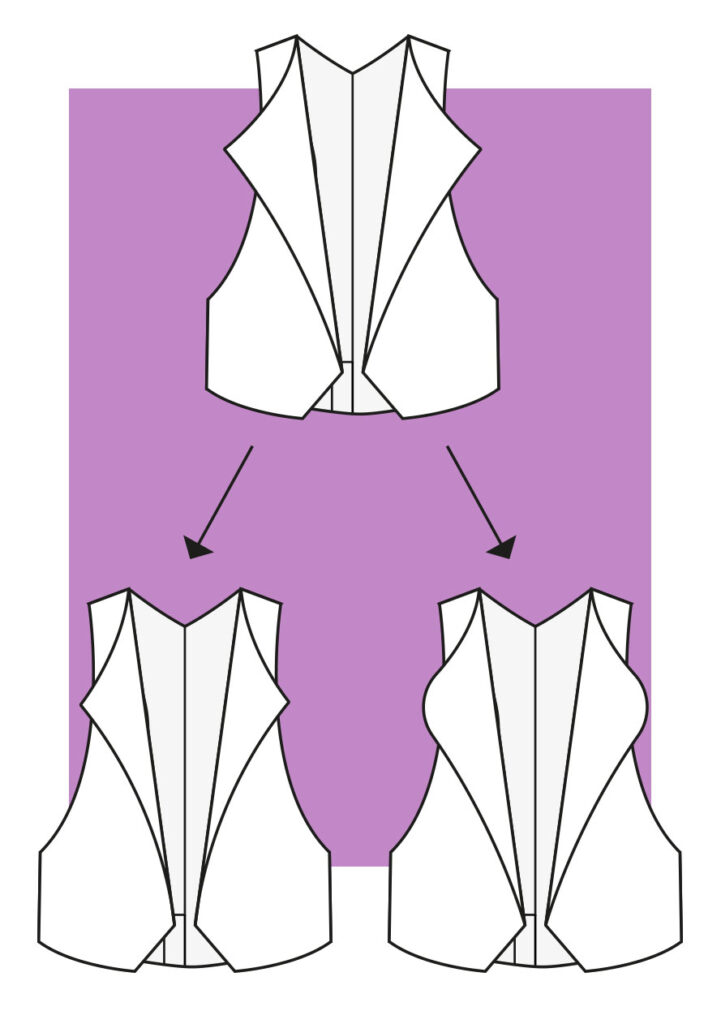
I’m actually already thinking about making one of these, too, with the main layer in dark blue and the insides plus the lapels in light yellow or mustard, depending on the shades I can find.
Every now and then it’s nice to have a quick sewing project that doesn’t require much fabric. It’s quite perfect for those fabric scraps, too.
I’m certainly curious to explore the possibilities of this new piece of clothing previously foreign to me! Maybe I will now become a wearer of vests. 😀

8 Comments
Thank you so much for your generosity in sharing your knowledge and patters with me.
I just discovered your page in Pinterest and began to read it immediately. You have hours and hours of interesting information I don’t know if I have the time or mind to dedicate to it to do it the justice it deserves, thank you again.
You’re welcome! 🙂 I hope you’ll find many useful things for your sewing projects. Enjoy!
Thank you always for sharing these patterns with us.
You’re welcome. 🙂
I am enjoying your information on vests, as I will be teaching a class on how to make a vest, this is a not for profit sewing class at our local library where I teach sewing and quilting and will be sharing this page to the students for their informational purposes. Thank your for this valuable information.
Awesome! 🙂 I’m happy to hear that and honored you will share it with your students, too. Hope they will find it helpful.
hey, thank you for this tutorial, I am mixing this , with your jumpsuit tutorial and going wild 😜😜😜
Excellent! 😀 That’s the way to go.