It’s back to basics! This post is all about sleeve pattern alterations. And I have a feeling this is going to become a series of blog-posts, as there are so many different sleeve-styles I want to show you.
Here’s a group of sleeve-styles that all have the same starting point. If you want to exercise, all you need is a basic sleeve pattern. Divide it like this into 6 slices. In case you’re using a half-scale pattern or smaller, you could then just take copies of it. This will save you time and you can try all the sleeve alterations here and your own versions, too.
edit: I added a pdf you can download. It’s a half-scale basic sleeve pattern, which should fit quite perfectly on one A4 sized paper.
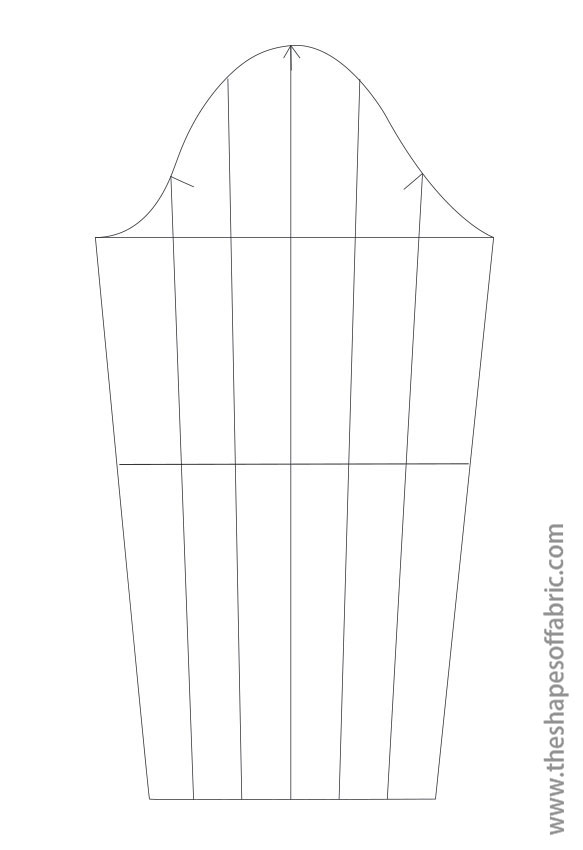
General idea
The idea behind all these sleeve patterns is adding volume with the slash and spread -method. The final look of the sleeve depends on where and how much you added the volume. Just cut the lines open and add as little or as much volume as you want. You don’t have to cut open all the lines and you can add different amounts of volume. Just keep it symmetrical.
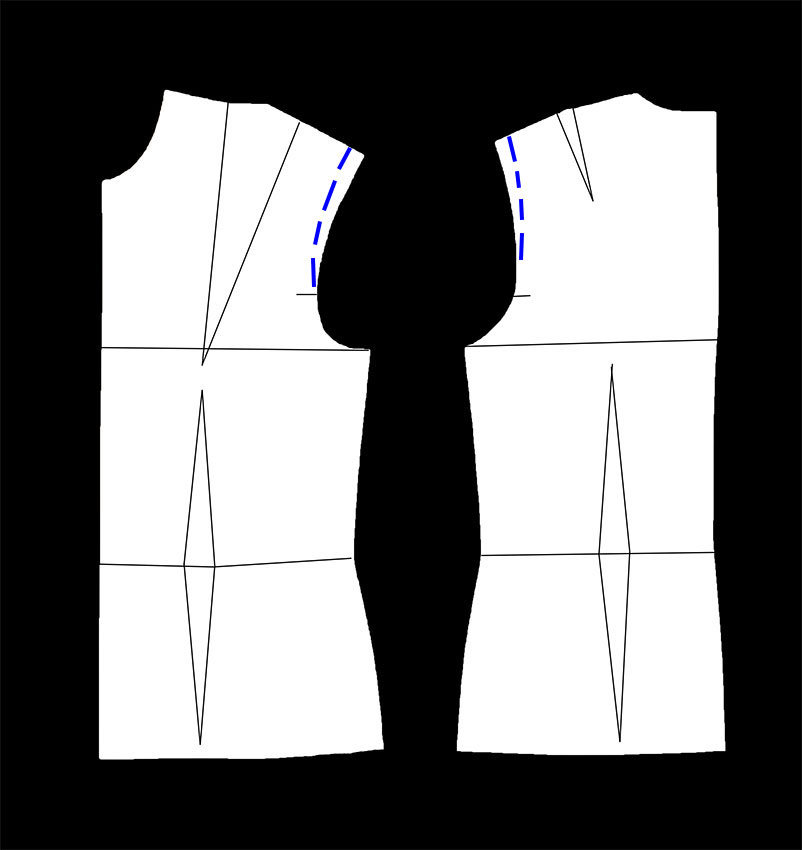
In case of the sleeves that have extra puff at the shoulder you need to intervene with the armscye of the bodice-pattern as well: take off a couple of cm from the shoulder-line. Otherwise your final garment will have really wide shoulders!
In case of the gathered sleeves, measure the original width of the sleeve-hem before modifying so that you know how much to gather.
Puffed sleeves
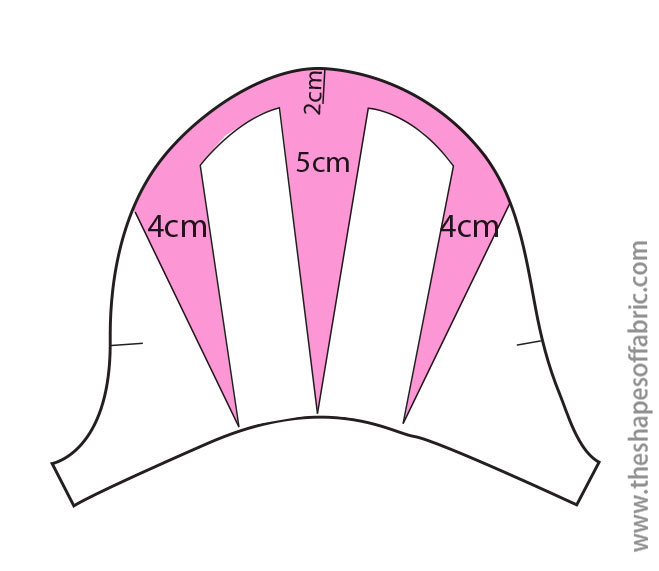
In the first example I added volume only at the top.

And here is the classic puff-sleeve with volume on both sides to gather.
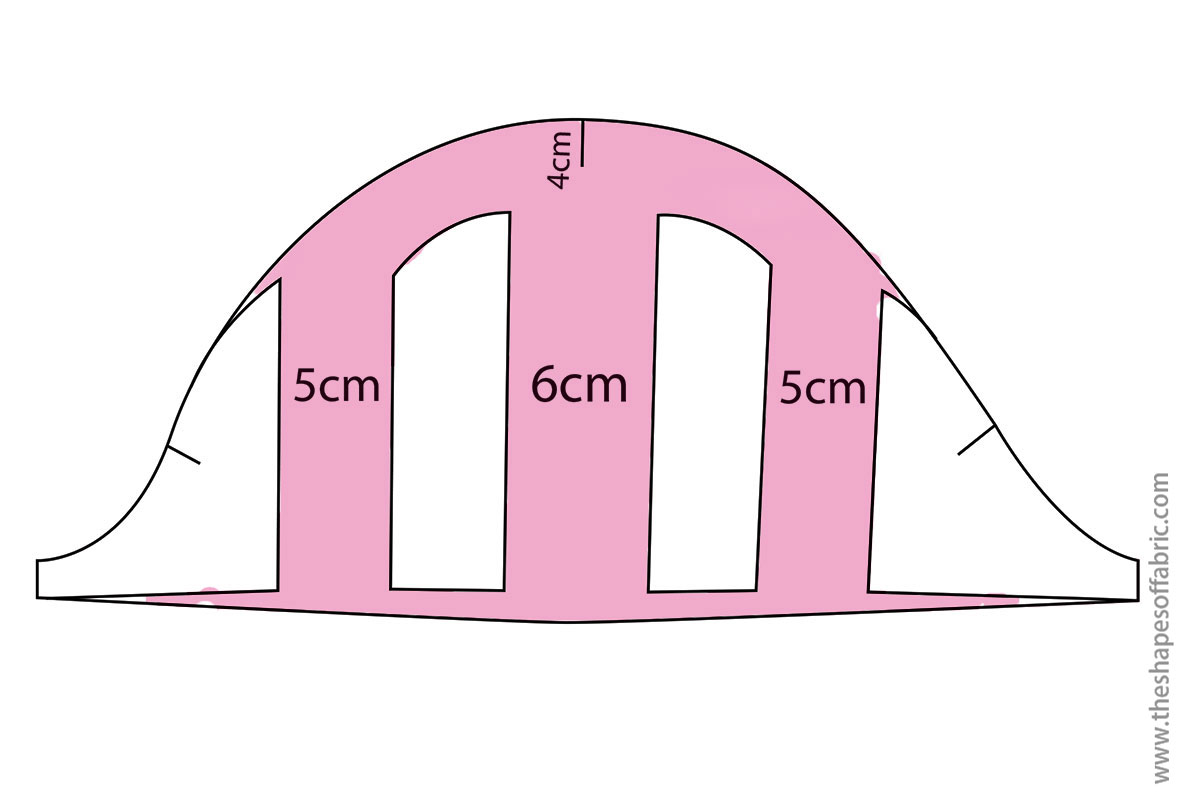
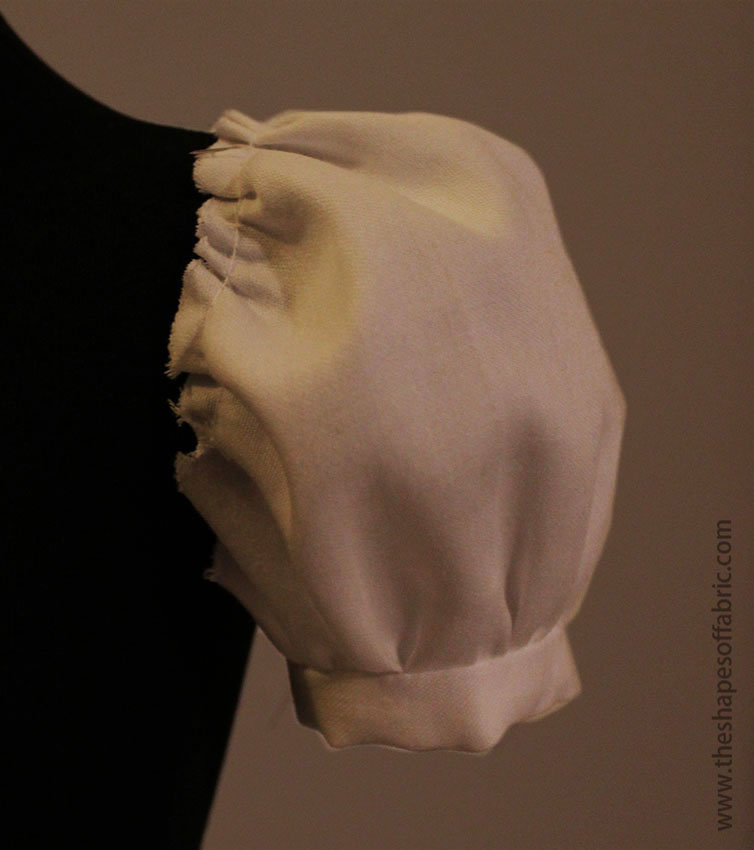
In both cases I lifted the sleeve-cap, so I’d have to modify the bodice-pattern, too. Lifting the sleeve-cap creates more volume.
Flared sleeve
Choose the length of the sleeve and then slash and spread. I made a short version.
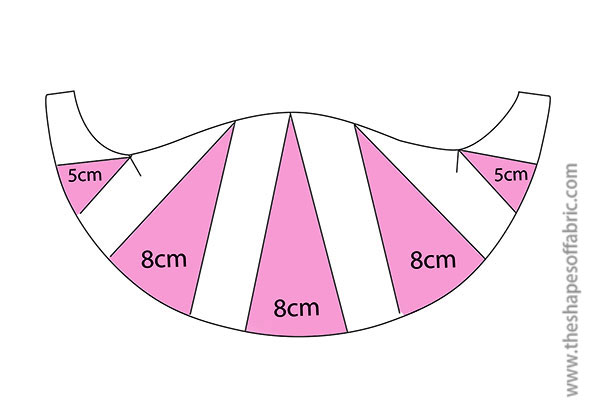
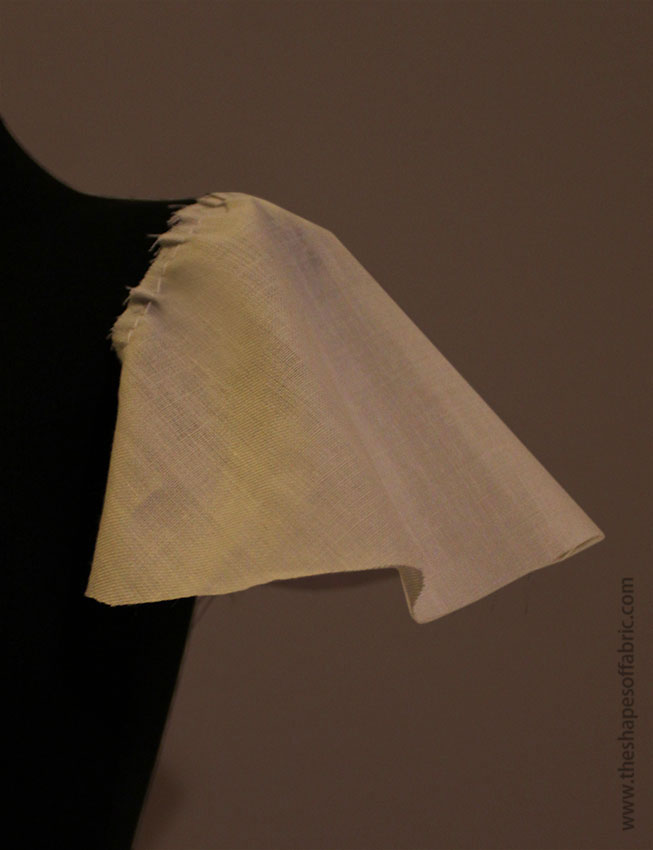
If you want to try a different effect, gather the volume instead of leaving it free.
Bell sleeve
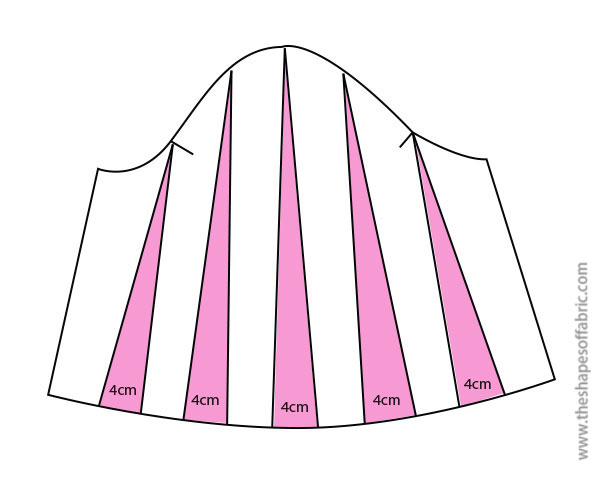
This is kind of the same as the one above, but with much less volume added.

Trumpet sleeve
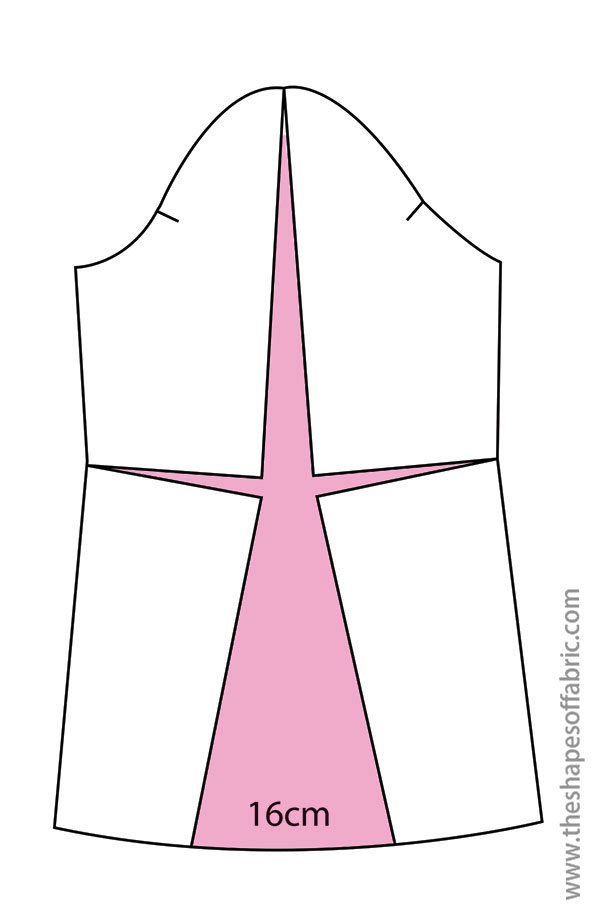
Here’s quite a subtle version of the trumpet sleeve. This has just one vertical cut in the middle. At the elbow-level there are these horizontal cuts that allow you to make the trumpet-shape. Try opening it a bit more, if you want a more pronounced shape.

Bishop sleeves
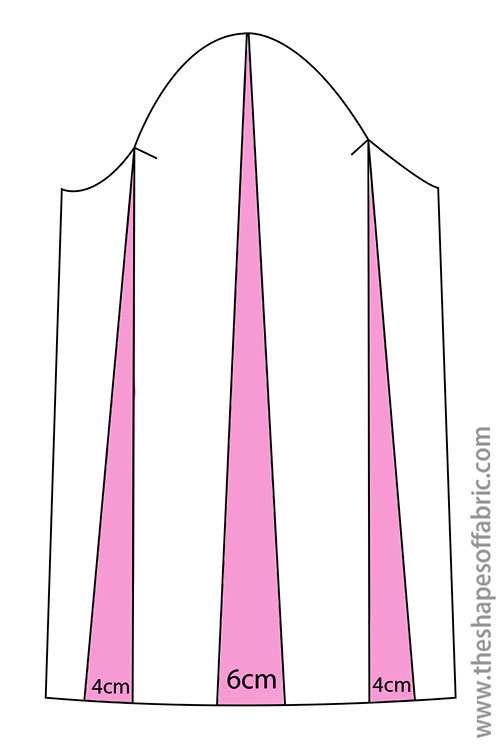
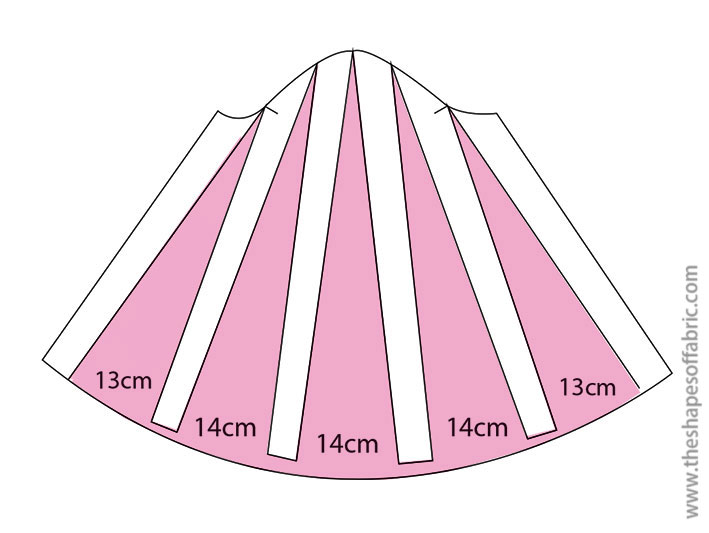
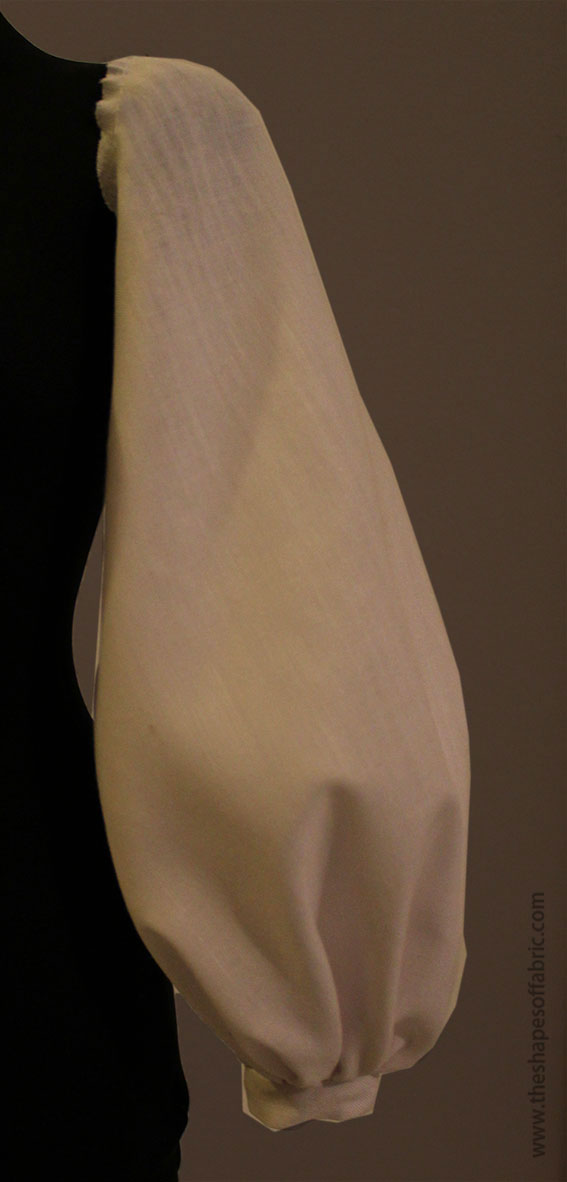
I made two different versions of this sleeve to illustrate how you can achieve a different result, depending on how much volume you add.

Peasant sleeve
This one is the same as the bishop-sleeve, but it has volume at the sleeve-cap as well. So I took this opportunity to show you how you can also add different amount of volume at the top and at the bottom.


So there you have 7 different easy to draft sleeve-styles, each with the possibility to modify the look even further just by changing the amount of volume.
Which one is your favorite?
P.s. If you’re interested in sleeve patterns, I have an ebook that has these and almost 50 other sleeve patterns explained. Both set-in sleeves and raglan sleeves, too! Check it out here.


37 Comments
How come all of the illustrations have cut, but the results I see on your mannequin have no sign of joining or so
It’s because you do the cuts only on the paper pattern to alter the shape of the future sleeve. Once the pattern has a desired shape, you cut the fabric directly in that shape. that’s why there are no extra seams on the final sleeve. I hope this makes sense. 🙂
I’m at Sewtec sewing and pattern making course and the Sleeves there so out there, so many fantastic new,big creations. which is very difficult when looking say bell you get an array of cool sleeves. so my question is there an up dated sleeve name or just a universal naming of the basic starting bock. as its driving me crazy….Cheers Peta
You can use any basic sleeve pattern to make these transformations. The basic sleeve pattern usually comes with a basic bodice block, so if you see in any patternmaking book where they teach how to draft the bodice block, it’s probably followed by the sleeve pattern that goes with it. Basic just means that it hasn’t been transformed yet.
Pingback: Ruffled Liberty Cheyenne Tunic - Hey June Handmade
Thanks for sharing! 🙂
hello, I could not find the PDF to download ?
Hi! It’s at the Downloads-section, which you can find in the side panel if you’re on computer. On mobile, scroll down and you’ll encounter it. 🙂
This is really helpful – thanks! Have you ever made puffed long sleeves? Once I get the short sleeve thing under control I’d like to try long sleeves too! 🙂
You’re welcome. 🙂 Yes, above the elbow line. I posted a picture of a dress with those sleeves this summer on Instagram. There’s a pattern in the picture, too. It’s pretty much the same as short puff sleeves, so you can make it! 🙂
Thanks, very helpful indeed…!
You’re welcome. 🙂 Enjoy drafting.
Love comming here, Thanks Mina, Regards from Fiji 🥰
Fiji! That’s quite a distance. 🙂 It’s awesome to have such a global reach. Greetings from Italy!
Pingback: Slashed Sleeve Tutorial – Take a Gambel
Thank you for the information. To achieve puff sleeves do you think a fabric like viscose would be appropriate? How much does the fabric chosen contribute to the puffiness? Thanks
I’ve seen different kinds of viscose fabrics, some are softer and the others “crispier”. It depends on what kind of puffiness you’d like to achieve. The softer and drapier types of fabric will produce softer and more round puff, if you know what I mean.
How would I convert a puffy sleeve to a non-puffy sleeve?
That’s a bit more complicated modification as you don’t know how much extra volume has been added. Basically you’ll need to work in the opposite direction and remove the excess volume by folding the pattern piece at a few points vertically. You’ll have to take some measurements from the bodice armscye it’s going to be sewn into to ensure that you reduce the right amount. The sleeve cap should be slightly larger than the armscye.
oh my god, thank you so much.!!
You’re welcome. 🙂
واقعا ازتون ممنونم به دلیل مهربانی و بخشندگی که به خرج میدید برای یادگیری خیاطی به دیگران من همش در اینترنت به دنبال یافتن مطالب هر چند کوچک در مورد خیاطی هستم ممنونم ازتون
You’re welcome. 🙂 It’s my pleasure.
hello! i’ve been looking for some sleeve-blouse’s patterns and this was so useful! i was wondering if you had the PDF to download? i couldn’t find it anywhere!
That’s great! 🙂 I don’t have a PDF to download, but you could turn this article into a PDF through Print Friendly. You just copy and paste the URL.
How can i make a puff raglan sleeve please? With Bishop ending?
thanks
You can do the slash and spread with raglan sleeves, too. But you can also just widen the sleeve hem on both sides to have volume to gather, if you don’t want a particularly large puff. 🙂
This is indeed very helpful. Thank you very much!
Excellent. 🙂 You’re welcome.
trying to download pattern trying to make a puffy sleeve for a robe for my Pastor
If you have a basic sleeve pattern ready, you can quickly turn it into a puffed sleeve. 🙂
I want to make a long sleeve that is puffy (like the peasant sleeve) down to just below the elbow, then fitted along the underarm. How would I do this? Two sleeve-types put together? A very long cuff?
Yeah, you’ll need a seam if you want the lower part to be fitted. Otherwise you’ll have too much extra volume. So, you can make a long cuff. 🙂
Hi : thanks for this post. With the trumpet sleeve, when I slash and spread, won’t it widen the armscye of the sleeve? Does this mean I’d have to adjust my body block armscye to match the increase? Thanks – (it probably wouldn’t matter for a puff sleeve because of the gathers but the trumpet is smooth around the cap) Is there an adjustment necessary on the body block for the increase caused during the slash and spread of the trumpet?
You’re welcome. 🙂 When you add volume with the slash & spread method, the armscye measurement doesn’t change, so there’s no need to adjust the bodice armhole.
WOW. This was just the article I was looking for! so exciting! Thanks so much! Mama of 5 littles.
Wonderful! 🙂 You’re welcome.