Skirt patterns are an excellent first step in learning how to draft your own sewing patterns. Even without a basic skirt block, you can make several skirt styles: circle skirts or panel skirts, for example. And all their variations!
For this tutorial, I’ve prepared a few different skirt patterns, something for each skill level. I can tell you already that the last one is my favorite, but it’s also the most difficult.
Skirt Patterns Difficulty Level: Easy
Besides circle and panel skirts, you can make a simple gathered skirt without having a basic skirt block. It works great with print fabrics that have a vertical pattern/stripes you want to maintain.
This type of skirt is actually even easier to make than the others because you can get away with just two rectangular pieces of fabric and elastic at the waist.
I made a bit more advanced version of this with a lining, waistband, and a zipper closure.
But let’s look at the measurements. You’ll need your waist and hip circumference, and your desired skirt length. You could make the entire skirt with just one piece of fabric, but it’s better to have a separate piece for the front and back. The skirt will have side seams.
Therefore, divide the waist circumference in half and calculate the volume. You can make that 1.5, 2, 2.5, or even 3 times your half waist circumference. The lighter weight the fabric, the more volume you can add. This will influence the hemline width but also the amount of bulk at the waist.
Just ensure it won’t be too tight around the hips. Check with your hip measurement.
The height of the rectangle is your desired skirt length plus seam and hem allowance. Or, if you’ll have an elastic, calculate enough width for the casing.

If you want to have a waistband, the pattern is again a rectangle. This time, the length is your waist circumference, and the height is twice the final waistband height because it will be folded lengthwise in half. The maximum height is 3+3cm. Add seam allowance to all sides.
The opening will be at the left side seam. Leave about 20cm for the zipper.
If your fabric will create a lot of bulk at the waist when gathered, consider making the waist circumference slightly larger than it actually is.
You can also add a button above the zipper. In this case, add a little overlap on one side of your waistband.
My Gathered Skirt
I took this opportunity to finally use a net fabric I’ve had in my stash for years. It has vertical stripes sewn on top.
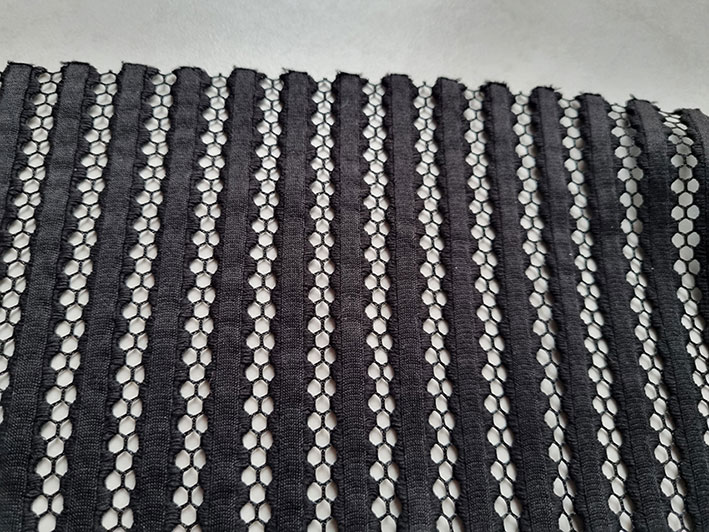
As you can see, it’s transparent, so I also needed a lining layer. I used a viscose-cotton blend.
A good thing with the netting is I didn’t need to hem it or finish the edges.
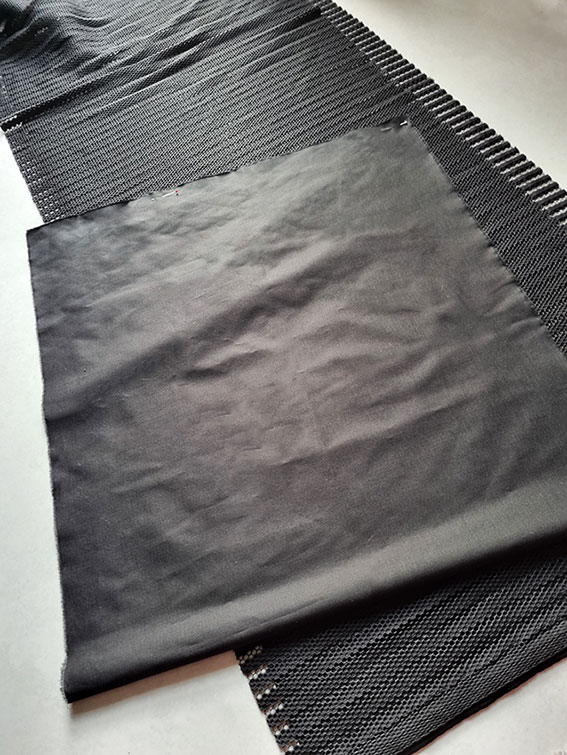
Here, I have the rectangular pieces. The lining is a bit shorter, and it has less volume. I pinned and sewed the side seams, leaving an opening for the zipper on the left side.
After this, I sewed the gathering stitches at the waist and hemmed the lining layer.
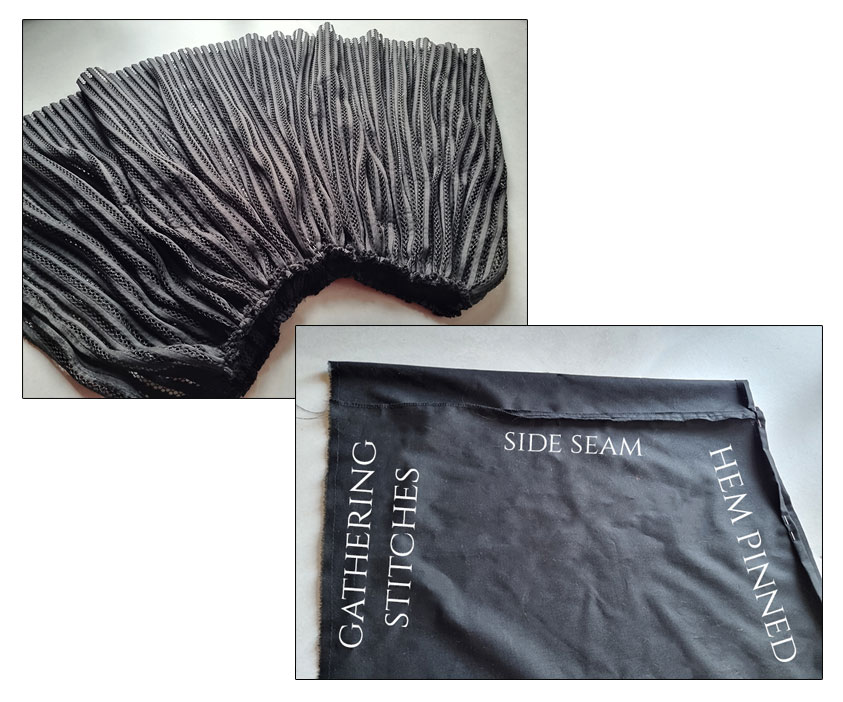
The netting became quite bulky at the waist after gathering it to the correct measurement. Here’s the lining ready:
Then, I attached the zipper. I had this metal zipper in my stash and it seemed to go well with the style.

Here, I’m attaching the zipper, one edge at a time. I cut off the seam allowance so I didn’t need to fold the netting.

Then, I sewed one edge of the waistband to the waist. I trimmed the seam allowance in half and did a row of zig-zag stitches to flatten the gathers.

I sewed the lining to the opposite long edge of the waistband, and then I could complete the zipper by attaching the lining.

The last step was to close the waistband by stitching the two layers together just above the first seam.
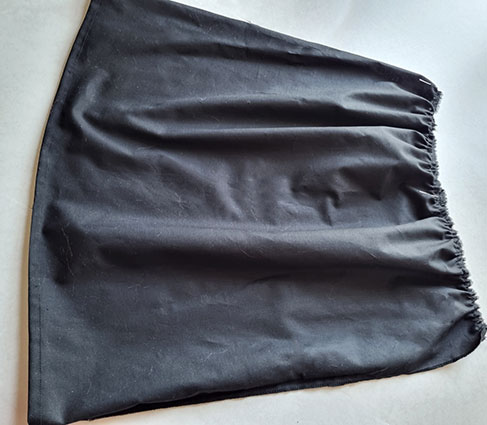
Here’s how the skirt turned out. I think it has a bit too much bulk at the waist, and I might remove some of it later.

You can also gather by folding. This will cause less bulk.
Skirt Patterns Difficulty Level: Intermediate
Now you’ll need a basic skirt block because these patterns use it as a starting point. I have a tutorial here if you do not have a skirt block yet.
I decided to go with pencil skirt styles so we get more variation in this tutorial. The good news is that you won’t need to make many changes to your skirt block. I have a tutorial for flared skirt styles here.
I’ll show you how to make three different pencil skirts with just a few changes to the basic block.
Godet Skirt
The first idea is to add godets to the hem. For this, you just need to adapt the length of the skirt and decide the height of the godet pieces.
I’m keeping mine knee length, which means no change as the basic block is already knee length.
The godets will be 15cm high (for example). Add notches at the center front, center back, and side seams to mark where the godets start. We’ll also add a godet in the middle of the front and back pieces. Here, you can make a line ending in a dot, so you’ll know where to slash.

The godet pattern is a triangle. Decide how wide you want it to be at the hem. I went with 12cm. Draw a line.
Find the midpoint and draw a line up at a right angle. Then, draw the two remaining sides symmetrically, using the godet height measurement.
Finally, make the hemline slightly rounded. Add seam and hem allowance.
You’ll cut the front and back pieces twice so you can insert the godets into the seams. This is easier than slashing. There will be 8 godet pieces.
Sewing the Godet Skirt
I made these skirts in half-scale using fabric scraps from my stash. This one is a (fairly wrinkly) cotton poplin. In case you’ve never sewn godets before, here’s how.
These were my skirt pieces. I cut the notches and already slashed where the godets would be inserted.

Start by sewing the godets that go into the slashes. Pin one side at a time, right sides together. Since there’s no actual seam allowance around the slash, you’ll just need to taper it down towards the tip.
You can stabilize the point with fusible interfacing. The poplin was actually great as it’s pretty tightly woven, so it didn’t unravel.

Then, pin and sew the opposite edge in the same way. I like to start at the tip because that way, the fabric won’t bunch up. Here’s the completed godet.

The ones that go into the seams are easier. There, we have the notches that mark where the tip of the godet should end up (see the arrow). Pin one edge at a time and sew.

After attaching one edge of the godet, you can sew the entire side seam and the remaining edge of the godet in one go. Just match the notches.
The godets create this undulating hem but won’t add volume to the rest of the skirt.

Here’s the completed skirt.

Pencil Skirt with a Flounce
The second idea is to add a slit and a flounce to the front piece.
The slit allows us to make the hemline narrower. Copy your basic skirt block. You’ll need the entire front piece, so mirror it. Adapt the length to your liking.
Then, remove about 4cm from the hemline at each side seam. You can check the measurement around your legs at hemline level to see if this will be too narrow. Redraw the side seam from the hipline down.

We’ll absorb one of the front darts into the seam that opens and becomes a slit towards the hem.
Start by drawing a line straight down from the dart tip. Decide the slit height, mark a notch, and draw the remaining side of the slit, leaving a 2cm gap at the hem.
Remove any angles at the hip and around the dart tip you absorbed into the seam.
We’ll attach a full circle flounce into this seam/slit. So, measure the seam length (the straight side), starting at the waist.

Once you have the seam length, you can calculate the inner circle radius for your flounce pattern. It’s seam length divided by 3.14, and the result divided by 2.
Take a compass and draw a circle using this radius.
This will be a high-low flounce. Decide how high you want it to be at the top and at the hem. My flounce was 20cm high at the top edge and 5cm at the hem.
Start by drawing the outer circle using the maximum height. It will help you draw the high-low shape. You can use the reference numbers in the illustration or make it your own.
Cutting the flounce twice and sewing the pieces together along the hem is probably the easiest way to finish the edges.
Sewing
I used lightweight wool for my skirt and cotton for the flounce. Start by attaching the flounce to one edge of the slit seam. Then, close the seam. The flounce will remain sandwiched in between. Edgestitch to flatten the seam so that the flounce points towards the c-front.
Fold the edges of the slit. After this, you can proceed normally.

Here’s the completed skirt.

High-Low Pencil Skirt with Ruffle
A third idea is to change the shape of the hemline and add a ruffle.
We’ll start with a similar shape to the previous skirt, where we reduced the hemline width.
This time, we’ll need the entire front and entire back piece because this is an asymmetrical design. If you have a shaped c-back seam, you first need to straighten it at the top and remove what you added at the side seams. Or, by increasing the darts if they aren’t large already.

Then, we can proceed with drawing the new hemline shape. In this example, the highest point is at hip level, and the lowest point is at knee level. Consider that the ruffle height will be added to the final skirt length.
Draw the hemline so it forms a continuous line between the front and back pieces. Once you’re happy with the shape, measure the lengths.
You’ll need the measurement to calculate the ruffle length, which is twice as long.
The ruffle piece is just a rectangle. Decide the height. Mine is 20cm.
You’ll have a separate piece for the front and back.
There will be a zipper at the side seam, ending at hip level. Add a notch.

Sewing
Sewing this skirt is quite straightforward. Close the darts and the side seams first. Then, unite the two ruffle pieces and sew the gathering stitches at the top edge. Hem the ruffles before gathering.
Mark the midpoints (ruffle and skirt hem) so it’s easier to distribute the gathers evenly. Gather to match the lengths. Then, pin and sew.

The resulting skirt. Mine is in half-scale so the ruffle remains quite stiff even though I used lightweight cotton.

Skirt Patterns Difficulty Level: Advanced
And now we finally arrived at the advanced level skirt pattern. For this one I chose a piece I had previously published on Instagram in half-scale. I was really curious to see how it would look like in full scale. It’s an origami skirt with bamboo petal folds.
I decided a silk brocade would be the perfect material to create this look. I would’ve preferred a monochrome brocade, but I guess that would’ve been quite difficult to find.
So this is what I got instead. It’s reversible and rather heavyweight. One side is more violet, and the other side is more peach. I decided to utilize both. The silk threads have a beautiful shine.
But most importantly, this fabric acts the way I need it to. I wanted soft folds as I was not going to press the folds flat.

The Origami Skirt Pattern
This is one of the origami techniques I learned from Shingo Sato. These are called bamboo petal folds. They are very much like tapered tucks. Or, let’s say, triangular box pleats.
The starting point for the pattern is an A-line skirt. As this pattern requires quite a lot of work, I sneakily only drafted the front piece, adapting the waist measurement so it covered precisely half of the waist measurement.
You first rotate the dart volume towards the hem, where it becomes flare. Then, you add enough flare to the side seam so it becomes completely straight. Of course, you can adapt the length as you want. I kept mine just above knee length.
The skirt consists of three vertical sections, or layers, that become higher towards the hem. The first one should be high enough to cover the zipper height. Trace the sections to get the lining pattern pieces.
Before separating the vertical sections, divide the whole skirt length horizontally into four even sections. This way, the bamboo petals will be lined up.

Then you can separate the sections 1-3. Measure how much space you have at the top between the lines. You can add a maximum of twice as much volume for the bamboo petals. Otherwise, they will overlap.
There will be a bamboo petal at the c-front, so start by adding half of its volume there. In the illustration below, I used my personal measurements. These might not work for you. They are just to give you an idea.
Slash and spread at each line, from top to bottom, by the required amount and tape paper to cover the gap, leaving some extra at the top. Fold the bamboo petals like box pleats, bringing the two sides together and flattening the volume evenly on both sides. Have a look at this video by Maestro himself to see how. The design is different, though.
Cut the excess paper off with the bamboo petals folded to get the correct shape at the top.

Add another complete bamboo petal at the side seam, too. When your pattern piece is ready, the outer edge should not exceed the starting point (see the lines above). Otherwise, you won’t be able to cut these on the fold.
Here are the final pieces. Just the first layer will be cut twice for the back because there will be a zipper. Fold the first bamboo petal away completely when cutting the back piece. The zipper will replace it.
You’ll need to cut a notch at each fold, that is, four notches per petal at the top. And another notch at the tip of the petal.

A little P.S. for the side seam: only the front piece will have the bamboo petal. Fold this section away when cutting the back piece. Add seam allowance.

Sewing the Origami Skirt
Here’s a picture I took while cutting the pieces. I added seam allowance to my pattern as I added the volume using tracing method.

I started by pinning the folds, using the notches as a reference.

Then, I closed the side seams before pinning the petals that go on top. Here you can see the situation on both sides, right and wrong. The seam remains quite hidden under the fold.

After this, I stitched the folds in place along the top edge. Here are all three layers prepared.

I cut the lining in cotton because basic lining fabric would’ve been too lightweight considering the brocade’s weight. Here, I closed the side seams. The uppermost layer is open at the c-back, like the main layer.

At this point, I united the two lowermost layers, matching the bamboo petals.

And attached one edge of a straight waistband to the uppermost layer’s waist. There was no pattern for the waistband; I just cut a straight piece of the correct length and width.

Before attaching the first layer to the rest of the skirt, I attached an invisible zipper to the c-back. I then sewed the lining to the opposite long edge of the waistband and attached it to the zipper.
I left a seam allowance below the zipper so I could more easily sew the first layer to layer 2.

After this, I could unite the skirt pieces, the lining first, and then the main layer.

The final steps were to fold and close the waistband, sewing the two layers together near the previous seam. And closing the hem. I just folded the seam allowances inside and stitched near the edge.

And so the Origami Skirt was ready! I was so happy to see it holding shape on its own.

Here’s me with my new special skirt.

So these were just some examples. You’ll find plenty of other skirt patterns here at my blog. 🙂


2 Comments
Great content and demonstration. Thanks
You’re welcome. 🙂