

The circle skirt tutorial is the most popular post I have ever published, and it seems it won’t be falling off the podium any time soon. It’s also the only post about circle skirts I have on my blog. So, I decided to write a new tutorial, featuring this 3/4 circle skirt I recently made for myself.
It’s a fusion between two skirts: This one with scalloped pleats and a skirt I’ve featured in this tutorial. The denim skirt is rigid, so I wanted to make this skirt more like the one with scalloped pleats. And that’s where the circle skirt comes in. The technique used here is contoured tucks.
I find the full circle skirt too voluminous, but I still wanted more flare than what a half circle can provide. That’s why I picked the 3/4 circle.
3/4 Circle Skirt Pattern
To avoid needing to refer back and forth between this and the circle skirt tutorial, here’s how to draft a 3/4 circle skirt pattern. However, if you want to read about circle skirt basics, you can find them in the said tutorial.
As you know, there’s no need to use a basic skirt block for circle skirt patterns. Instead, you need to make a calculation to get the correct waist measurement for your skirt.
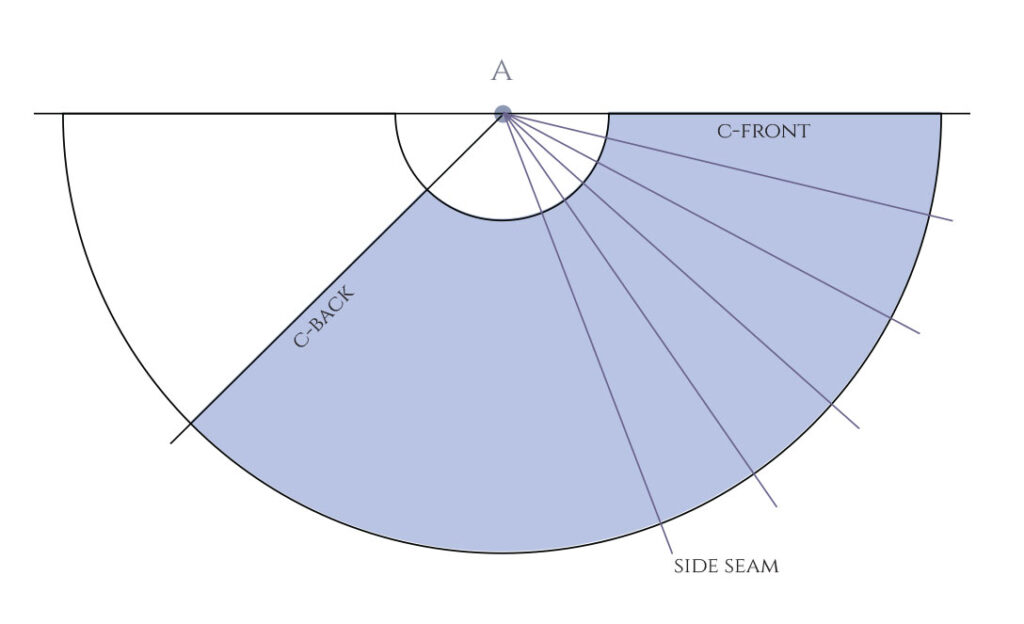
Here it is. To calculate the A-B radius to draw the smaller circle (=the waist), start by dividing your half waist circumference by 3,14.
For example, if your waist is 74cm, divide it first in half: 74cm /2 =37cm. And then by 3,14: 37cm /3,14 =11,8cm
Now, let’s divide this number by 3, to get one third: 11,8cm /3 =3,9cm.
Finally, unite the two: 11,8cm + 3,9cm =15,7cm
This is the A-B radius to draw the waist of the skirt, as shown below.

B to C is your desired skirt length. For example, my skirt hem remains slightly above the knees. Draw the hemline using a measuring tape or a ruler.
This pattern covers just half of the skirt, so you’ll need to cut two of these pieces.
Adding Contoured Tucks
Now that we have the base pattern, we can add the contoured tucks. Start by planning how many rows of tucks and what shape you want them to have. As the skirt will be symmetrical, there’s no need to prepare more than half of your pattern.
The lines represent the base of each tuck. Distribute them evenly. Start by dividing the waist. Then, draw lines starting at point A, passing through the points you marked at the waist, and finishing at the hemline.
Next, plan the tuck shape. Mine is a zig-zag line that grows larger towards the hem. You can draw a guideline first (see the green line).
Measure the shape’s widest point once you’re happy with it. Just a heads-up: The wider the shape, the more fabric you’ll need for your skirt. The tuck allowance will be twice this measurement.

Trace the shape onto basic printer paper to create a template you’ll use for sewing.
Finally, add the tuck allowance at each line at a right angle. Additionally, there is a half-tuck allowance at both ends. The short edges remain straight.
Mark the midpoints. At the top edge, also add notches at both edges of the tuck allowance if your shape
grows towards the hem. You’ll need them to pin your template at the correct point.
There will be a zipper at the c-back, and you need to “empty” the tuck allowance after cutting the piece. So, just mark where the zipper ends on your pattern.

This skirt will have a straight waistband. Draw a rectangle using the skirt’s half waist measurement and 2x the desired waistband height. The maximum height for straight waistbands is 3+3cm.
You can divide the skirt pattern into more pieces along the center of the tucks if you have trouble fitting it onto your fabric. (Remember to add seam allowance then.) I ended up having to separate all the sections, as I had the fabric before drafting the pattern!
I finished the hemline with a bias tape. You can also trace a hemline facing, but you need to do it before adding tuck allowance.
Sewing the Circle Skirt with Contoured Tucks
I was considering making the skirt from denim, but in the end, I couldn’t find non-stretch denim in the weight and color I was looking for, so I opted for cotton gabardine instead. I found this beautiful blue-grayish(?) shade.
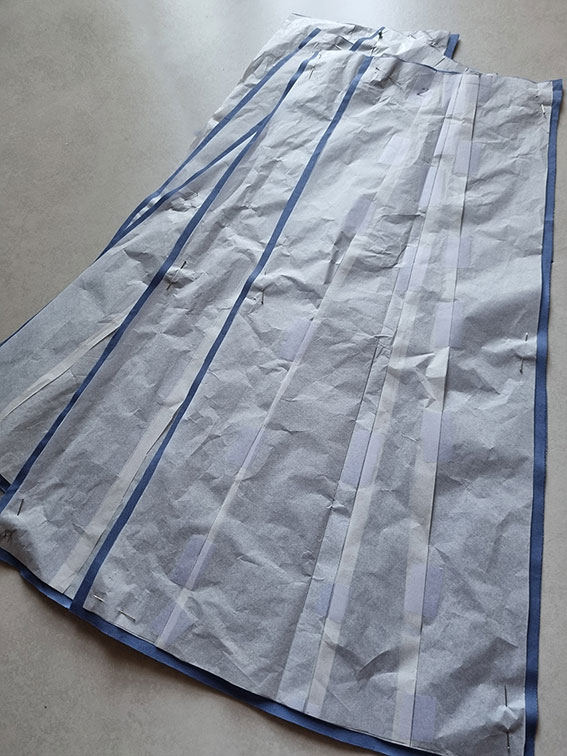
Here’s just half of the skirt pieces. As you can see, all the sections are separated, and I added a narrow seam allowance to the long edges. Also, the hemline has a narrow seam allowance for attaching the bias tape.
I was a bit annoyed having to separate the sections, as it kind of ruins the idea of the contoured tucks.
I emptied the tuck allowance to leave room for the zipper at the c-back. This area covers the first two zig-zag shapes.
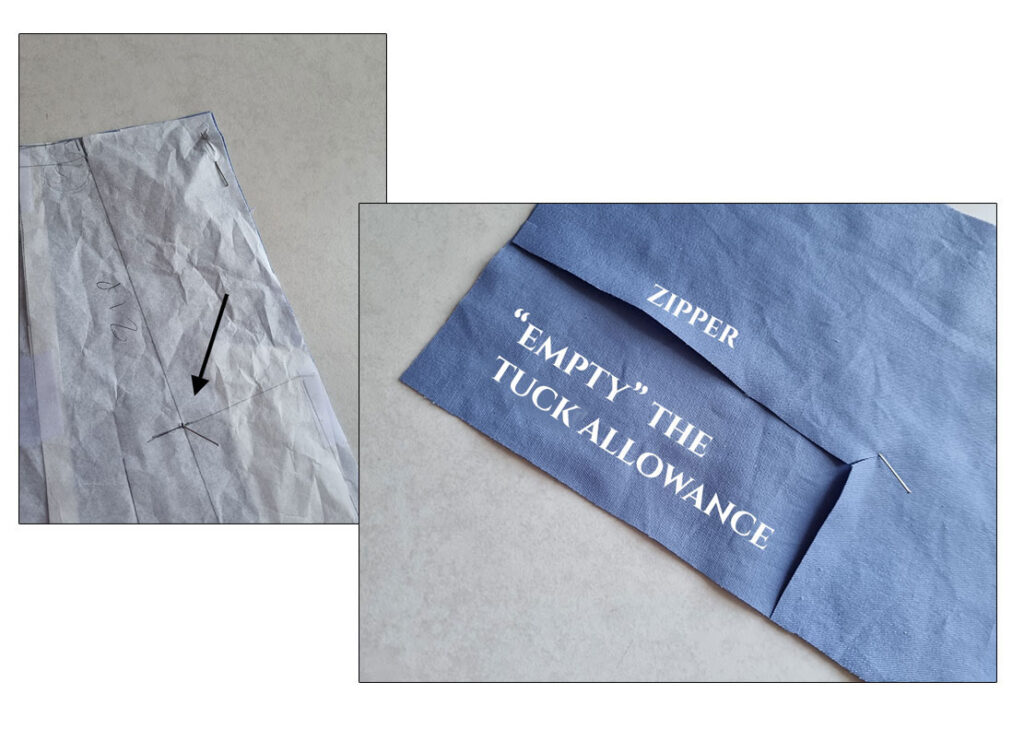
As I had separated all the sections, I started by pinning them back together in the correct order with a few pins, right sides together, leaving the c-back seam open.
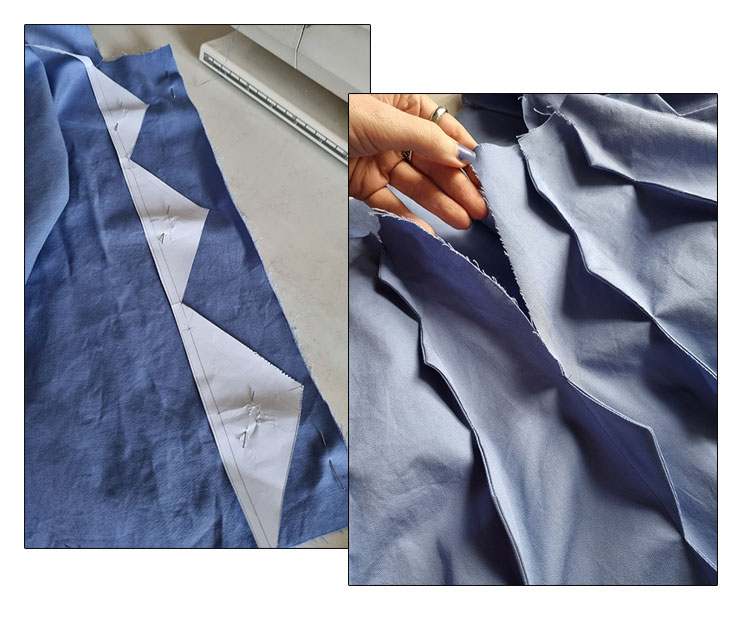
Then, I placed the template onto the first seam, aligning the top edge with the notches at the waist, and the bottom edge so that I only had a seam allowance above the last triangle tip.

The Contoured Tucks
With the template in place, I could then sew the zig-zag shape.
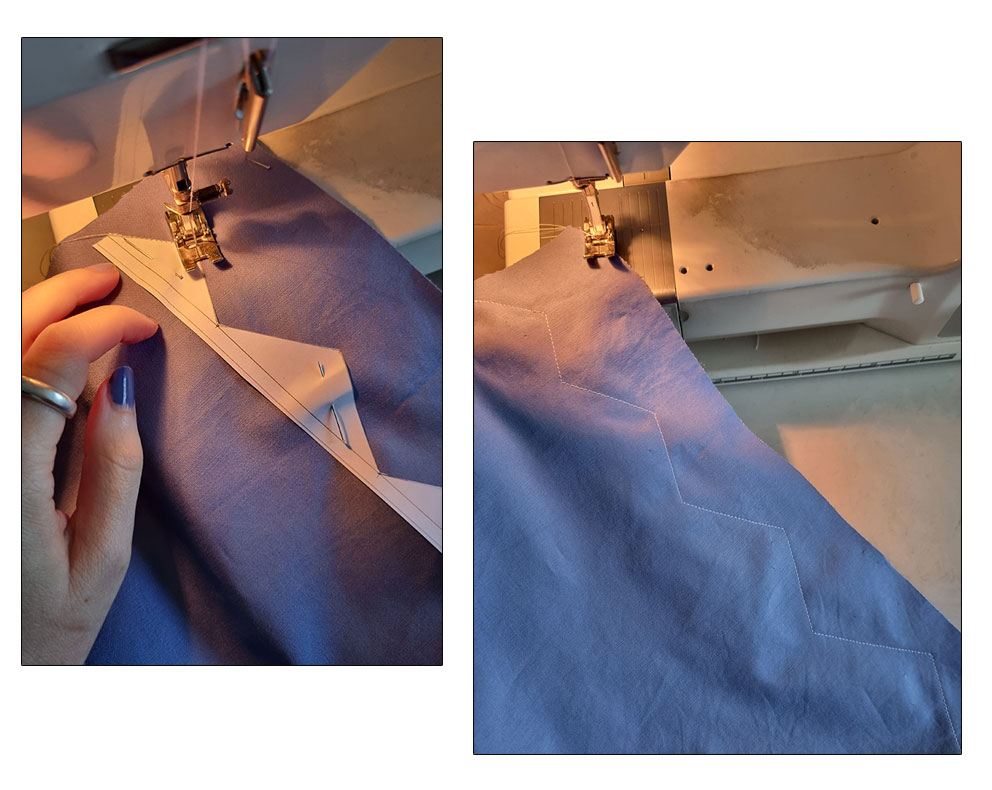
You can sew all the tucks in one go and then trim off excess fabric—some extra around the tips. Make cuts at the corners and at the start and end points of the tucks, so you’ll free the waist and hemline seam allowances.
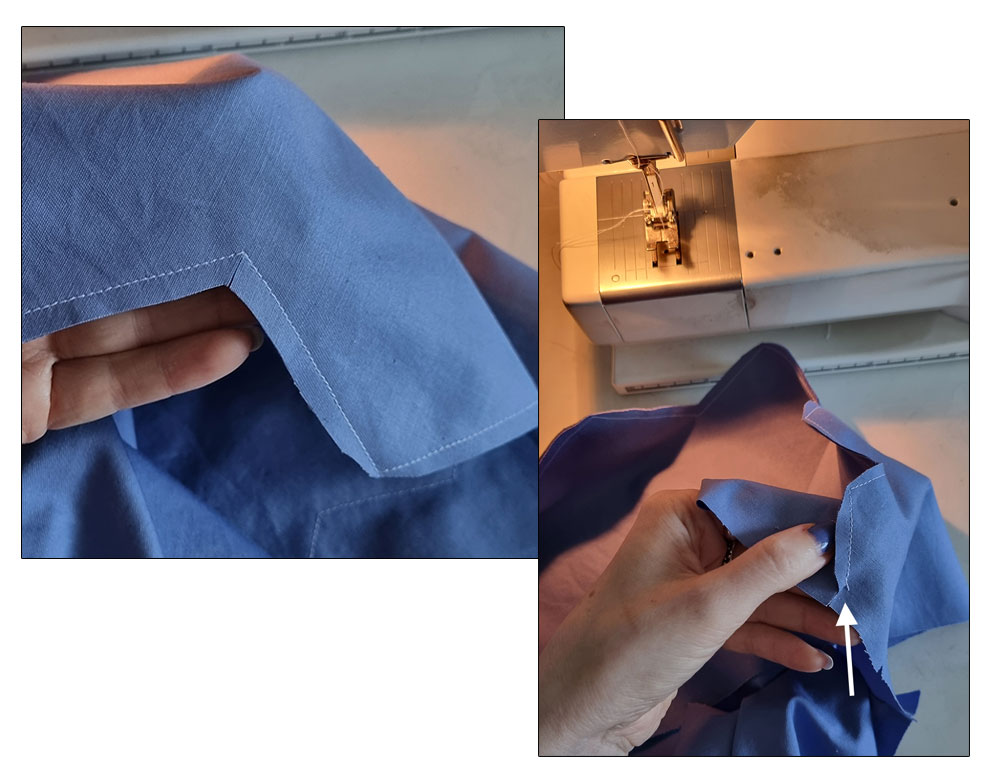
Then, turn the right sides out and press the tucks flat.
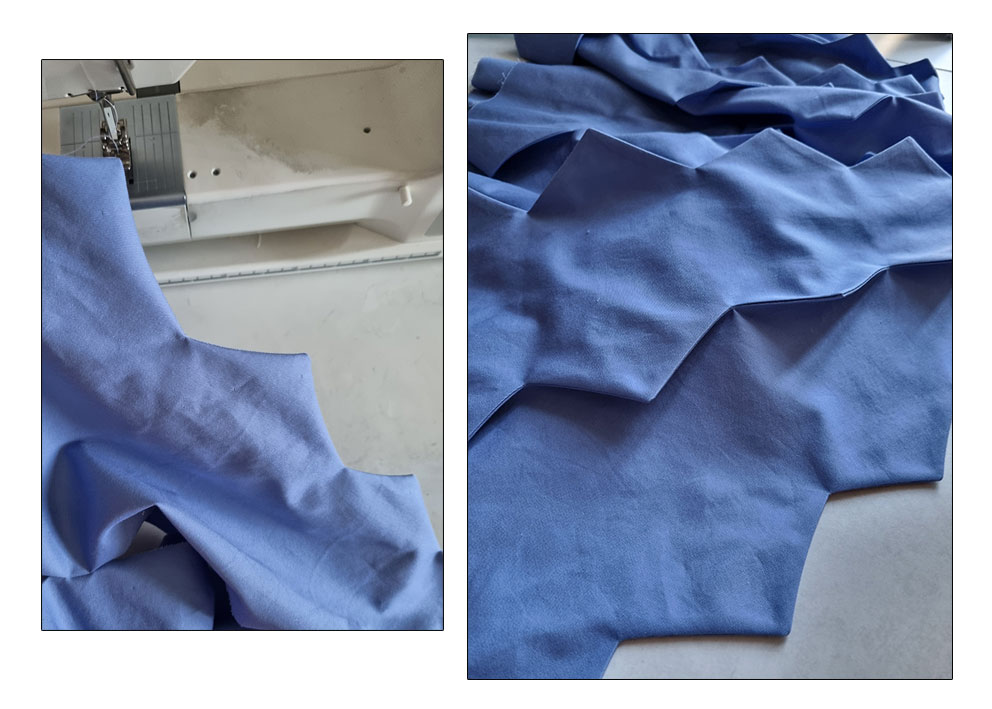
Contoured tucks will also need to be stitched at their base. You can eyeball this, especially with the smaller shapes. Or use a piece of paper as a guide, for example.
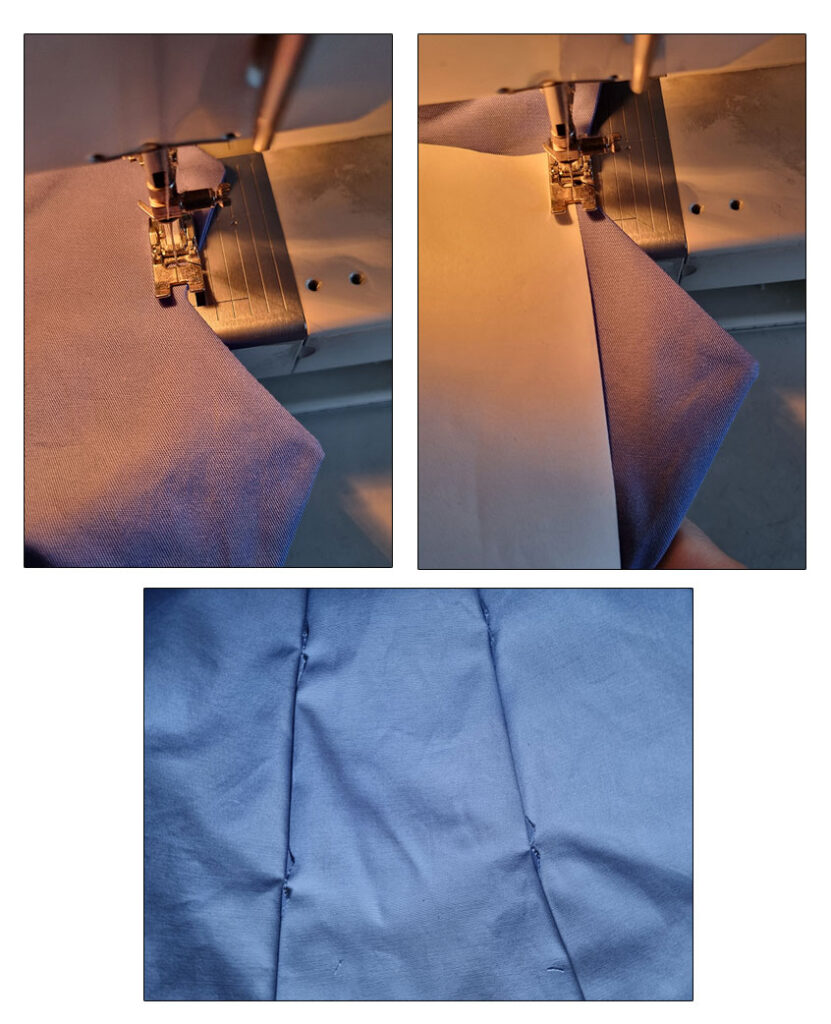
In case you were wondering if there is a need to serge the seams, the image above shows how much of the previous seam allowance will remain visible.
Here are the completed tucks.
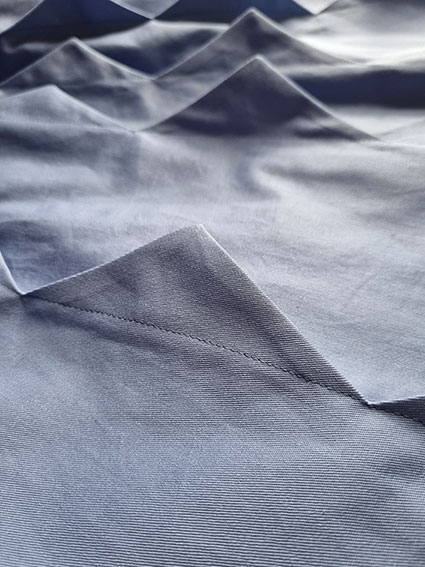
Now you can close the c-back seam by sewing the remaining tucks below the zipper. Place the template so it’s aligned with the endpoint of the zipper seam. Finish these in the same way as the other tucks.
The Waistband and Zipper
At this point, you can attach one edge of the straight waistband to the waist of your skirt, right sides together. I didn’t have any fusible interfacing, so I simply added an extra layer of cotton.
Mark the midpoints of your waistband and your skirt’s waist so it’s easier to distribute the lengths while pinning.
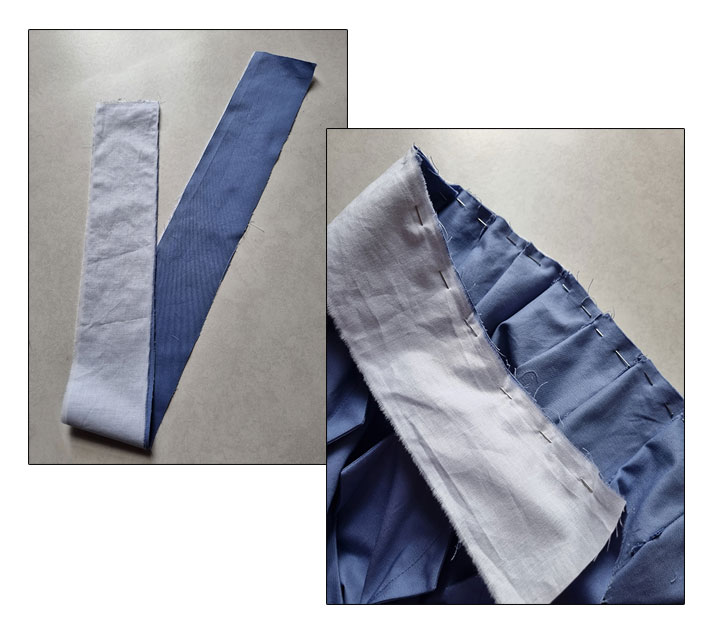
Sew the waistband and then press the seam allowance towards it. Also, press a crease in the middle of the waistband at the c-back on both sides. This will help you pin the zipper at the correct point. Finish the edges with your preferred method before attaching the zipper.
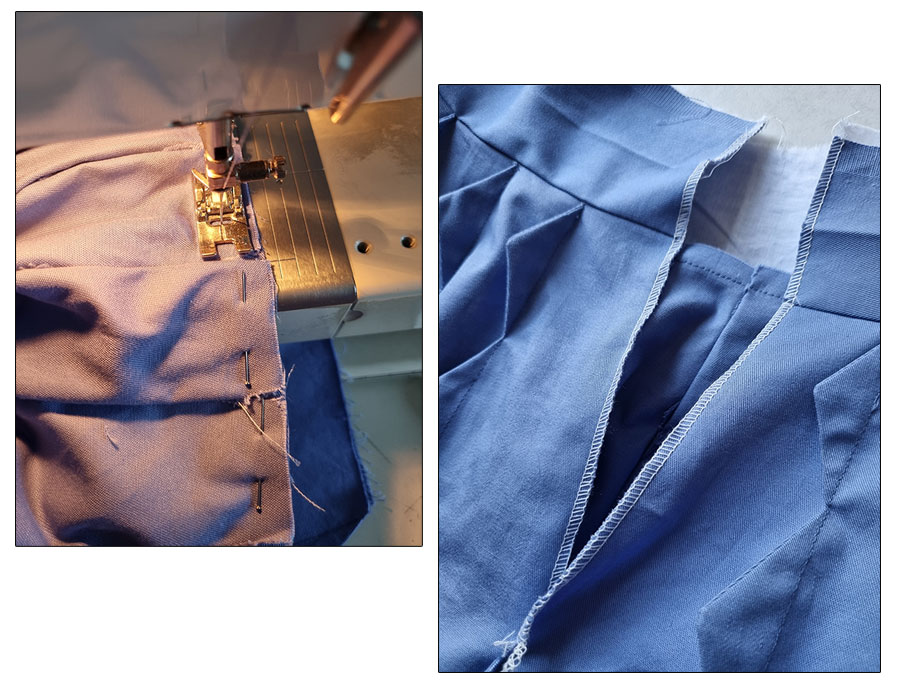
I added an invisible zipper. Here’s my workflow for attaching it:
First, I pin one side, right sides together, placing the top stop of the zipper slightly below the crease I pressed to the waistband. I sew this with an invisible zipper foot.
Then, I close the zipper and pin the remaining side. I baste it and check that the two sides are aligned before finally sewing it in place.
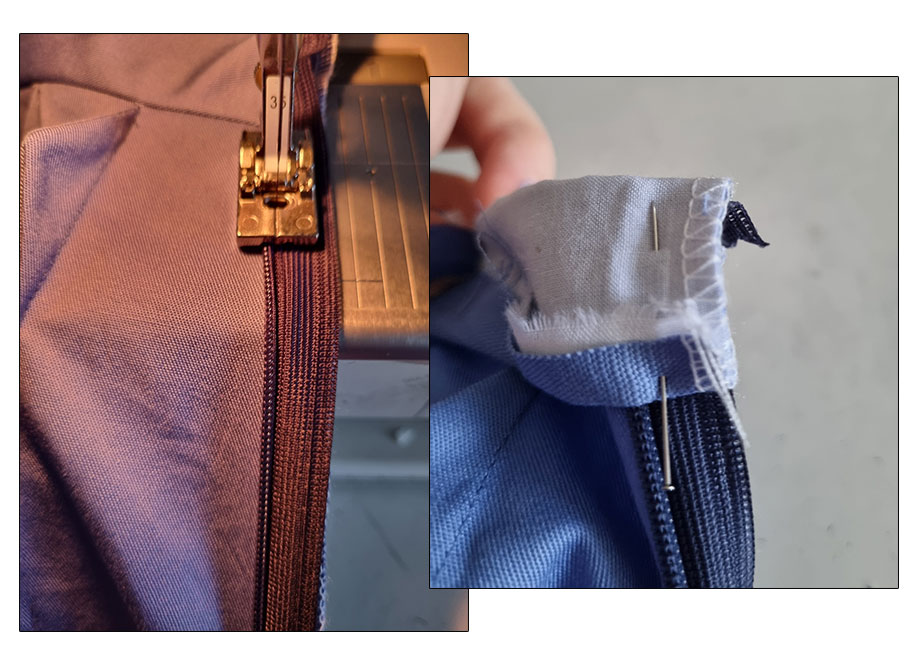
If your skirt won’t have a lining, you can now attach the short edge of the waistband to your zipper, right sides together, folding it as shown above. Use the regular zipper foot.
If you do want a lining, you can draft a basic flared skirt pattern for it, using the same waist measurement as your circle skirt. Sew the lining and then attach it to the remaining long edge of your waistband (see the arrow), right sides together. Do this before sewing the short edge of your waistband to the zipper.
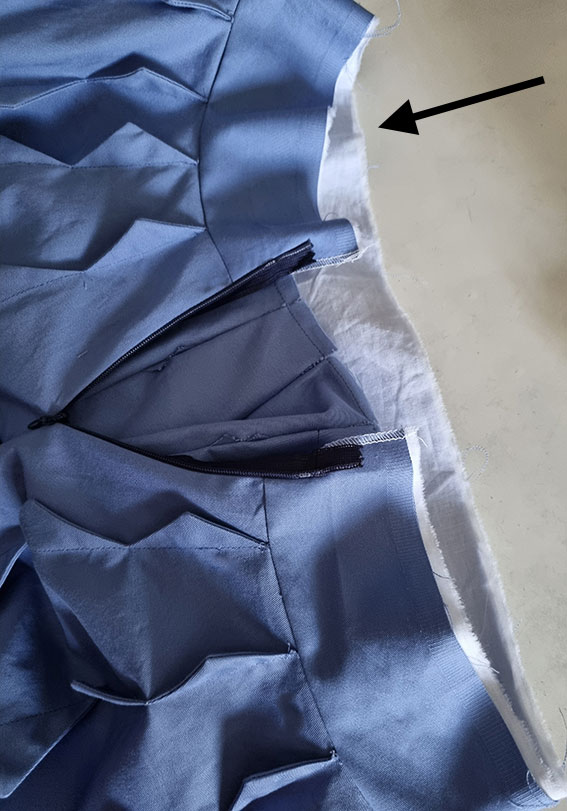
Then, depending on whether you have a lining or not, either fold the waistband in half, matching the seams, pin and sew the two layers together. OR, just fold the waistband’s remaining seam allowance under and topstitch. You can refer to this tutorial, for example.
The Hem
As mentioned, I used bias tape to finish the hem. I happened to have a roll of black bias tape, so I used that. You don’t need to pin it before sewing. Just the starting point.
Sew the right sides together.
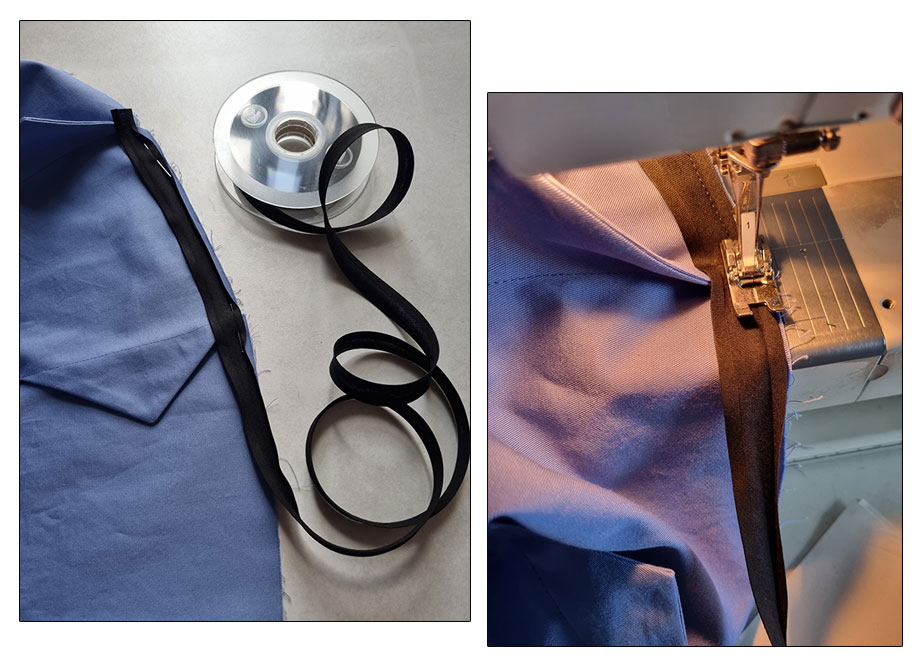
Press the bias tape towards the seam allowance and then to the wrong side. Because of the contoured tucks, you’ll need to hand-stitch the remaining edge.
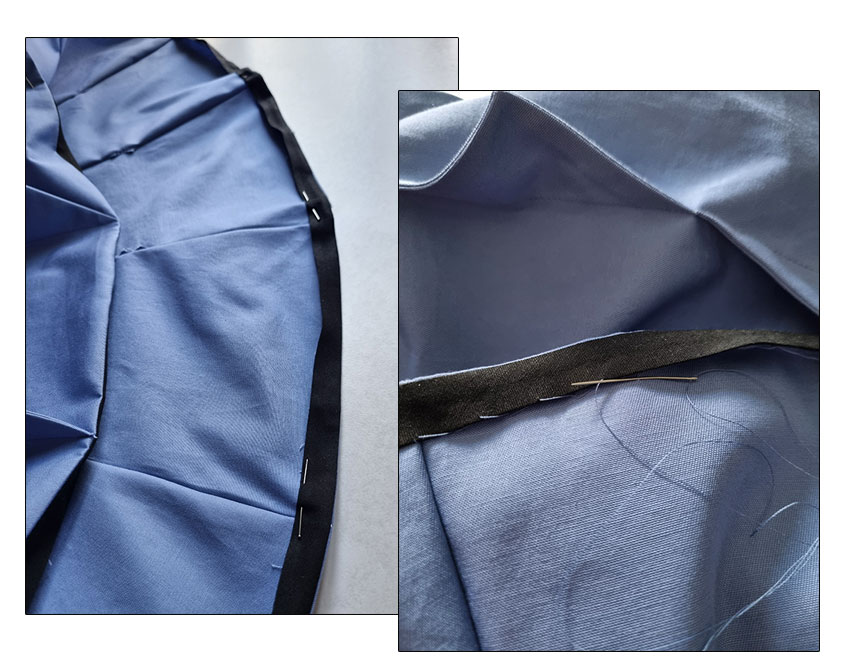
I kind of like the bias tape finish, as it gives some extra structure to the hem as well.
The Look
It’s time to reveal the resulting look! Mannequins first.
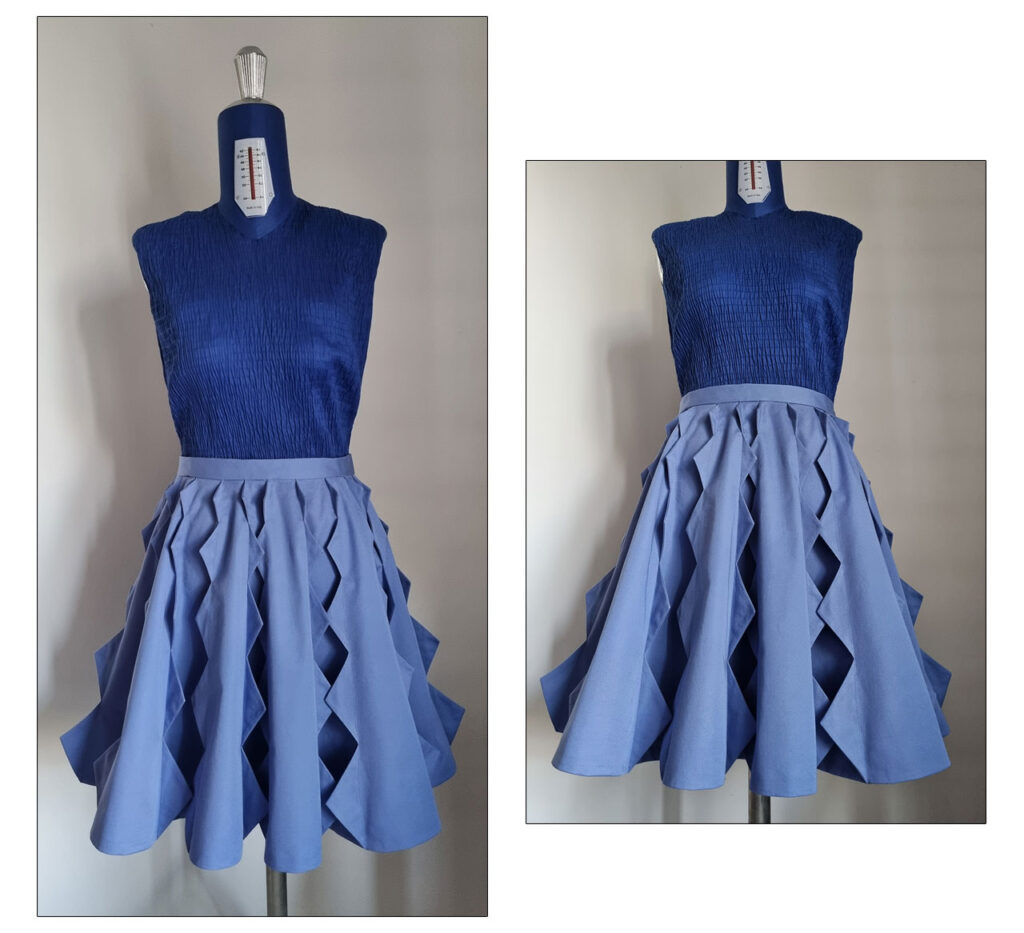
And then myself. This color looks nice with black. 😀
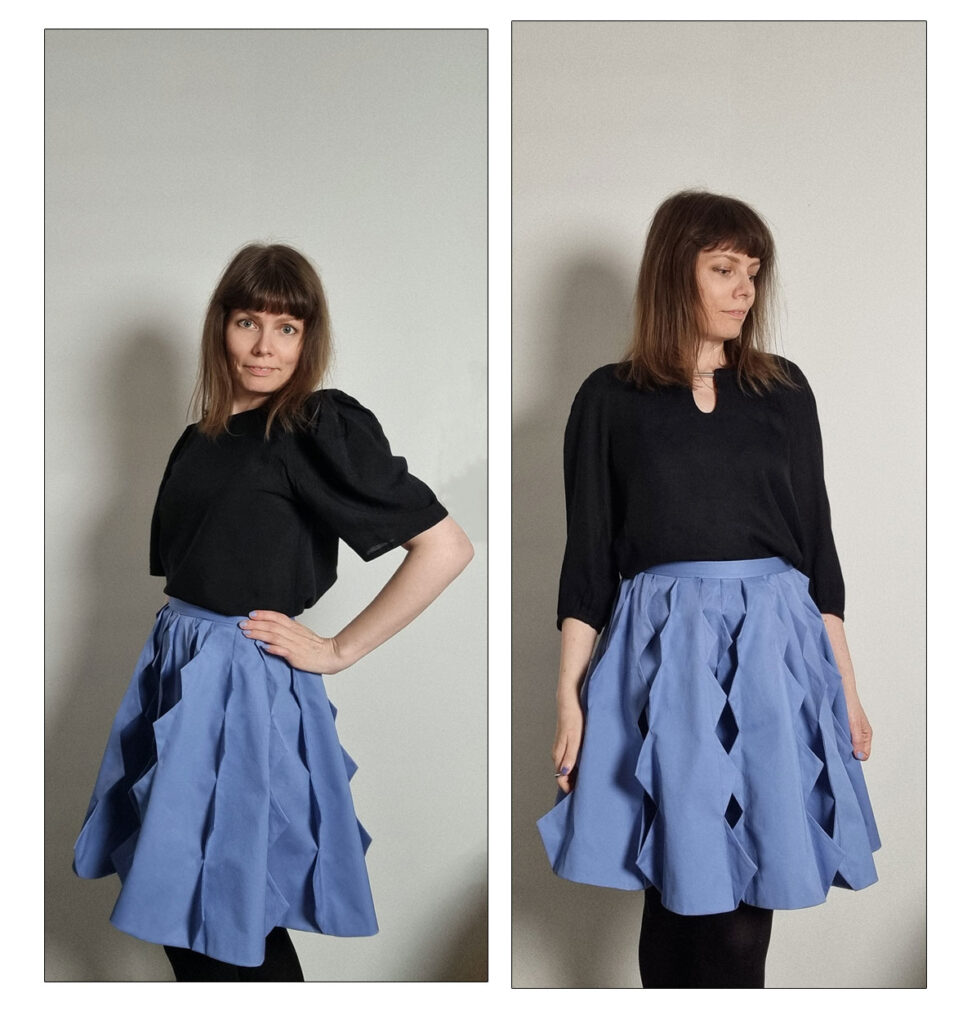
This was quite a time-consuming project, but I think it was worth it. I had 2 metres of fabric, which turned out to be insufficient without separating the sections. So, it’s also a fabric-consuming project.
The vibe is rather similar to my scalloped pleats -skirt. It’s even easy to iron, strangely enough!


