Continuing with the skirt pattern alterations, this time I’m going to write about the flared and pleated skirts.
If you don’t have the basic skirt block, you’ll find the instructions here. Or you can download the half scale basic skirt pattern from the side panel.
There will be more color, as I figured I could use my fabric scraps to make the example skirts in half scale.
Gathered skirt
Probably the easiest one of the flared skirts is the gathered skirt. You could even just cut a large rectangle without any pattern and gather that, but you’ll get a better result by doing like this:
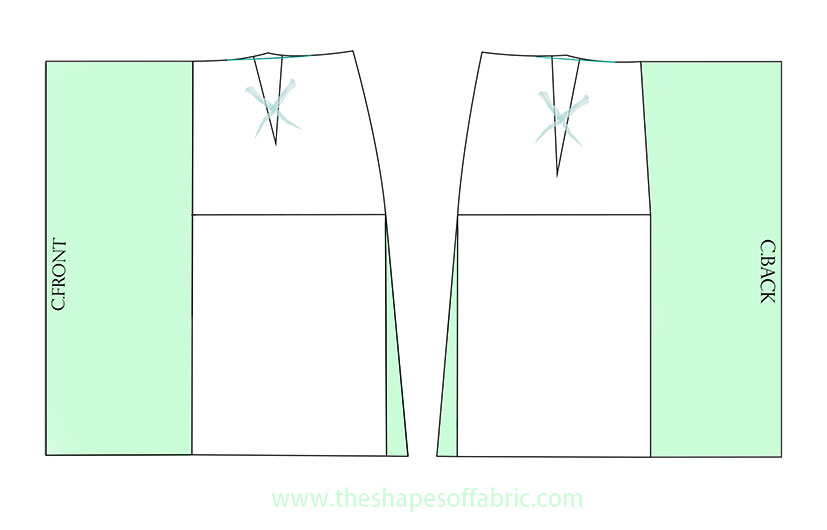
Just ignore the darts and add as much volume as you like to the centre front and -back of your pattern. I just doubled the waist measurement. Also, you can add a bit of volume towards the hemline at the sides.
In this case, the straight waistband works just fine. I wrote about waistbands in the previous post.
Here’s how my skirt turned out:
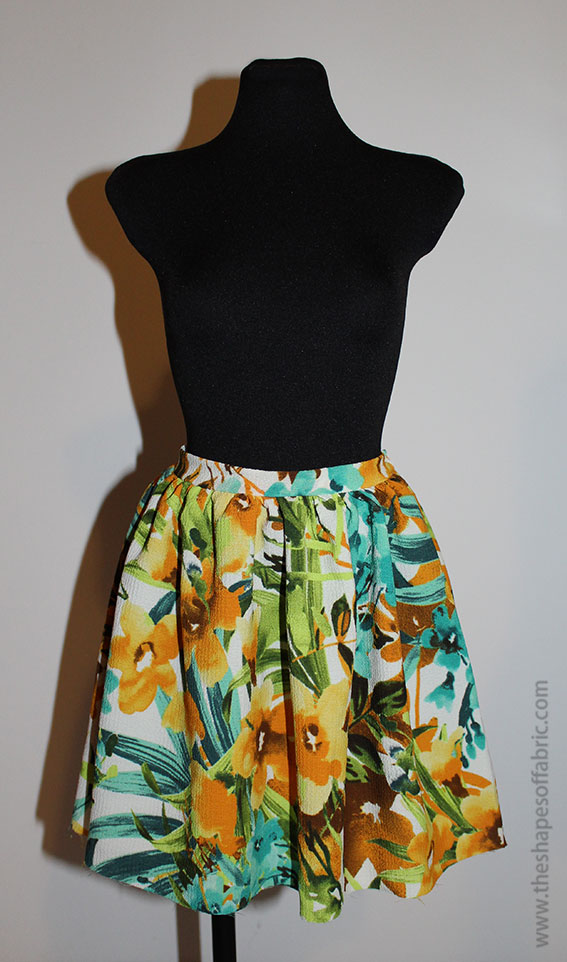
As you can see, this type of skirt creates bulk right below the waist. To avoid that, you could try the next one.
Flared skirt
This is a version of the A-line skirt. It just has more volume.
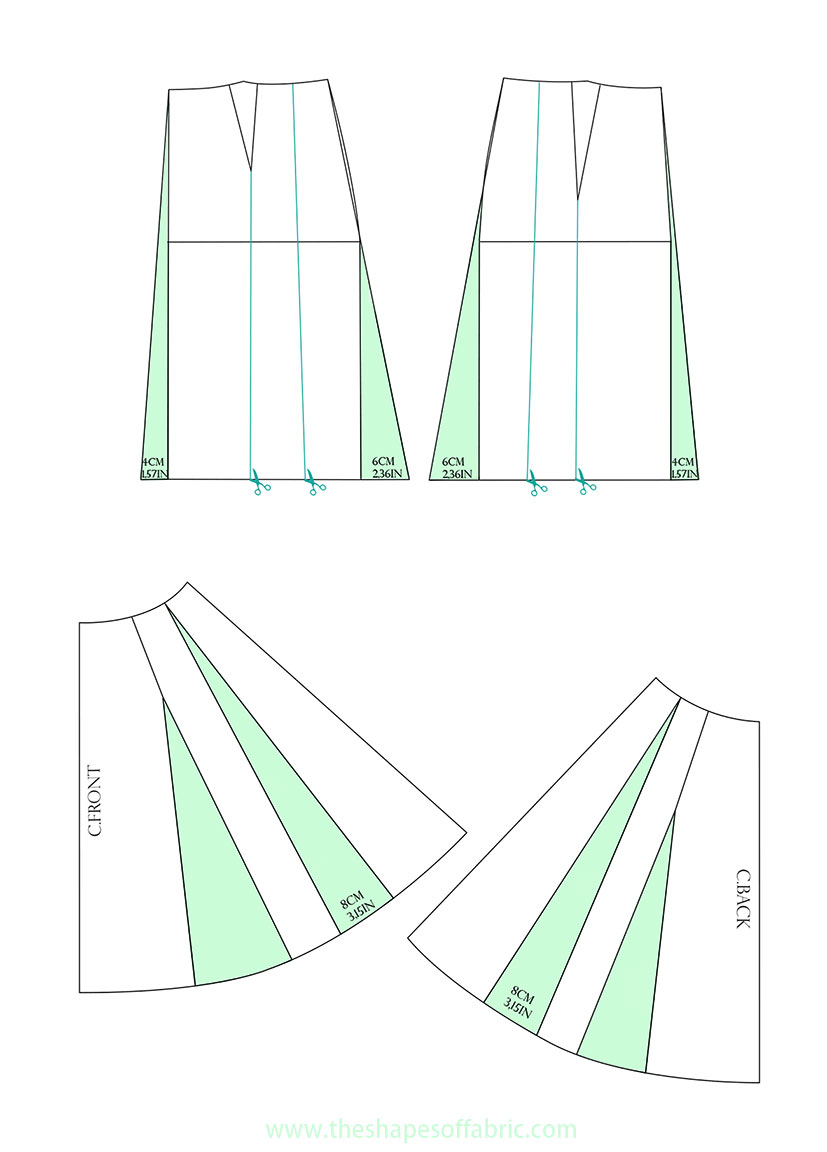
You start the pattern the same way as an A-line skirt: close the darts and open the volume at the hemline. Then add some more volume to the centre front and -back, more to the sides and finally also in the middle with the slash and spread method.
The amounts I added are just examples.
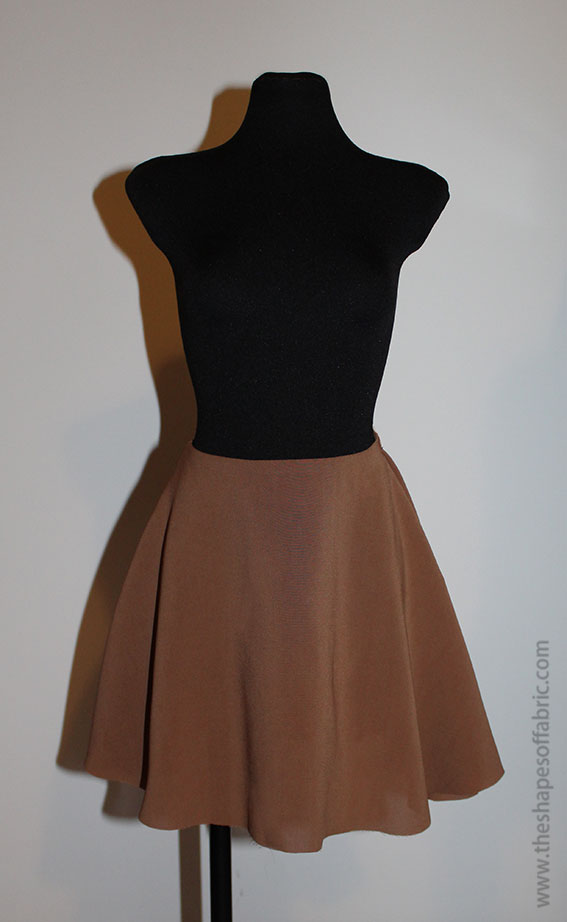
I decided to finish the waist seam with a facing.
Flared yoke skirt
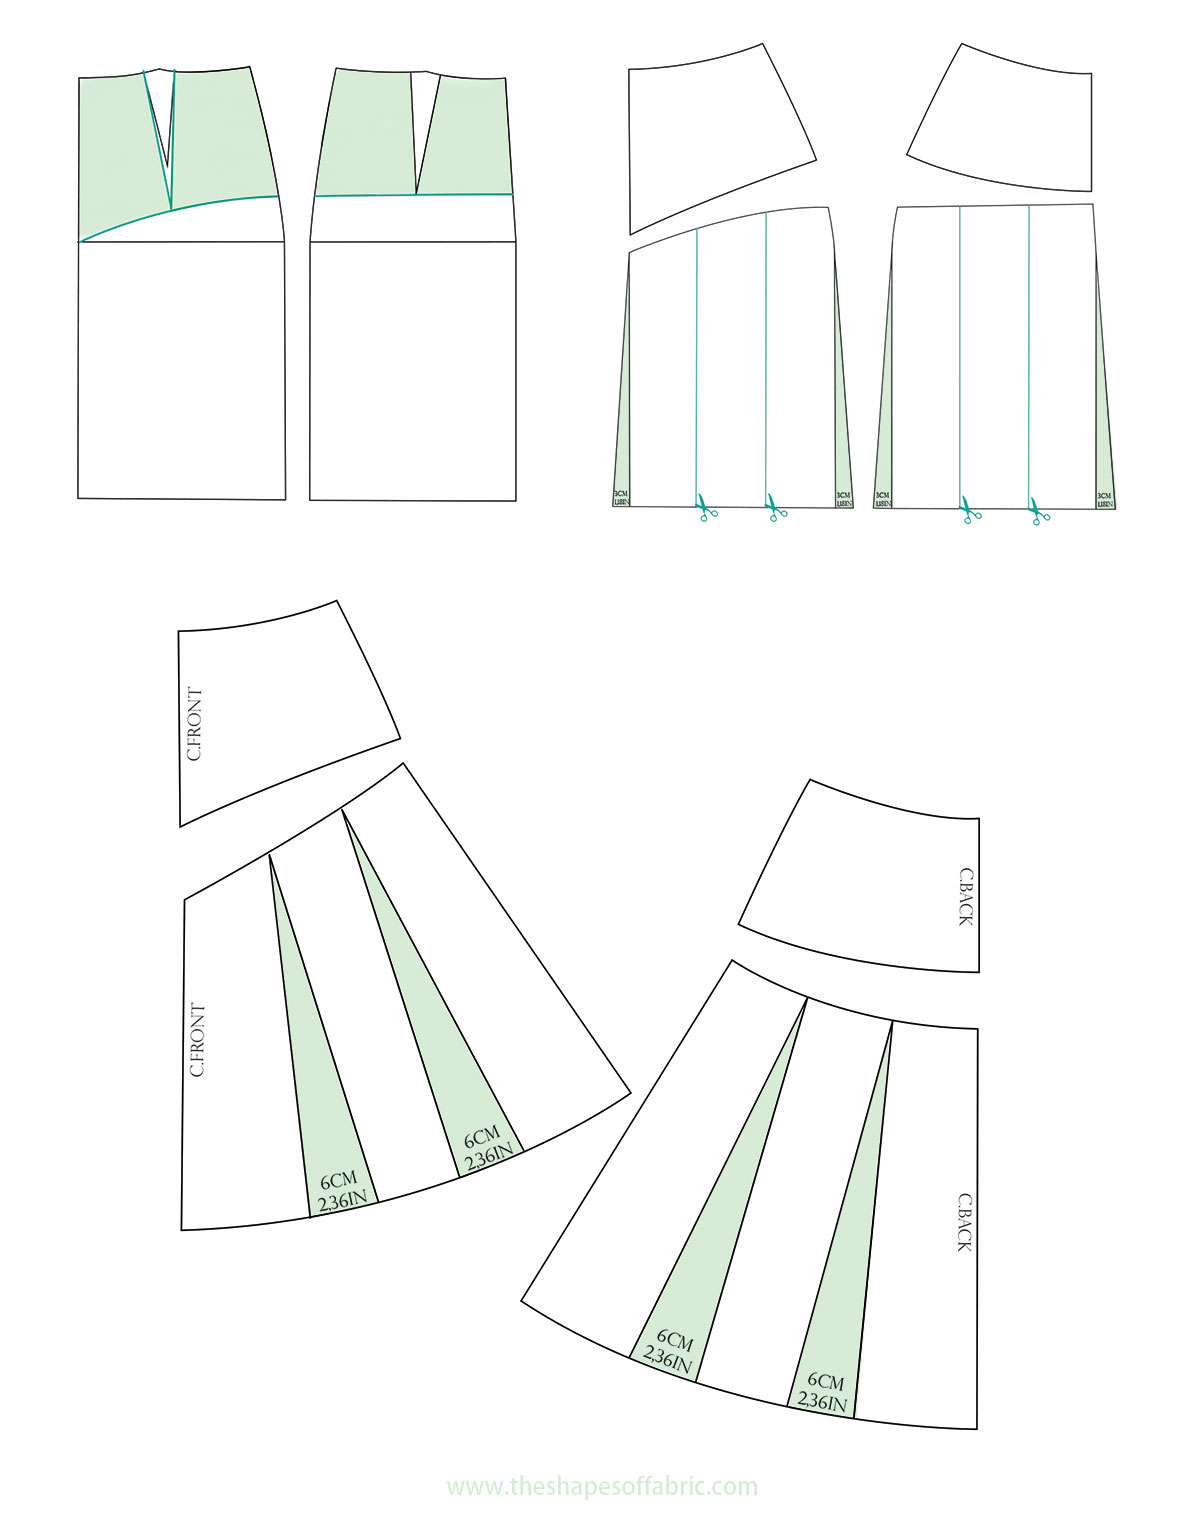
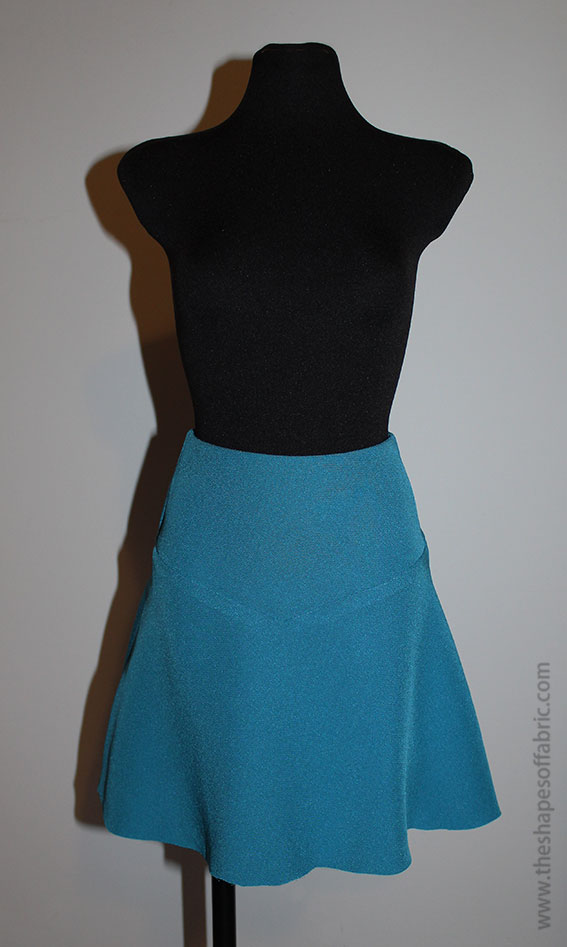
Here’s a slightly different version of the yoke skirt from last time.
First separate the yoke as normal, and then add volume with the slash and spread -method to the remaining part.
I realize all the numbers don’t show well in the drawing. It says 3cm/1,18in, but you can add your own amount anyways.
I cut the yoke twice to get a facing, too.
Gypsy skirt
Before moving on to the pleated skirts, here’s another gathered skirt, namely a gypsy skirt.
You’ll only need your basic skirt pattern to draft the uppermost part, which would be like a yoke. The rest of the pattern is just rectangles you can cut directly in fabric without a pattern. But you need to make the calculations first.
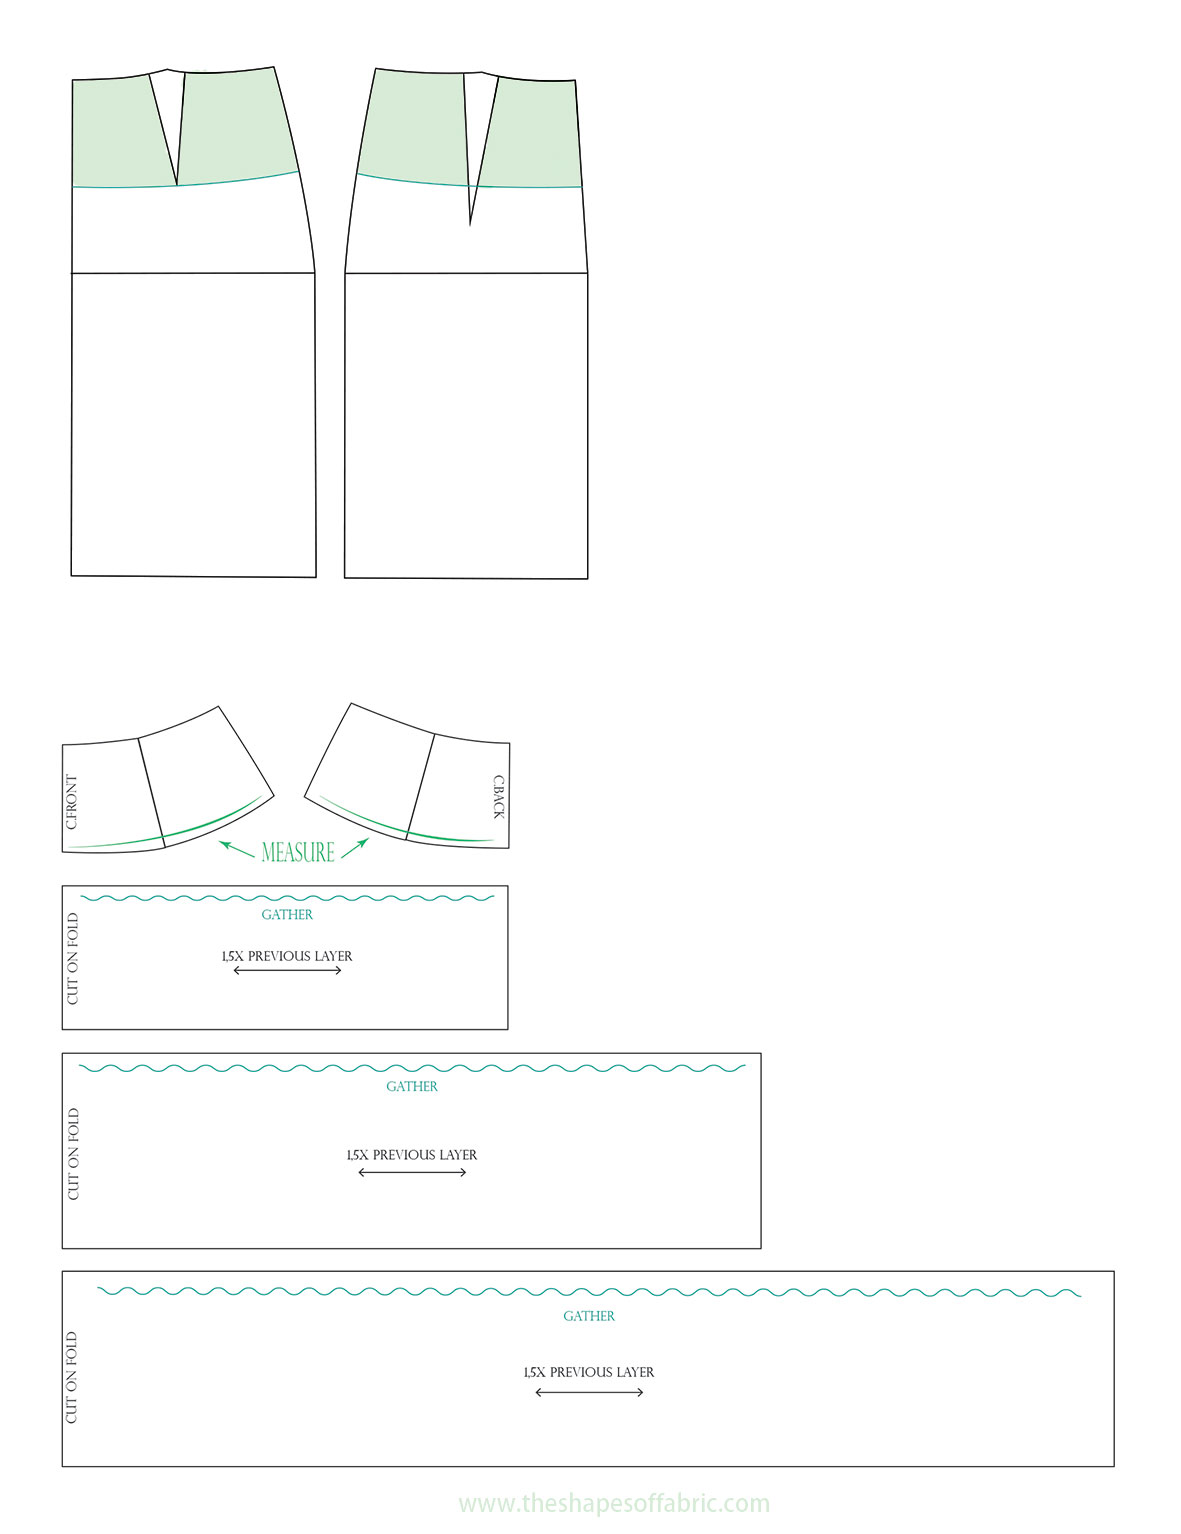
Make the yoke in a desired width and close the darts, smoothening the pointy bits. Then measure the lower end of both front and back pieces.
Decide how many layers your skirt will have and how wide each section will be. They don’t necessarily have to be all in the same width. Remember to add seam allowance.
In my example the first layer is narrower than the other two. Also, decide how much to gather. It could be 1,5x or 2x the measurement for example.
Once you have decided all this and measured the yoke, you can calculate the length of the layers. So each layer is x times longer than the previous one where it’s going to be attached.
Here’s my version. Never mind the fabric! 😀

Single box pleat skirt
There are different types of pleated skirts and I’ll show you a couple of them. Let’s start with one box pleat at the centre front and -back.
To make it look nicer, I did an A-line skirt version. This means the skirt will have no darts.
Otherwise all you need to do is to add half of the box pleat volume both front and back. In this case the zipper will be on the side.

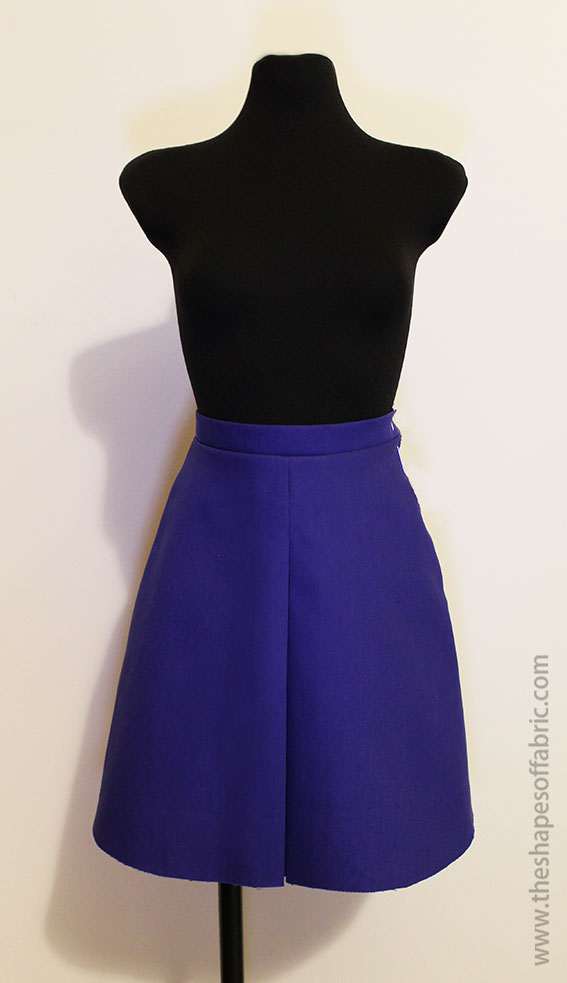
The box pleat kind of makes this skirt look like culottes.
Two box pleats
In this version, the pleats will be placed exactly where the darts are.
Just cut the pattern in half like in the drawing, following the dart lines at the upper part. Then add the desired amount of volume in the middle.
Mark the centre of the pleat from the hemline upwards. You might notice that the upper part won’t be symmetrical, so adjust that without changing the original width.
Cut the waistline with the box pleat folded.


If you want 3 box pleats, you can make a mix of this and the previous pattern.
Pleated skirt
Okay, this time I mean fully pleated skirt. Knife pleats all around.
This is a more complicated pattern to explain. But let’s see.
Begin by copying your basic skirt pattern, ignoring the darts. Just measure their width.
Maybe add a bit of flare to the side, which always looks nicer.
Divide the skirt into equal parts. This is where the pleats will be. Calculate that there has to be enough room between the pleats so that the folds won’t be overlapping (which would cause bulk).
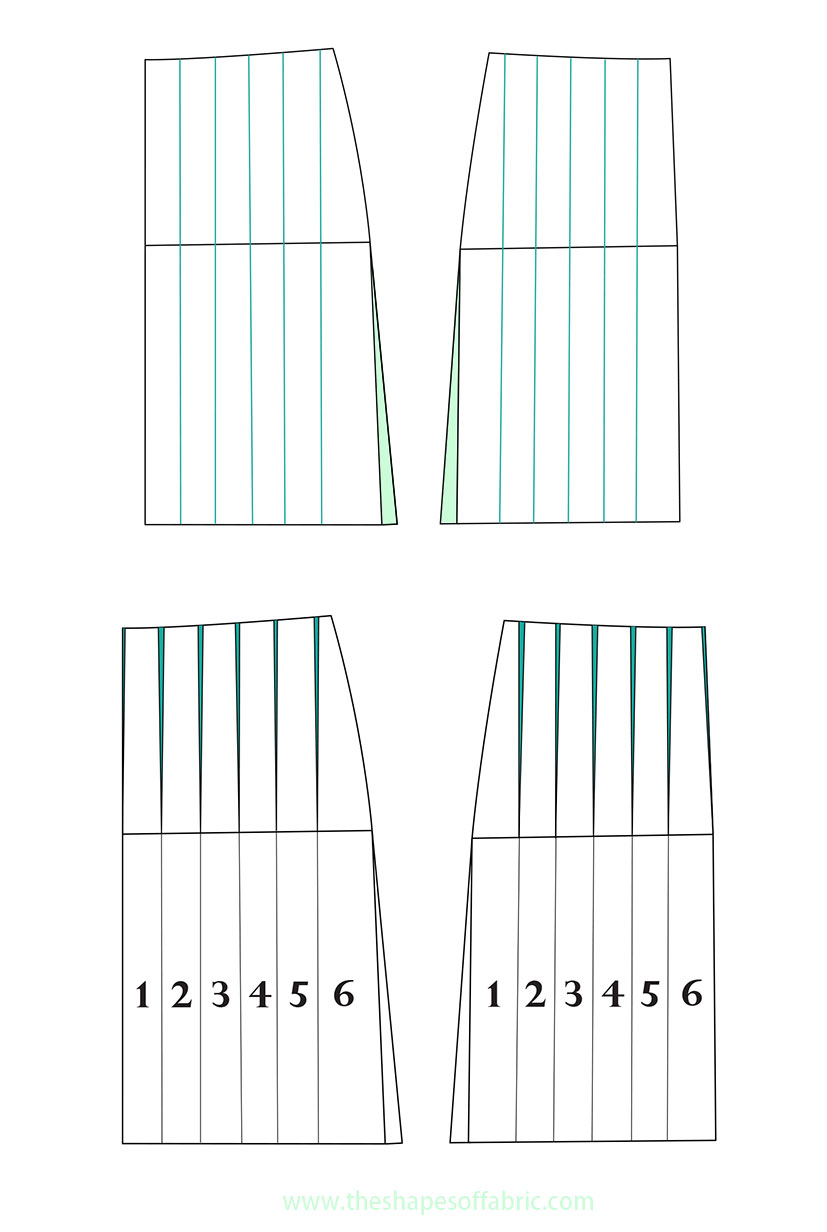
From this point on I’ll explain the front piece only, as the back is practically the same. This time I’m going to use cm only as we’ll be dealing with tiny measurements.
Also, notice, that it’s a good idea to work on the full front piece, instead of half a front. You can mirror the piece with all the lines you drew.
So now you’ll need the measurement of the front dart. In my case the dart was 3cm.
Then count your pleats. How many pleats do you have on the whole front piece? There will be a pleat also at the centre front. I have 11.
There are two 3cm darts, which makes 6cm in total. The idea here is to divide the volume of the darts between the pleats. So 6cm /11=0,5cm.
This means I have to add a 0,5cm tiny dart around each line, ending at the hipline. Notice that at the centre front there’s only half a dart: 0,25cm, unless you’re working on the whole front piece.
Your result might be different, depending on the amount of pleats and the size of the original dart.
Number the sections.

Remember how to add pleats? Check out this post if not.
Take another piece of paper and start copying the sections, adding the amount of volume you want in between. I added 6cm / 2,36in to get a 3cm / 1,18in pleat. The numbers of the sections should help you keep track.
From the hipline upwards the volume will be slightly bigger, as there are also the little darts that will remain inside the pleats.
Cut the waistline with the pleats folded. This is why you should work on the whole front piece: the dart allowance shapes are slightly different on the right and left halves when all the pleats are folded in the same direction.
At the centre back the pleat starts just under the hipline, because there will be a zipper. Alternatively, you can add the zipper at the left side seam.
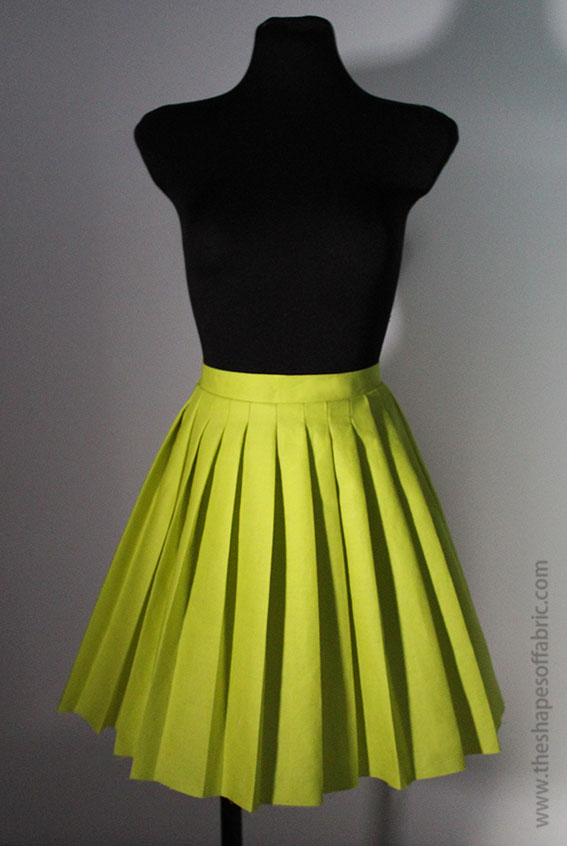
I think I covered the flared and pleated skirts pretty well with these. If you prefer more fitted skirts, next tutorial will be about those.
I’ve started a board about skirt ideas on Pinterest. I’ll be adding new pictures to it quite frequently, so go check that out for inspiration!


45 Comments
These posts are awesome thank you
You’re welcome. 🙂 Yes, it seems people really appreciate learning about patterns.
You’re very easy to understand. Thank you so much!
You’re welcome. 🙂 It’s exactly what I’m trying to accomplish here, so I’m happy to hear that.
I luv skirts. Made mistakes in drafting various styles. Thank you so much. You made it easier and solvable.
Glad to hear that! 🙂 You’re welcome.
Amazing draft and finishing, am going to try them.
Thanks! 🙂 Happy sewing! Enjoy.
Thank you so much, your explanations makes looks effortless
You’re welcome. Skirts are pretty easy to draft, so you’ll be quickly rewarded for your pattern making efforts. 🙂
I just stumbled on your tutorials and I must say that they are wonderful. Thank you for this. I want to learn to make the basic patterns. Can you help, please?
That is always nice to hear. 🙂 And it’s awesome that you are interested in learning to draft patterns. For now I have only created a tutorial on the basic skirt pattern. For the others, you can look for some basic patternmaking books, such as those by Winifred Aldrich and Helen Joseph Armstrong.
Thank you so much for sharing
You’re welcome. 🙂
Wonderful 🙂
Thank you! 🙂
Hi Minna,
I really appreciate this tutorial to create the pleated skirt. I’m actually trying to figure out how to create a skirt where the half of it is pleated (half back, half front) and the other part is just simple. I have the feeling the in your example it looks like an A line skirt at the end (although the pattern starts from a straight one). Do you think it’s worth to try to do the ´simple ´ part of my skirt as an A line? tricky question, isn’t it? 😉
thank you a lot if you could help me out.
Hello Hédi! Yes, I think it would look better if you made the plain part of the skirt A line (or even a bit more flared) because the pleats will make the other side flared. The skirt would look more symmetrical that way. 🙂 Have fun!
this post is amazing. I have a couple PDFs that i tried to use for my assignments, didn’t really understand them but this is a lot more understandable.
Thanks so much.
You’re welcome! 🙂 I tried to make the instructions as clear as possible. Happy drafting!
I have a 8m length material. How long flared will I get from that ?
Usually you can calculate twice the desired skirt length to find out how much fabric you need for a normal flared skirt. So with 8m you will get more than one skirt for sure, even if they are floor length. 🙂
Thank you for the excellent instructions. I just made a (doll size) dress skirt with a wide box pleat in the center front. It looks ugly: The “box” gets narrower towards the hem. I want it to get wider. I was looking for solutions and there are so many pleat skirt tutorials that simply say to use a rectangular piece of fabric, and to make all the pleats parallel. Any hip curves are going to push those pleats out of shape. It annoys me to no end that it was so hard to find a tutorial that actually worries about the fit and I was relieved to find yours. Thanks again ❤️
Thank you for your lovely message. 🙂 Yeah, after learning to draft pleats this way, I’ve never looked back. 😀 It also helps if you top stitch them at least a bit at the upper part.
I love your post though am new in this field of fashion but I really want to know more because I love fashion, thank you.
Thank you. 🙂 I hope you’ll be making lots of pretty garments. It’s great that you want to learn patternmaking.
you are talented
Thanks so much! 🙂 I’m flattered.
What an insightful post! Thanks
Glad you liked it. 🙂
Thanks so much for the inspiring pattern tweaks. I’m about to attempt adjusting the skirt section of a dress pattern from A-line to flared to copy a dress which I bought and love. Not sure about the direction of the straight line from base of dart to hem so I’ll follow the grainline. I will use cheap fabric for my first attempt!
That’s fantastic! Don’t worry too much about the correct direction. Following the grainline will work great. 🙂
Thank you so much! this post is incredibly helpful.
You’re welcome. Hope you’ll be making lovely skirts. 🙂
Pingback: MadeByMuszyńskaEwa
Pingback: Moja sukienka do ślubu cywilnego – wybór materiału, szycie i efekt końcowy. - Ewa Muszyńska
Awesome awesome awesome stuff!
Thanks so much! 🙂
I can’t wait to get started! Your patterns and xour designs are fantastic!
Thanks so much! 🙂 I hope you’ll end up making many cool clothes for yourself.
Are the pleats in the knife pleated skirt facing the same direction in the back?
Never mind I saw the arrows on the pattern that answered my question. Thank you for the amazing post.
Awesome. 🙂 With knife pleats it’s actually a good idea to draft the whole skirt pattern (right and left sides). That way you get a more accurate pleat allowance shapes at the waistline.
Brilliant post! So wonderful that you have seen examples of each one.
I am currently making a miniskirt out of boiled wool and am trying to decide whether to use darts or if it could take the flare…..although I am a slim figure I have a tummy which looks a few months pregnant! So am trying to work out which cut would minimise this …obviously one doesn’t want to add bulk either as it is a thick fabric. I have thought a four panelled skirt might also work, as the structure might be appealing (and if so, maybe it should be made up like a four gore skirt?
Thank you. 🙂 You could also consider making a yoke skirt. The construction will allow you to remove the darts, keep the top section quite fitted and the rest of the skirt flared.