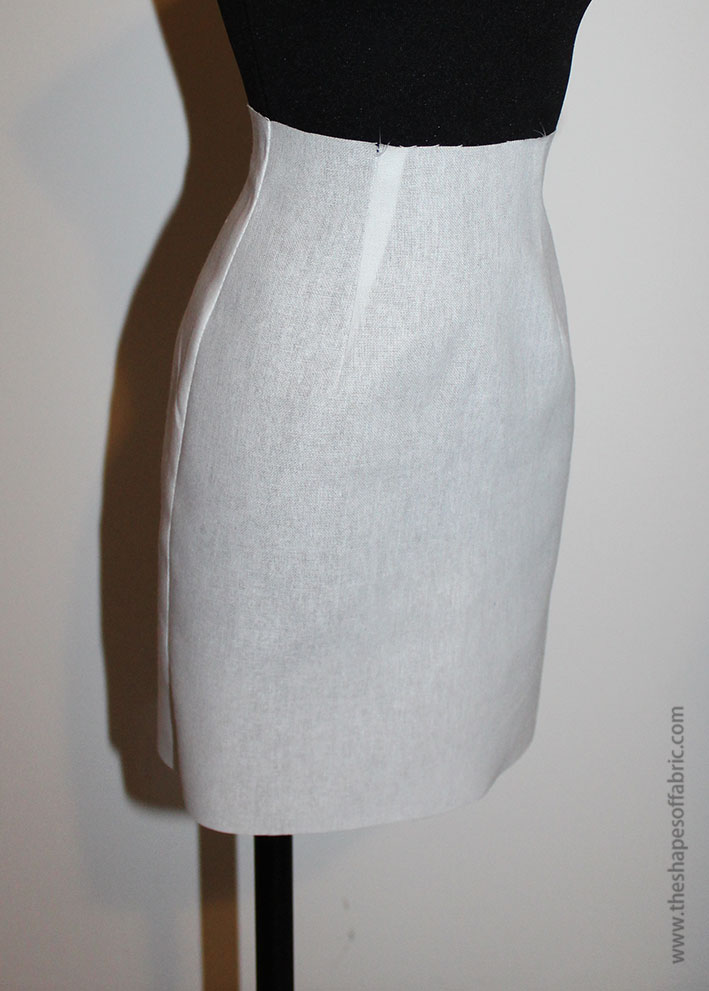
Wouldn’t it be awesome to be able to draft your own skirt patterns? Well, I’m going to help you get started on that by showing some simple skirt pattern alterations.
Last time I wrote about how to draft the basic skirt block using your own measurements. Did you manage to get yours done? Or maybe you had one already?
Even if you don’t have the pattern at the moment, I got you covered! I added a free half-scale basic skirt pattern (size S) pdf for you to download. This way you can practice the skirt pattern alterations with that.
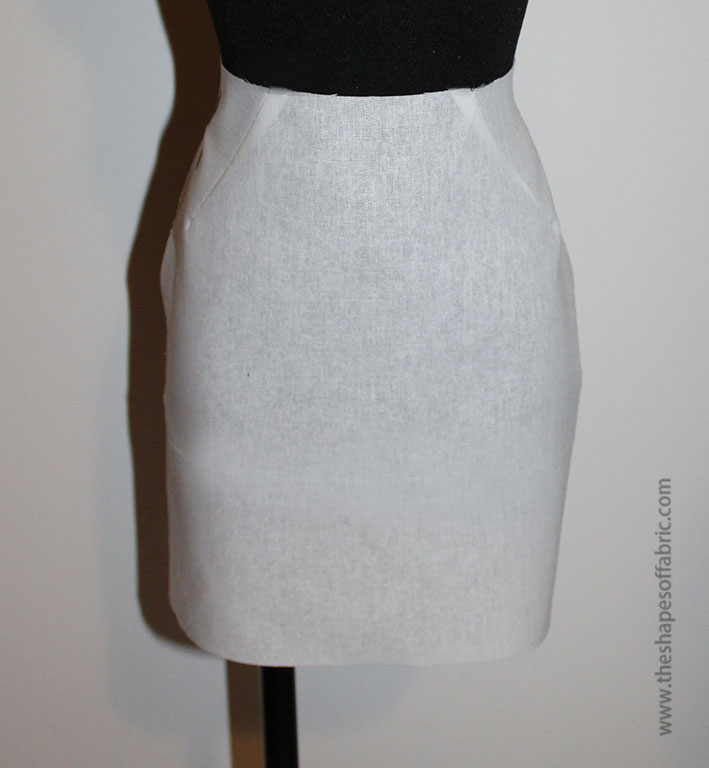
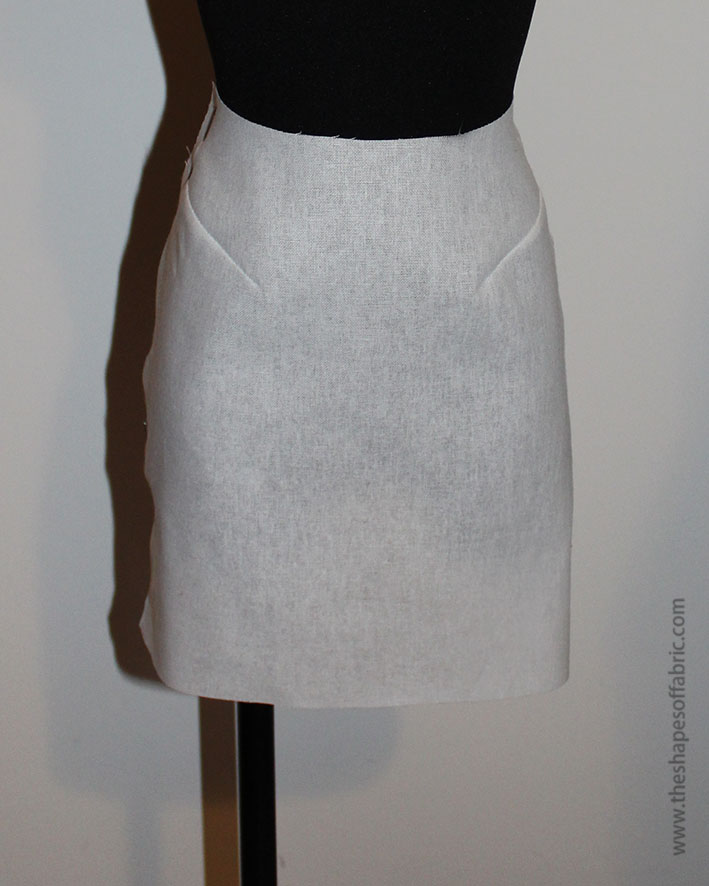
Dart manipulation
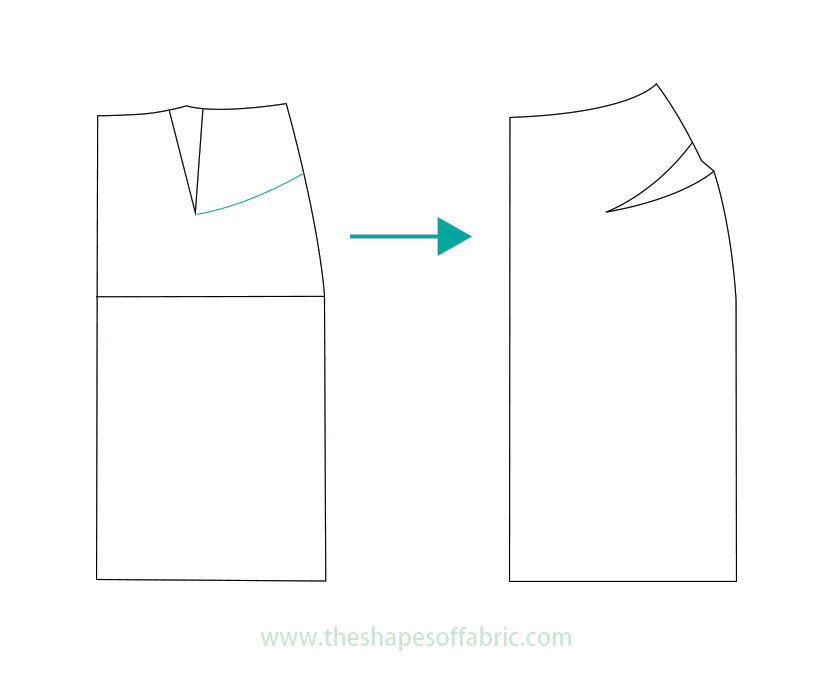
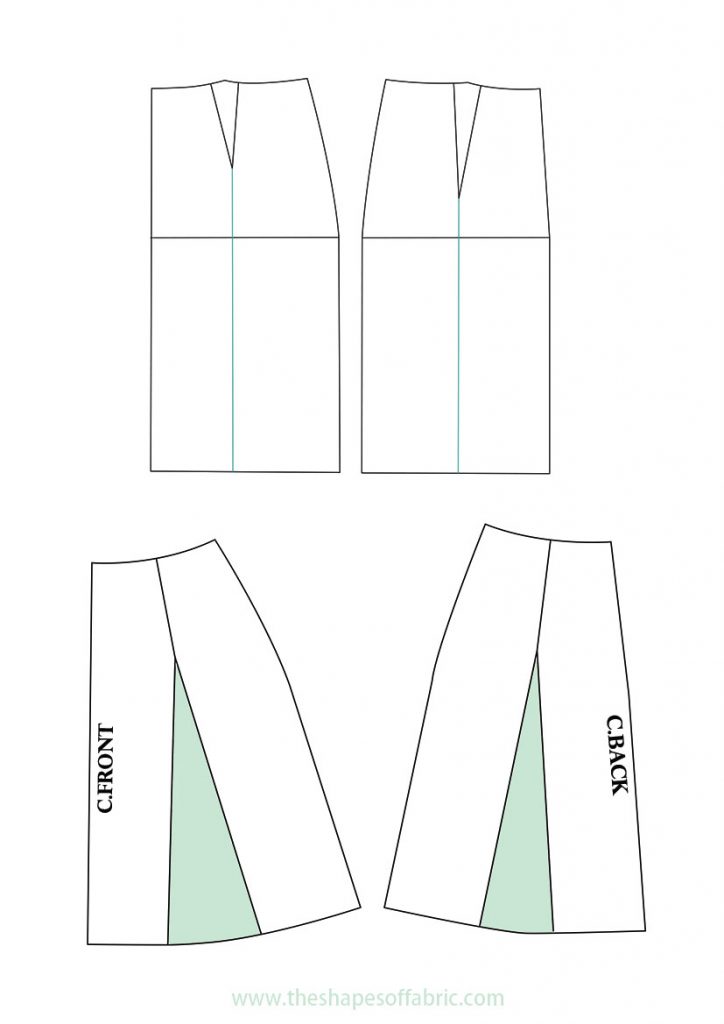
As you might already be familiar with dart manipulation, that will be a great way to start altering the pattern. Just like with the bodice, you can change the direction of the darts. They don’t necessarily have to start from the waistline.
Here are a couple of ideas. In the first example, you simply draw the dart again. Remember also to add paper and re-cut the waistline with the dart closed to get the new waist and dart allowance shape.

The second one is a curved dart: Just draw the new dart line shape ending at the tip of the old dart and cut it open. Close the old dart and add paper to cover the hole. Cut the side of the skirt with the new dart closed to get the right shape.
Pencil skirt or A-line skirt?
Here’s a simple way to change the silhouette of the basic skirt.
If you want to make it more fitted, just take off a couple of centimeters or an inch at the hemline.
To make sure you won’t exaggerate, you can always measure the circumference around your legs at the level the skirt hem is going to be. Ensure you’ll be able to walk! Of course, using stretch materials or adding a slit will help, too.
Divide the circumference measurement by 4, since the front and back pattern pieces each cover 1/4 of the full circumference. And compare it to the pattern’s width at the hemline to see how much to remove.

See the curve at the hipline? Smoothen it, and if the curve is too steep, you can make the waist dart bigger. That way you get to straighten the side curve a bit at the top: add the extra amount you will remove with the bigger dart.

How about the A-line skirt then? There are a few different ways, each with a different result.
You could just close the dart and open the volume at the hemline like this: draw a line from the dart tip to the hemline. Cut it open and close the dart. Then, fill the gap with a piece of paper.
This way the skirt becomes a bit wider and at the same time, you get rid of the darts.

But what if this isn’t wide enough? Well, then you can add some more volume to the sides. Just don’t add too much, or the skirt will look like a flat triangle, as too much volume will concentrate at the sides. A good way to add just the right amount is to follow the hipline curve. This should add up to 5cm (1.97in.) In my example a bit less.


I’ll show you later how to add even more volume.
Low waist or high waist?
Let’s see the low waisted skirt first, as it’s the more simple version.
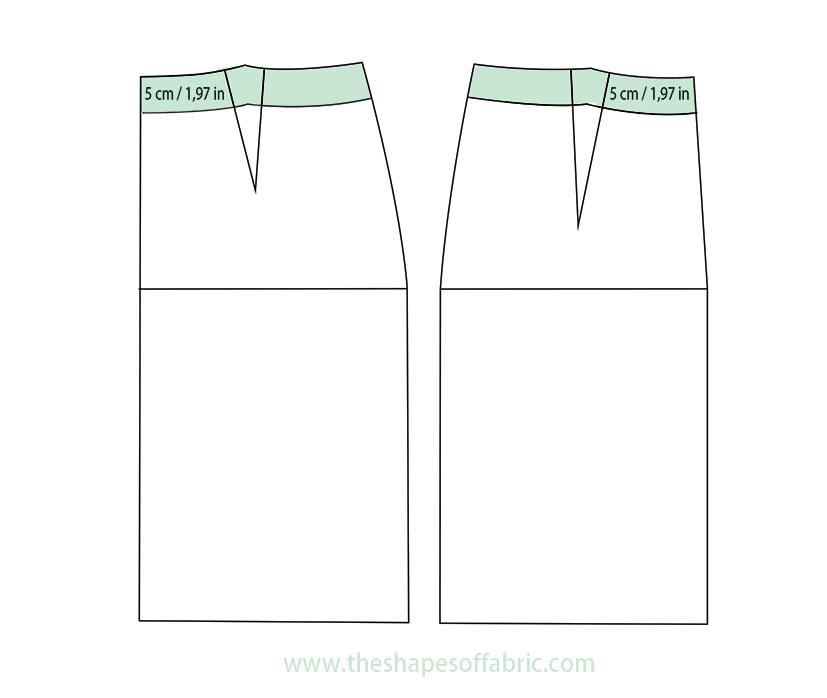
All you have to do is to lower the waistline the amount of cm/in. you want. In my example, I lowered the waist by 5cm (1.97in.).
You’ll also probably have to take in 0.5-1cm (0.2-0.39in.) at the new waistline, both front and back.


The high waisted skirt works a bit differently. You have two options, depending on how much you want to raise the waistline. If it’s max 5cm (1.97in.), then you can do like in this drawing:
Draw lines straight up (following the grainline) at the c.front, c.back, sides and the darts. Copy the original waistline shape. Smoothen the sides.

If you want an even higher waistline, then you’ll need to measure the body circumference at the desired level.
Raise the waistline as before and then adjust it to the new measurement. You get more space by widening the sides and making the darts smaller. I raised the waistline by 8cm (3.15in.).


Waistband or facing?
Do you prefer to have a waistband or does the skirt look better with a plain waistline?
In case you prefer a facing, you can draw its shape directly onto the skirt pattern. I usually make a 7-8cm (2.76-3.15in.) wide facing. But in the example here it’s about 10cm (3.94in.).
Trace the pieces. Close the darts and you’ve got the facing pattern.

In the case of a waistband, the simplest way is to make a straight piece. This works only with waistbands that aren’t wider than 3cm (1.18in.) though.
The length will be the same as your waist measurement at the level you want the skirt waist to be. Basically, you can take the measurement from your skirt pattern’s waist line after you’re done modifying it.
If you want your waistband to have a button closure, add a few cm or an inch extra for the overlapping part on one side.
The height is twice the final measurement because the waistband is folded lengthwise in half.

Wider waistbands should be shaped. Sounds difficult? Don’t worry, you’ll get the pattern directly from your skirt block!
If you’re happy with the waistband ending at the natural waist, you can use the same method as with the low waisted skirt. It’s just that this time the section that you trimmed off, will become the waistband. (In this case, don’t take in the skirt waist.)
That 5cm is just an example, but your waistband can be as wide or narrow as you want. Close the darts and you have the pattern.

If you want the skirt to be lower than the natural waist, you can just first lower the waist at the desired level and then separate the waistband.
How about a yoke?
From the waistbands, we get to yokes. The idea is the same as with the shaped waistband. Choose the height and draw a shape you want, somewhere above the hipline. Adjust the darts so that they end at the yoke line.

After you’ve copied the pieces, close the darts and smoothen all pointy areas. This is like working with the style lines; you get rid of the darts.
Here are the pattern pieces. If the longer dart made your skirt too tight around the hips, you can add volume to the side seam.


Final tips
Here are a few general tips enclosed in one picture.

To get a nice hemline, place the front- and back pieces together like this and check if there are any angles in the middle. Correct if needed. In this case I had to trim off a pointy bit. This happens with flared skirts.
Another tip is to always start the hemline and waistline in a 90-degree angle at the c.front and c.back.
Ok, there you had some simple ideas to start experimenting with skirt pattern alterations. I hope you found the article useful.
Go ahead and download the half-scale pattern if you like.
More styles are coming up soon! What’s you’re favorite type of skirt?


26 Comments
Just WAOUH!!! And THANK YOU !!!!
You’re welcome. 😀
FOR A STRAIGHT SKIRT: should the hem/bottom width equal the hip width? am trying to narrow an Aline dress pattern to a straight or pencil width.
Yes, the straight skirt is pretty much the same as the basic skirt block. 🙂
Wow. This is helpful. Thanks
You’re welcome. 🙂
Great tutorial. Makes something that is always explained in such a complicated way so understandable.
Thank you! 🙂 It’s nice to hear I managed to create a helpful tutorial.
Thank you. The explanations are so clear. I will save and refer to this page.
You’re welcome. 🙂 Glad to hear. Enjoy your future skirt projects.
Me encantó y resultó fácil comprender la adaptación en faldas con el básico muy práctico
Muchas gracias! 🙂
Thanx So much I am so Happy to get ur site Lucky to have U as Inspiration thanks so much looking further for more knowledge from u Mam thanks so much
Thank you for your lovely comment. 🙂 I’m glad to hear that. You’re welcome.
You are really good I’m tempted into asking for an online course with you.
Thanks. 🙂 Online courses are definitely on my to-do list, but for now I’ve only published written guides.
I feel so inspired and empowered after reading this tutorial! You make drafting patterns seem so possible. Thank you for sharing all of this information, and so clearly!
Thank you! 🙂 Obviously, I’m thrilled to hear that, as it’s one of my main goals.
You just made love pattern drafting more. Thank you so much for those tips on flare skirt🥰😍. You are 🙌
Well that’s wonderful news! 🙂 Enjoy making the skirts.
Hi, great article! I still have a question. If I would want to remove the darts from the front of a basic skirt block, how could i do that? Thank you!
Thanks! 🙂 Well, it depends on how wide the darts are. You might be able to remove the dart volume from the side seam if the dart isn’t very large. (If the final skirt will be made in a knit fabric, the dart size doesn’t matter.) Otherwise you’d need to create a yoke to absorb the dart, turn it into a fold at the waist, or gather the skirt waist. Another option is to rotate the dart towards the hemline, but that means your skirt will be more flared.
Thanks for the illustration
It’s so clear
You’re welcome. 🙂
Hi, this is so helpful, thank you.
I’m altering a waisted skirt pattern to be a hipster.
I see your diagram of reducing by 5cms to drop waist. Would you recommend 10 cms for a hipster skirt?
Thanks
You’re welcome. 🙂 10cm will be very low but that might be exactly the look you’re going for. You can measure the distance between your waist and the level you want the skirt’s top edge to end up at.